2 – names and functions of parts – Teac HS-20 User Manual
Page 17
TASCAM HS-20
17
2 – Names and functions of parts
If the total number of entries, including files and subfolders,
inside a folder exceeds about 20,000, recording becomes
impossible and "Rec Limit" appears. For details, see
“Recording operation limitations” on page 29.
Press this area to open the MEDIA SELECT screen. (See “Card
selection” on page 26.)
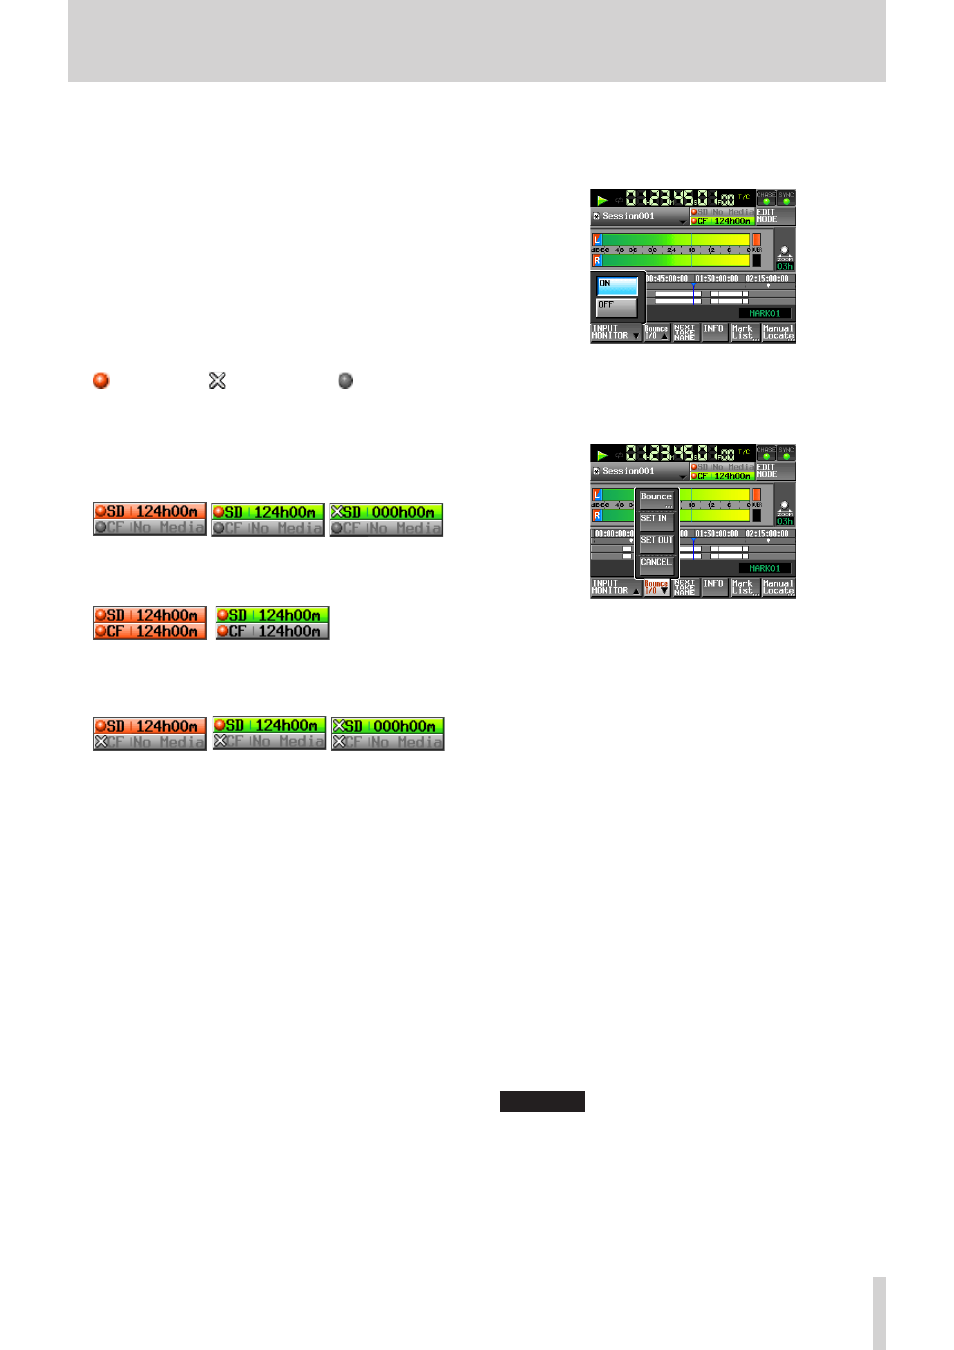
Media status indicators
These indicators show whether media recording is possible,
not possible or not selected for recording.
The status will be displayed in timeline and take modes.
(Status is not displayed in playlist mode.)
o
Indicators
Recording
possible
Recording not
possible
Not selected
for recording
o
Remaining media button examples
1 REC MODE set to Single
Recording
Not recording
Recording not
possible*
2 REC MODE set to Mirror
Recording
Not recording
3 REC MODE set to Mirror when mirroring not possible*
Recording
Not recording
Recording not
possible*
*See “Setting button appearance” on page 77 for more
information about when recording is not possible or
mirroring is not possible.
y
Zoom rate
This shows the track area zoom ratio and the amount of time
displayed.
Turn the DATA dial to the right to zoom in (reduce the
amount of time displayed) and turn it to the left to zoom out
(increase the amount of time displayed).
u
Timeline cursor
This cursor shows the position of recording or playback. It is
always shown in the middle of the screen.
i
Mark name
This is the name of the mark at the current time or the
nearest preceding mark.
Touch this part while a mark name other than the auto mark
is shown to open the mark name editing screen.
o
INPUT MONITOR button
Touch this button to open a pull-up menu where you can
turn input monitoring ON/OFF.
When ON, sound input through the assigned input
connector is always output from this unit.
p
BOUNCE I/O button
Touch this button to open a pull-up menu for bouncing.
Bounce button
Touch this button to bounce. In the following circum-
stances, this button appears gray and cannot be used.
o
When both starting (IN) and ending (OUT) points have not
been set
o
During playback or recording
SET IN button
Touch to set the current position as the bounce starting
(IN) point.
SET OUT button
Touch to set the current position as the bounce ending
(OUT) point.
CLEAR button
Touch to discard the currently set bounce starting (IN)
and ending (OUT) points.
For details about this button, see “Bouncing” on page 55.
a
NEXT TAKE NAME button
Touch this button to open the NEXT TAKE NAME page where
you can set the name that will be given to takes or files
recorded in the future.
o
First half of take names
The first half of the take name can be set to either the
User Word, Folder Name or Date/Time.
(Default: DATE/TIME)
CAUTION
The first half of the take name can only be changed when
the unit is stopped.
o
User Word mode button
Use the user word for the first half of the take name.
Touch the EDIT button to open the screen where you
can change the user word. (This works the same as the
screen for editing the names of folders in the root folder.)