Left side panel, 2 – names and functions of parts – Teac DR-680MKII User Manual
Page 12
12
TASCAM DR-680MKII
2 – Names and Functions of Parts
Turn this knob while pressing the HOME/DISPLAY
button on the front panel to adjust the display
contrast.
When the
MENU
screen is open, this dial can be used
for the same functions as the DATA wheel and pressing
this dial has the same function as the ENTER/MARK
button.
When the Home Screen is open, press to set a mark.
When the Home Screen is open, turn to skip to a mark.
When the
MENU
screen is open, press to move the
cursor left or right.
When the
MENU
screen is open, turn to move the cursor
or change a setting value.
d
PAUSE button and indicator
Press when stopped or recording to start recording
standby. The indicator lights when in recording
standby.
Press when in recording standby to stop recording
standby.
NOTE
The PAUSE button on the front panel functions only
when recording. Use the PLAY/PAUSE button on the top
of the unit to pause playback.
f
REC button and indicator
Press when stopped or in recording standby to start
recording. The indicator lights when recording or in
recording standby.
Press this button when recording to end the current
take and continue recording a new take without pause.
g
REC TRIM button
Press to open the input
TRIM
settings screen.
When the input
TRIM
settings screen is open, press to
close it and open the Home Screen.
h
MIX LEVEL button
Press to open the
LEVEL
settings screen.
Press when the
LEVEL
settings screen is open to close
it and return to the Home Screen.
j
Channel number buttons (1–6 buttons)
Use these to select tracks on the
TRIM
,
LEVEL
and
PAN
settings screens.
Press when in recording standby to arm/disarm that
track for recording.
On the Functions Screen, press to turn the selected
function ON or OFF for that track.
Press and hold to enable/disable solo monitoring of
that track.
k
MIX [LOCK] button
When the
LEVEL
screen is open, this selects the stereo
track as the track to be controlled. Press and hold this
button to engage or disengage the lock function,
which disables the use of other buttons.
Left side panel
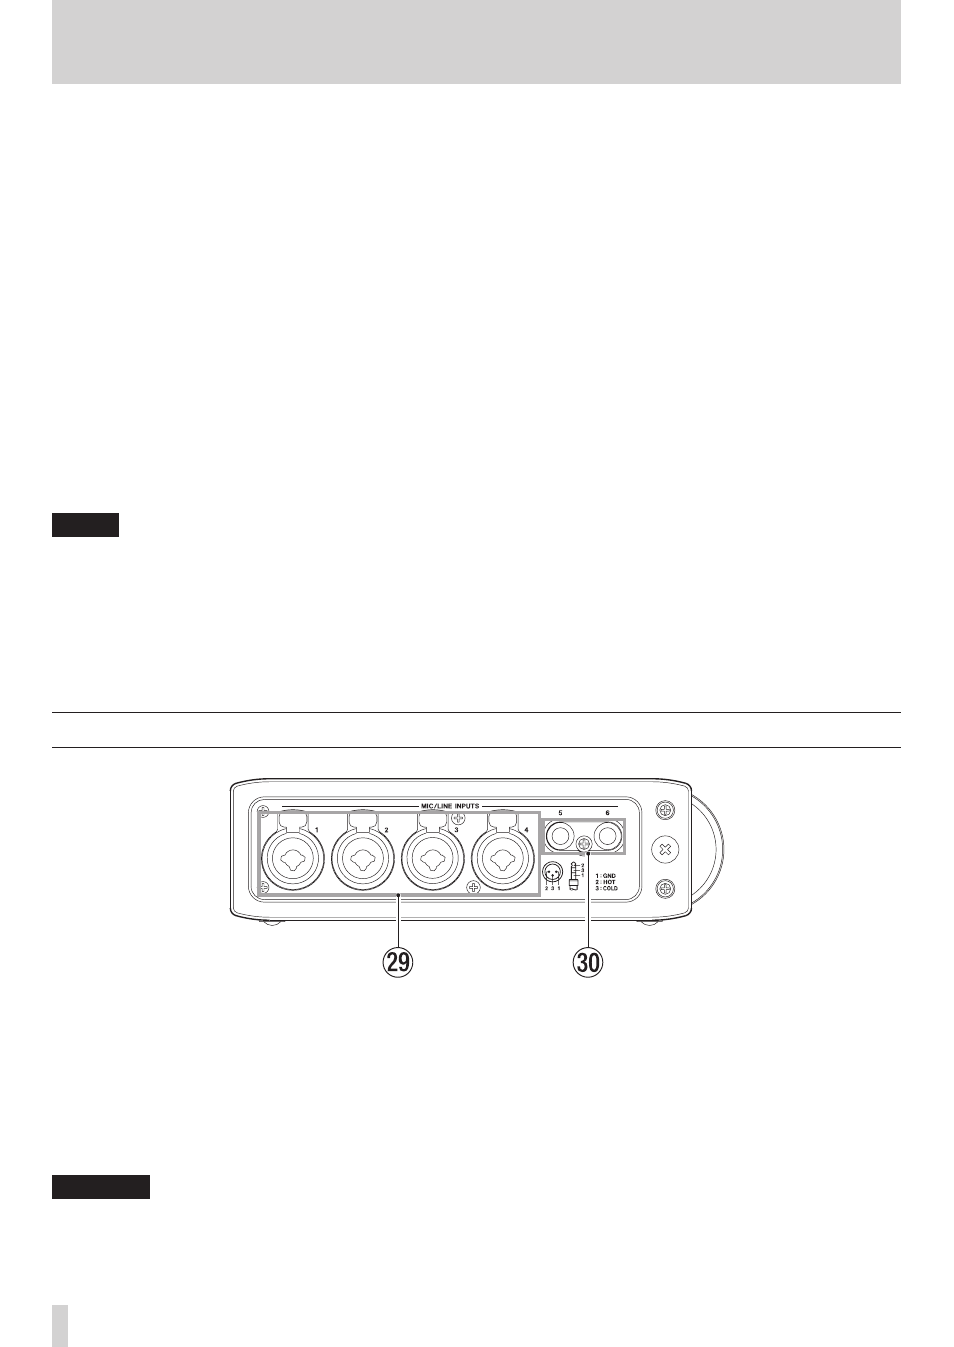
l
MIC/LINE INPUTS (XLR/TRS) jacks
These are balanced analog XLR/TRS combo jacks for
microphone and line level inputs (1: GND 2: HOT 3:
COLD, Tip: HOT Ring: COLD Sleeve: GND).
;
MIC/LINE INPUTS (TRS) jacks
These are balanced analog TRS jacks for microphone
and line level inputs (Tip: HOT Ring: COLD Sleeve:
GND).
CAUTION
• Confirm that phantom power is OFF before connecting
a line level device to a MIC/LINE INPUTS jack. If you
connect a line level device while phantom power is
being supplied, that device and this unit could be
damaged.
• When using a condenser microphone, before
connecting to and disconnecting from a MIC/LINE
INPUTS jack, confirm that the phantom power for that
jack is OFF. If you connect or disconnect a mic while
phantom power is being supplied, that mic and this
unit could be damaged.
• Do not connect an unbalanced dynamic mic to an XLR
connector when phantom power is being supplied.
Doing so could damage that mic and this unit.