Connecting and removing hard drives – Kanguru Mini Clone User Manual
Page 8
8
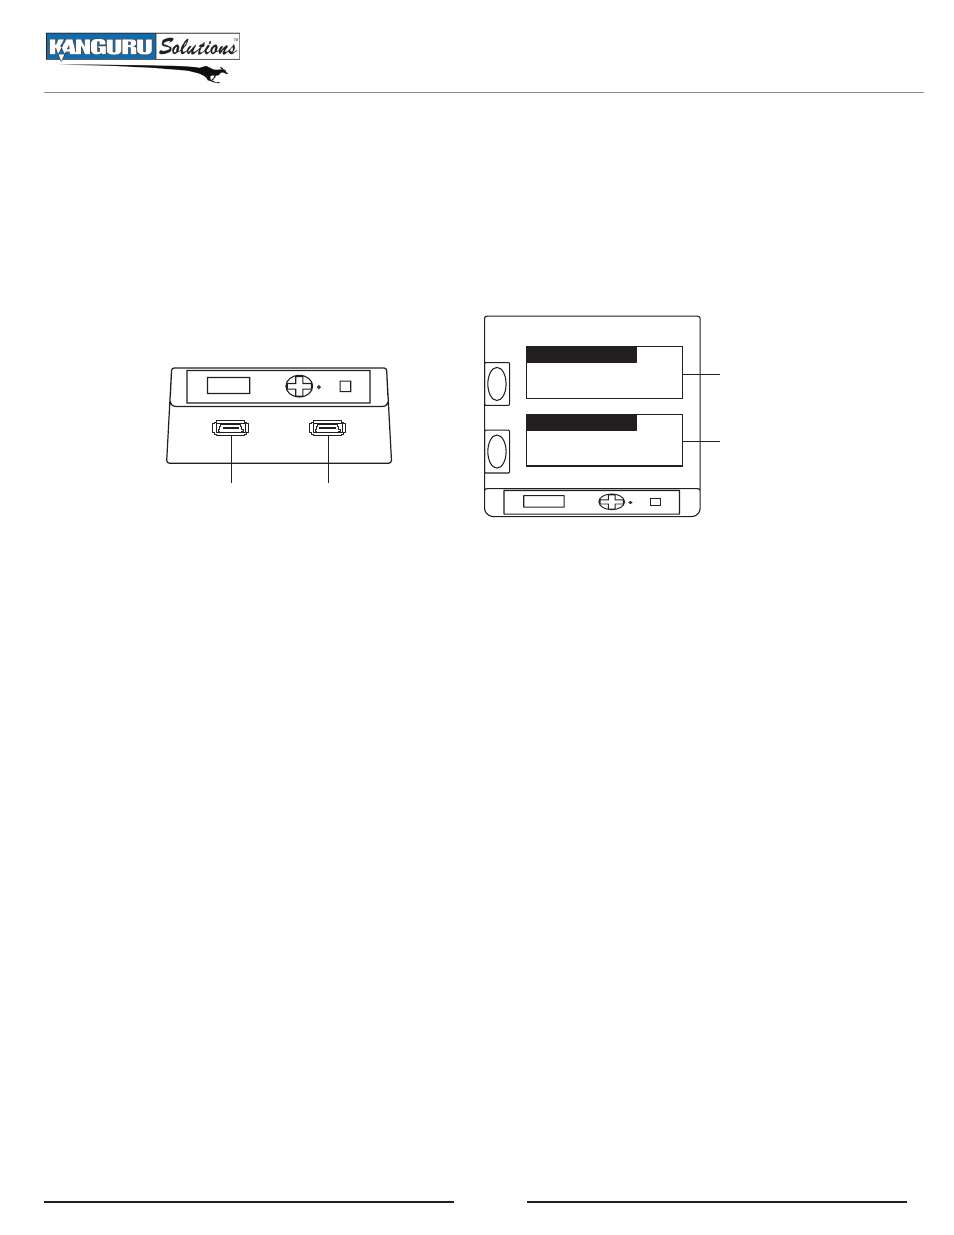
3. Connecting and Removing Hard Drives
There are 4 ports for connecting hard drives to your miniClone. The Disk 1 and Disk 2 ports on the top
of the unit are toaster style HDD cradles, used for connecting bare SATA drives. The Disk 3 and Disk 4
ports on the front of the unit are USB/eSATA ports for connecting external hard drives or flash drives.
Disk 1
Disk 2
Disk 3
Disk 4
DISK1
DISK2
Before connecting hard drives please notice:
• Hard drives precision instruments. Avoid bumping or dropping them.
• Hard drives are electrical devices. When handling bare drives, please be aware that static electricity
may damage your hard drive. Please discharge any static electricity before operating by touching a
metal frame or using electrostatic prevention bands.
• To protect your hard drives, please remove all hard drives from this product when not in use.
• SATA HDD connectors have a guaranteed number of times for connection/removal, specified by
the manufacturer. If an HDD is connected/removed more than this number of times, the quality
of the HDD cannot be guaranteed. Therefore please minimize the number of times you connect/
remove HDDs.
• The Disk 1 and Disk 2 connection ports are only for SATA HDDs. HDDs based on other standards
such as IDE (PATA) HDD, SCSI HDD or SAS HDD cannot be connected.
Connecting and Removing Hard Drives