Guralp Systems CMG-DM24 User Manual
Page 22
Operator’s Guide DM-24 Digitiser
Issue G January 2003
20
3.1 DIGITISER CONFIGURATION:-USING ‘SCREAM’
To access the digitiser configuration setup from SCREAM, double-click with the left
mouse button on the digitisers icon in the Available Streams window ( NOT the Local
or COM port icons). Alternatively, you can single-click on the digitisers icon with the
right mouse button, then select Configure from the pop-up menu.
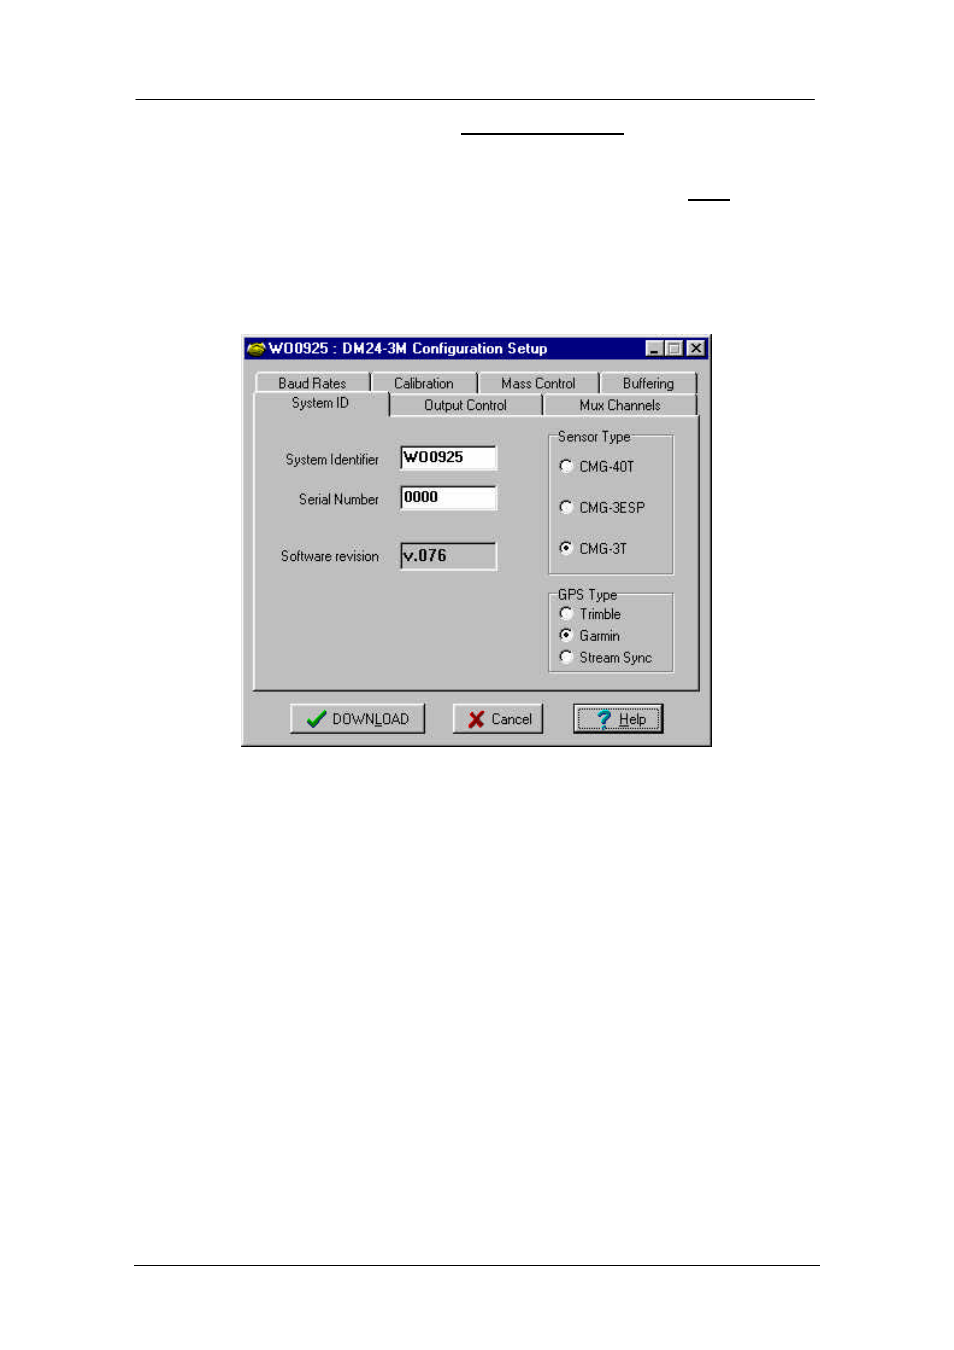
DIGITISER CONFIGURATION
System Identifier and Serial Number: The digitiser type is identified by its system
identifier and serial number. These two parameters are stored as the first two
32-bit fields in the header of each data and status block generated by the
digitiser to indicate the blocks origin. Each of these parameters consists of 6
alphanumerics encoded as base 36 numbers. On delivery from the factory, the
system identifier and the serial number are, respectively, set to the GSL works
order number and the DM serial number, or if bonded to a seismometer, the
seismometer’s serial number. The System-ID can be reset to any convenient
combination of letters and numbers, such as an abbreviation of your institution.
Sensor Type: If the sensor attached to the digitiser is a Guralp velocity sensor, several
seismometer functions, such as sensor locking, centering and calibration, may
be controlled through the digitiser. The type of sensor programmed with this
option determines which functions will be available through the SCREAM
digitiser configuration set-up interface or through interactive commands. If the
digitiser is bonded to a sensor, it will arrive from the factory programmed to
the proper sensor type.