Guralp Systems CMG-EDU Installation User Manual
Cmg-edu, Seismometer, Installation
CMG-EDU
Seismometer
Installation
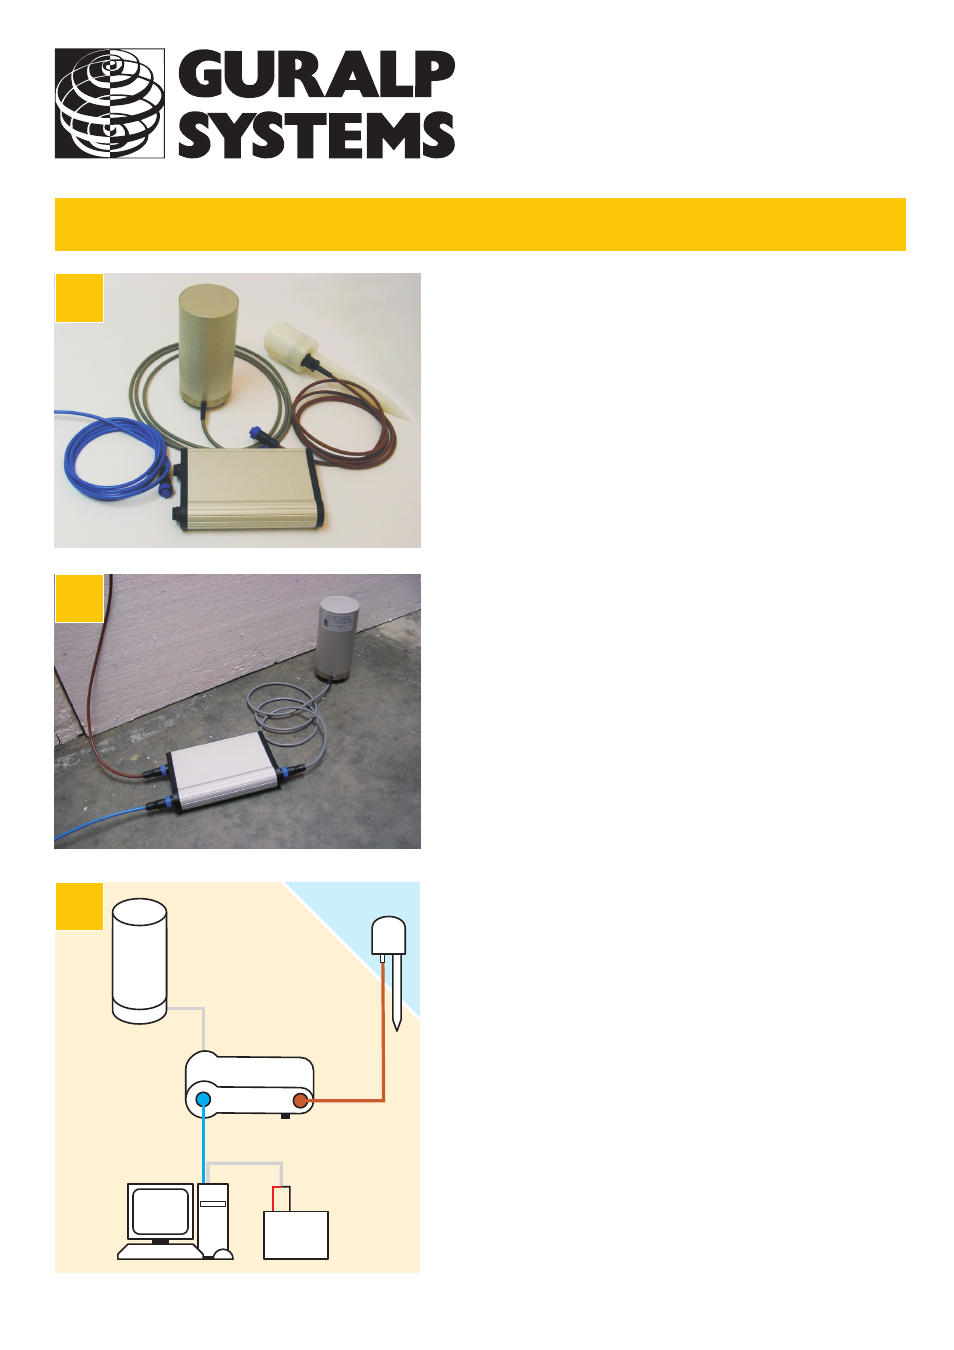
Check you have all components and cables.
- CMG-EDU-V or H sensor
- CMG-CD24E1 digitizer
- GPS receiver
- Brown GPS—digitizer cable
- Blue/grey digitizer—PC—power cable
- Test and calibration data booklet
You will need a Windows or Linux PC with an RS232 port
and a 12–24 V DC power supply.
Choose suitable sites to install the sensor and GPS.
The sensor should be placed
- directly on a cement or concrete floor free from cracks
- at, or ideally below, ground level
- in an environment with constant temperature
- sheltered from air currents in a dark corner or box
- away from people and machinery
- away from electrical cables and appliances
The GPS should be placed somewhere with a good view
of the sky, and within 15 m of the digitizer.
Connect the various parts together.
- Connect the grey cable attached to the sensor
to the SENSOR socket on the digitizer.
- Connect the brown cable attached to the GPS
to the GPS socket on the digitizer.
- The remaining blue and grey cables are joined together
at a 9-pin RS232 socket. Connect this socket to your
PC’s serial connector.
- The grey cable from the RS232 connector ends in
red and black wires. Connect the black wire to the
negative (–) terminal of the power supply,
and the red wire to the positive (+) terminal.
- The blue cable from the RS232 connector ends at a
blue socket. Connect this to the DATA plug on the
digitizer. Do this step last.
1
2
Sensor
3
RS232
GPS
Power
supply
+
–
PC
Digitizer