Pcv removal, Pcv installation, Figure 3 – Gasboy Blackmer GDP User Manual
Page 11: Caution
MDE-4096C Blackmer® Global Dispenser Pump Operation, Maintenance and Kit Installation Manual · April 2008
Page 11
Maintenance
PCV Removal
Excessive wear on the PCV can cause improper pump performance, including
flow loss or excessive or low discharge pressure.
CAUTION
To remove the PCV, proceed as follows:
1
Drain the pump following the procedure provided in the section
.
2
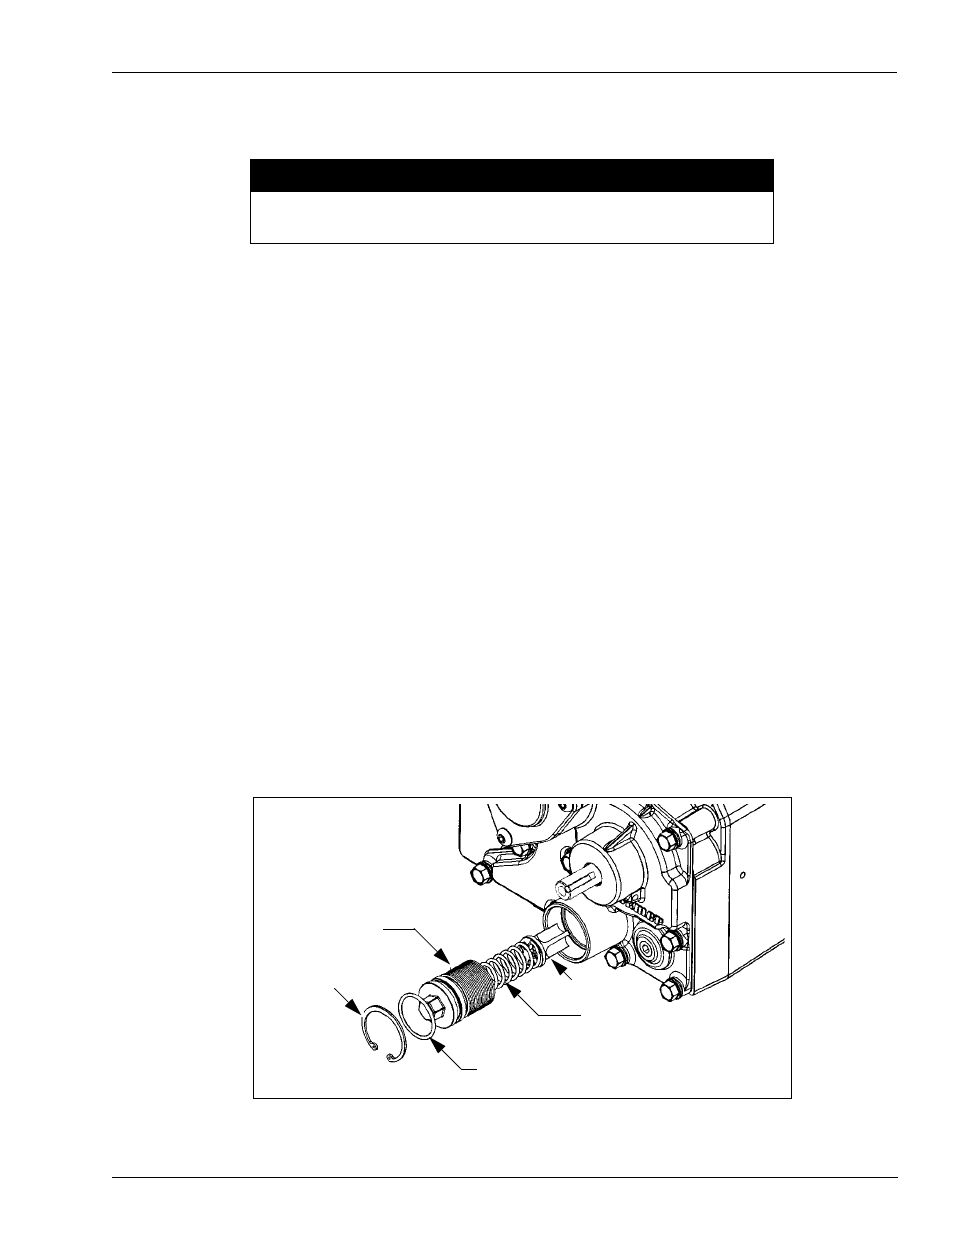
Remove the snap ring (15) (see
3
Using a 16 mm socket wrench, turn the valve cover (13) outward or counterclockwise (CCW)
until completely removed.
4
Remove the spring (12) and valve (10).
5
If the valve does not come out with the spring, use needle nose pliers to remove it from the
bore.
PCV Installation
To install the PCV, proceed as follows:
1
Inspect valve (10) for damage or excessive wear. Replace if necessary.
2
Install PCV in the reverse order of removal (see
Figure 3: PCV
Snap Ring (15)
Valve Cover (13)
Cover O-Ring (14)
Spring (12)
Valve (10)
- 216S (18 pages)
- Atlas Fuel Systems Site Prep Manual (42 pages)
- Atlas Technician Programming Quick Ref (2 pages)
- ATC M05819K00X Kits (28 pages)
- Atlas Fuel Systems Owner Manual (80 pages)
- Gilbarco Global Pumping Unit Operation Manual (42 pages)
- 26 (7 pages)
- Atlas Valve Replacement Kits (10 pages)
- Atlas Fuel Systems Installation Manual (100 pages)
- 9120K (8 pages)
- 9820K (6 pages)
- Atlas Single Std. Inlet Centering Kit (8 pages)
- 8800 Atlas (1 page)
- 9120K Series Service Manual (40 pages)
- 9800A Atlas (6 pages)
- 9800 Atlas (14 pages)
- 9800 Atlas (20 pages)
- M08400 (6 pages)
- 9100 Series (8 pages)
- 9820K Series Installation (62 pages)
- 9853K (8 pages)
- 9216KTW (36 pages)
- Recommended Spare Atlas (14 pages)
- DEF Atlas (28 pages)
- 9820K Series (12 pages)
- 9800Q (1 page)
- Q Series (3 pages)
- 8753E (2 pages)
- 9152AXTW2 (1 page)
- 8800E (2 pages)
- 8800E (1 page)
- 9820Q Series (1 page)
- Atlas Start-up (230 pages)
- 2600A (3 pages)
- 2600A (12 pages)
- 2600A (2 pages)
- 9800Q Front Load Vapor (2 pages)
- 215A (1 page)
- 9800A (4 pages)
- 9820A (1 page)
- 216A (31 pages)
- 215A (2 pages)
- 9800Q Vapor (2 pages)
- Lamp Kit (2 pages)
- 9120Q Pulser (1 page)