Paxton Superchargers Ford Mustang GT User Manual
Page 78
P/N: 4809654 v5.0
©2010 Paxton Automotive
All Rights Reserved, Intl. Copr. Secured
58
A. Remove the rear seat by depressing the two
release buttons at the front edge of the seat.
(See Fig. 13-a.)
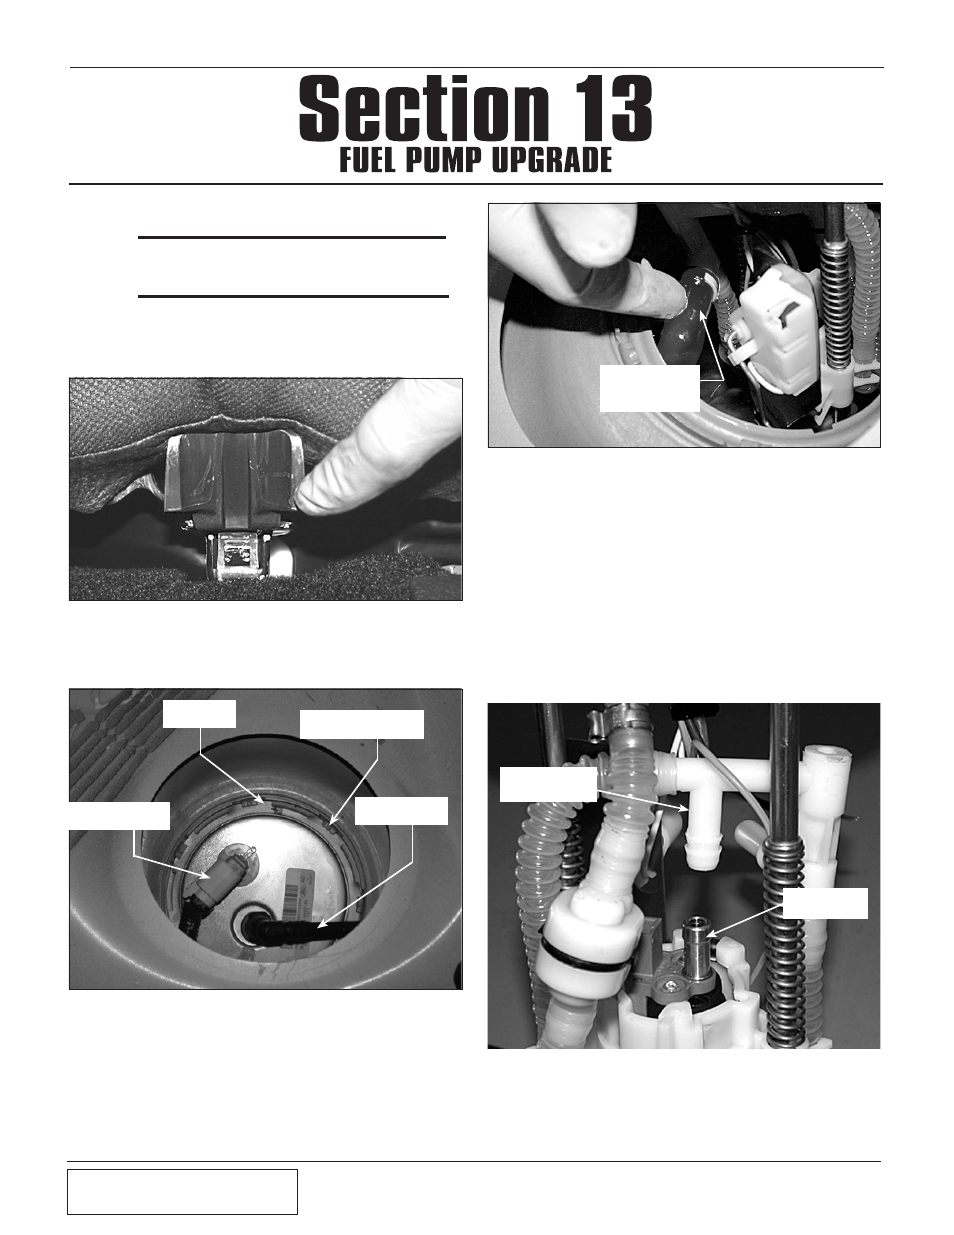
E. Slowly pull the fuel pump assembly up. Locate
the cross-over fuel line connection on the fuel
pump assembly and disconnect. (See Fig.
13-c.)
F. Remove the pump assembly from the tank
being careful not to damage or lose the rubber
O-ring.
G. Carefully cut the step-less clamps securing the
short corrugated fuel line between the fuel
pump outlet and distribution rail. Remove the
fuel line and discard. (See Fig. 13-d.)
C. Unplug the sending unit harness and disconnect
the fuel line connection.
D. Using a small screwdriver or chisel and ham-
mer, tap the retaining ring in a counter clock-
wise direction. Remove the retaining ring and
set aside. (See Fig. 13-b.)
B. Remove the round plastic inspection cover on
the driver’s side. (See Fig. 13-b.)
Fig. 13-a
Fig. 13-b
Fig. 13-c
13. FUEL PUMP UPGRADE
FUEL LINE
CONNECTION
RECEIVING DOTS
ON EACH EAR
RETAINING
RING
HARNESS
CONNECTION
CROSS-OVER
LINE
CONNECTION
*** NOTE ***
This section is best performed with the fuel level
BELOw half a tank.
Fig. 13-d
DISTRIBUTION
RAIL
PUMP
DISCHARGE
Section 9
AIR DISCHARGE ASSEMBLY INSTALLATION
(NON-COOLED KITS ONLY)