Paxton Superchargers Ford Mustang GT User Manual
Page 53
P/N: 4809654 v5.0
©2010 Paxton Automotive
All Rights Reserved, Intl. Copr. Secured
33
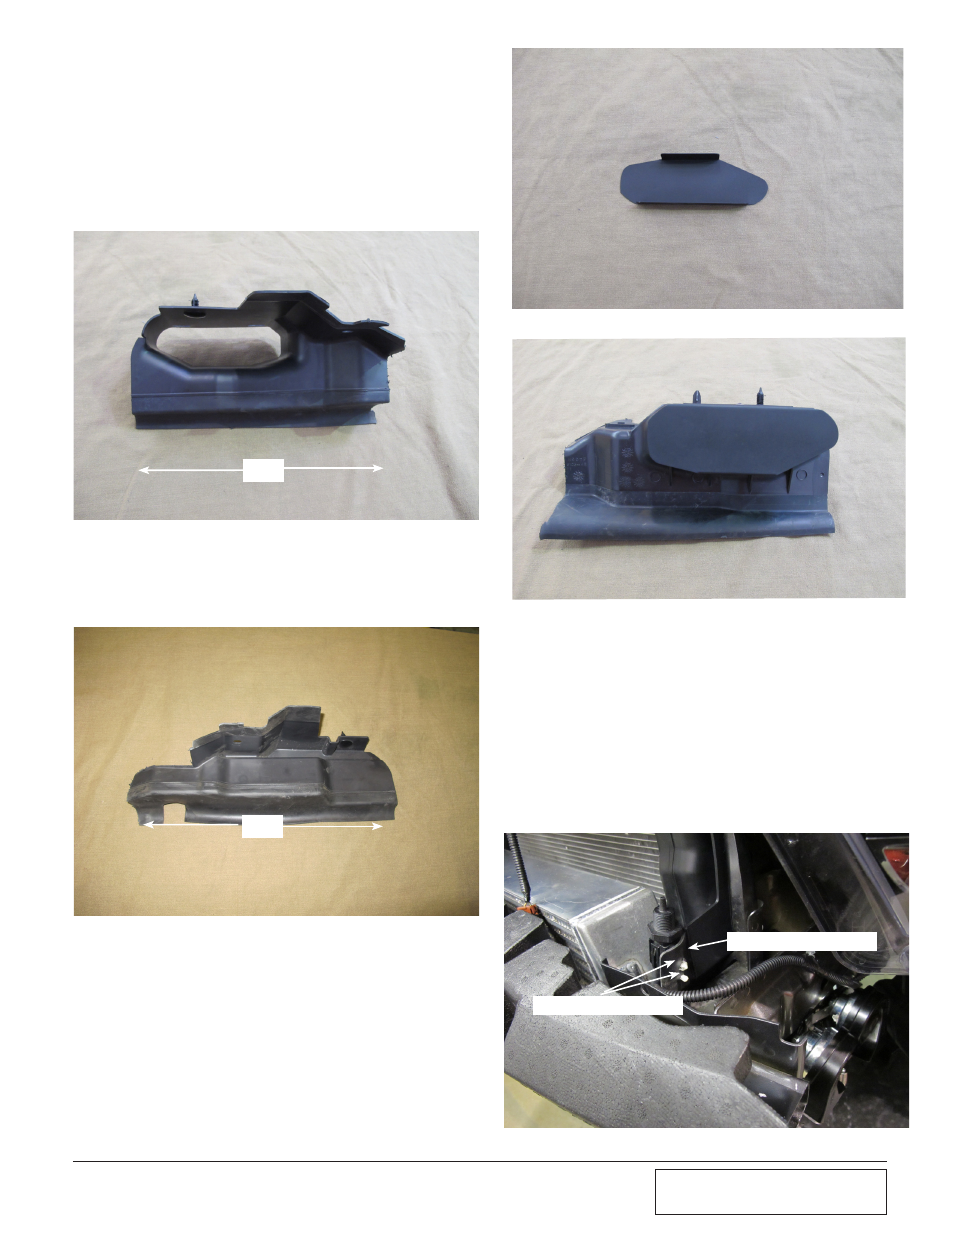
8F. AiR DivERSioN PANEL MoDiFiCATioN (2010)
Models only)
1. You will need to trim the air diversion panels
previously removed in step 8A, Fig 8A-j. On the
drivers side, measure from the top 12" and cut
the remaining material below. (See Fig 8F-a)
Fig. 8F-c
12"
15 1/2"
AMBIENT TEMP SENSOR
Fig. 8F-a
Fig. 8F-b
Fig. 8F-e
Fig. 8F-d
DRILL TWO HOLES HERE
2. On the passenger side, measure from the top 15
1/2" and cut the remaining material below. (See
Fig 8F-b)
3. Locate the supplied air diversion panel cover
PN 4FU013-021 Attach the supplied cover
to the modified driver side diversion panel.
Use the holes in the cover as a template to
drill 1/8" holes thru the plastic panel. Secure
cover to the panel using supplied 1/8" rivets.
(See Figs. 8F-c , 8F-d)
4. Reinstall the air diversion panels back onto
the car. You will need to install the ambient
air temperature sensor (located on the horn
wiring harness) in a revised location. On the
drivers side air diversion panel, you will find
some soft rubber on the front . This is where
you will mount the ambient air temp sensor.
Simply drill or poke two holes to allow the
attached clip to go through the rubber. (See
8F-e)