Swagelok tube fittings, Retightening swagelok tube fittings, Installation – Parr Instrument 6100 User Manual
Page 11
Installation
6100
2
w w w . p a r r i n s t . c o m
9
procedure and calculations. The user should config-
ure the calorimeter at this time to accommodate the
desired sample weight entry mode. The calorimeter
can be placed into standardization mode on the
Calorimeter Operation Page, with the operating mode
key. If multiple bombs and buckets are being used
with the calorimeter to maximize sample through-
put, the calorimeter can be configured to prompt
for a Bomb ID at the start of each test. The Bomb ID
can also be selected on the Calorimeter Operations
Page, using the Bomb/EE key. Both bomb and bucket
combinations will need to be standardized separately.
The end result of a standardization test is an energy
equivalent value, or the amount of energy required to
raise the temperature of the calorimeter one degree.
Repeated standardization with any given bomb and
bucket combination should yield an energy equiva-
lent value with a range of 14 calories per degree,
centered around the mean value for all tests using
that bomb bucket combination. The calorimeter is
ready for testing samples after an energy equivalent
value has been obtained.
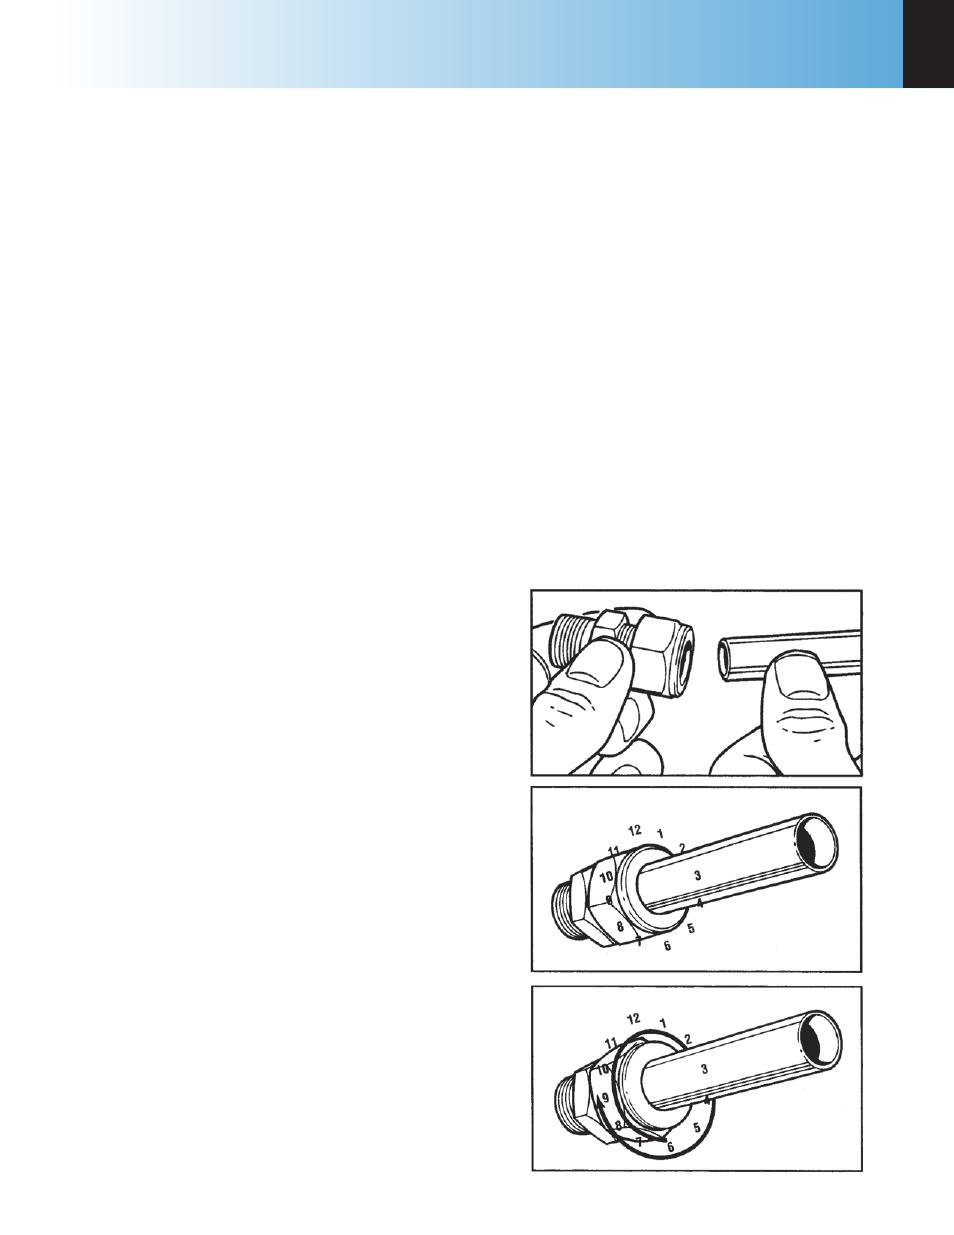
Swagelok Tube Fittings
When Swagelok Tube Fittings are used, the instruc-
tions for installation are:
1. Simply insert the tubing into the Swagelok Tube
Fitting. Make sure that the tubing rests firmly
on the shoulder of the fitting and that the nut is
finger-tight.
2. Before tightening the Swagelok nut, scribe the nut
at the 6 o’clock position.
3. While holding the fitting body steady with a back-
up wrench, tighten the nut 1-1/4 turns. Watch the
scribe mark, make one complete revolution and
continue to the 9 o’clock position.
4. For 3/16” and 4mm or smaller tube fittings, tight-
en the Swagelok nut 3/4 turns from finger-tight.
Retightening Swagelok Tube Fittings
Swagelok tubing connections can be disconnected
and retightened many times. The same reliable leak-
proof seal can be obtained every time the connection
is remade using the simple two-step procedure.
1. Insert the tubing with pre-swaged ferrules into the
fitting body until the front ferrule seats.
2. Tighten the nut by hand. Rotate the nut to the
Figure 2-1
Swagelok Tube Fittings
original position with a wrench. An increase in re-
sistance will be encountered at the original posi-
tion. Then tighten slightly with a wrench. Smaller
tube sizes (up to 3/16” or 4mm) take less tighten-
ing to reach the original position than larger tube
sizes. The type of tubing and the wall thickness
also has an effect on the amount of tightening re-
quired. Plastic tubing requires a minimal amount
of additional tightening while heavy wall metal
tubing may require somewhat more tightening. In
general, the nut only needs to be tightened about
1/8 turn beyond finger tight where the ferrule
seats in order to obtain a tight seal.
Over tightening the nut should be avoided.
Over
tightening the nut causes distortion (flaring) of the lip
of the tube fitting where the ferrule seats. This in turn
causes the threaded portion of the body to deform.
It becomes difficult to tighten the nut by hand during
a subsequent re-tightening when the fitting body
becomes distorted in this manner.