Installation manual, Visix network camera – 3xLOGIC VISIX Camera User Manual
Page 90
Installation Manual
|
VISIX Network Camera
10225 Westmoor Drive, Suite 300, Westminster, CO 80021 | www.3xlogic.com | (877) 3XLOGIC
89
No.
Description
2
Photosensitive Resistance
3
PIR sensor
4
Microphone
5
Lens
6
3-‐axis Adjustment Bracket
7
Alarm Indicator:
Indicator goes solid red (camera armed) or solid blue (camera unarmed).
8
Status Indicator: Indicator flashes blue when any movement or presence is detected
9
Link Indicator: Indicator flashes orange when network connection is functioning
properly.
10
Speaker
11
RESET
12
Micro SD card slot
13
Alarm In/Out, GND, Audio Out Interface
14
Power supply interface
15
10M / 100M self-‐adaptive Ethernet interface & PoE
16
WPS(Wi-‐Fi Protected Setup) Button
NOTE:
Press
and
hold
RESET
for
10s
when
the
camera
is
powering
on
or
rebooting
to
restore
the
default
settings,
including
the
user
name,
password,
IP
address,
port
No.,
etc.
WPS Configuration
A
wireless
router
with
the
WPS
function
is
required.
Refer
to
the
steps
below
for
configuration.
Steps:
1)
Press
the
WPS
button
on
the
router.
2)
Press
the
WPS
button
(about
2s)
on
the
camera
within
120s
you
enable
the
WPS
of
the
router
to
join
the
wireless
network.
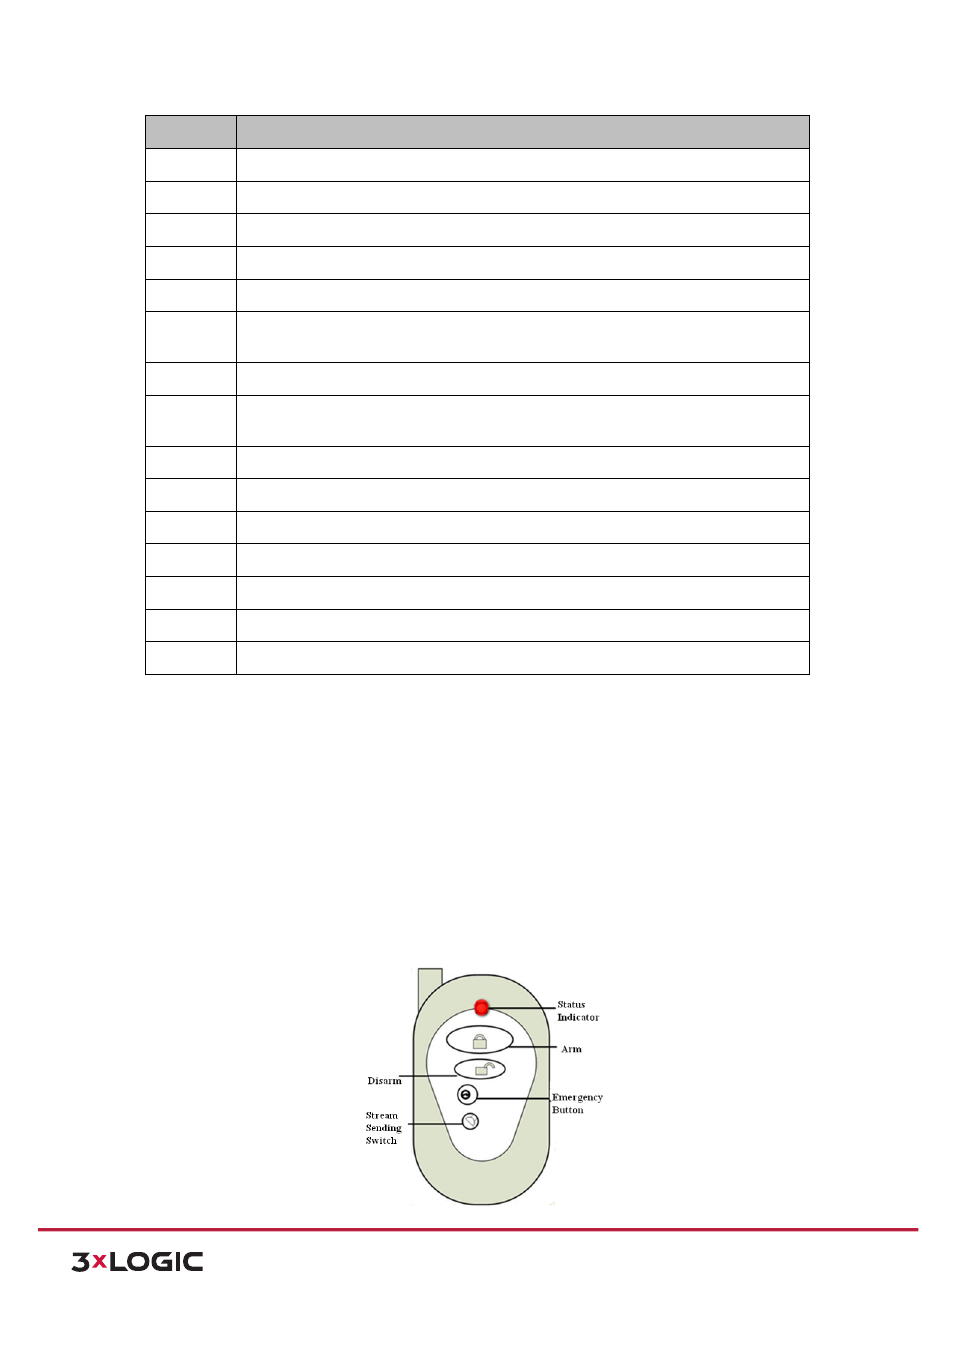
REMOTE CONTROL OVERVIEW
A remote control is included in the package to provide a convenient operation. Please refer to the figure below.