Installation manual, Visix network camera – 3xLOGIC VISIX Camera User Manual
Page 12
Installation Manual
|
VISIX Network Camera
10225 Westmoor Drive, Suite 300, Westminster, CO 80021 | www.3xlogic.com | (877) 3XLOGIC
11
No.
Description
14
Grounding
15
RESET: Reset Button
NOTE:
Press
and
hold
RESET
for
10s
when
the
camera
is
powering
on
or
rebooting
to
restore
the
default
settings,
including
the
user
name,
password,
IP
address,
port
No.,
etc.
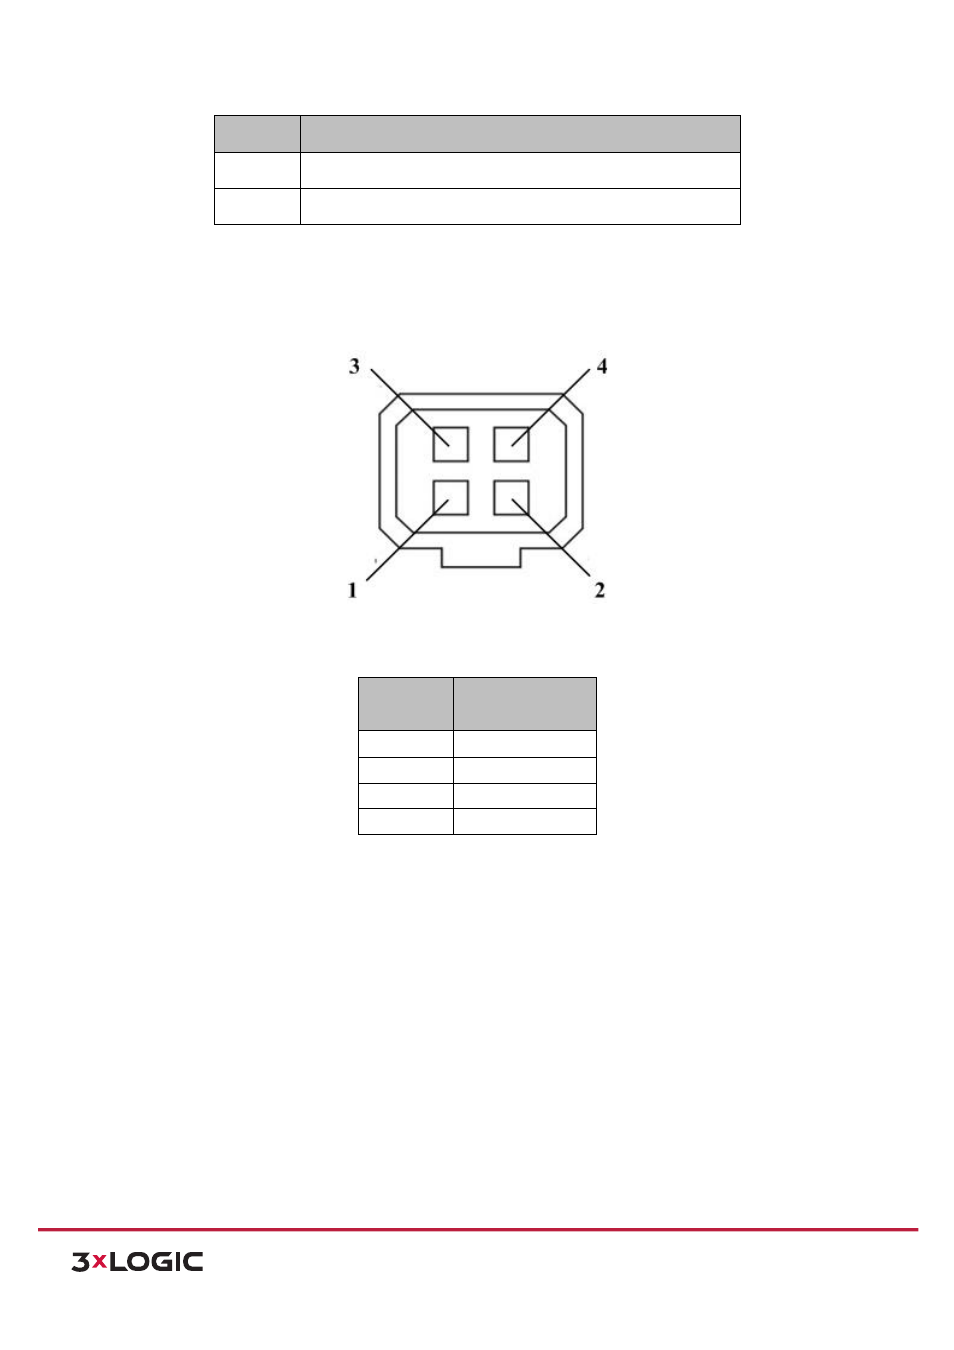
The auto-‐iris interface is shown in below:
Figure 3-‐2
Auto-‐iris Interface
Pins
Table 1-‐2
No.
DC-‐driven
1
Damp-‐
2
Damp+
3
Drive+
4
Drive-‐
NOTE:
Power,
Video
and
GND
pins
are
used
when
the
auto-‐iris
is
driven
by
video;
Damp+,
Damp-‐,
Drive+
and
Drive-‐
pins
are
used
when
the
auto-‐iris
is
driven
by
DC.
AVAILABLE MOUNTS
!
Universal Corner Mount (3xLOGIC Product #:
VX-‐CM
)
!
Universal Pole Mount ( 3xLOGIC Product #:
VX-‐POLE
)
This camera can also be used with any standard CCTV Camera bracket for wall and ceiling mount applications.
INSTALLATION
Steps:
1). Attach the mounting bracket to the ceiling using expansion screws.