How to establish needle entry point c, How to establish needle entry point d, Second designation – SINGER XL1000 Quantum User Manual
Page 97
Attention! The text in this document has been recognized automatically. To view the original document, you can use the "Original mode".
f
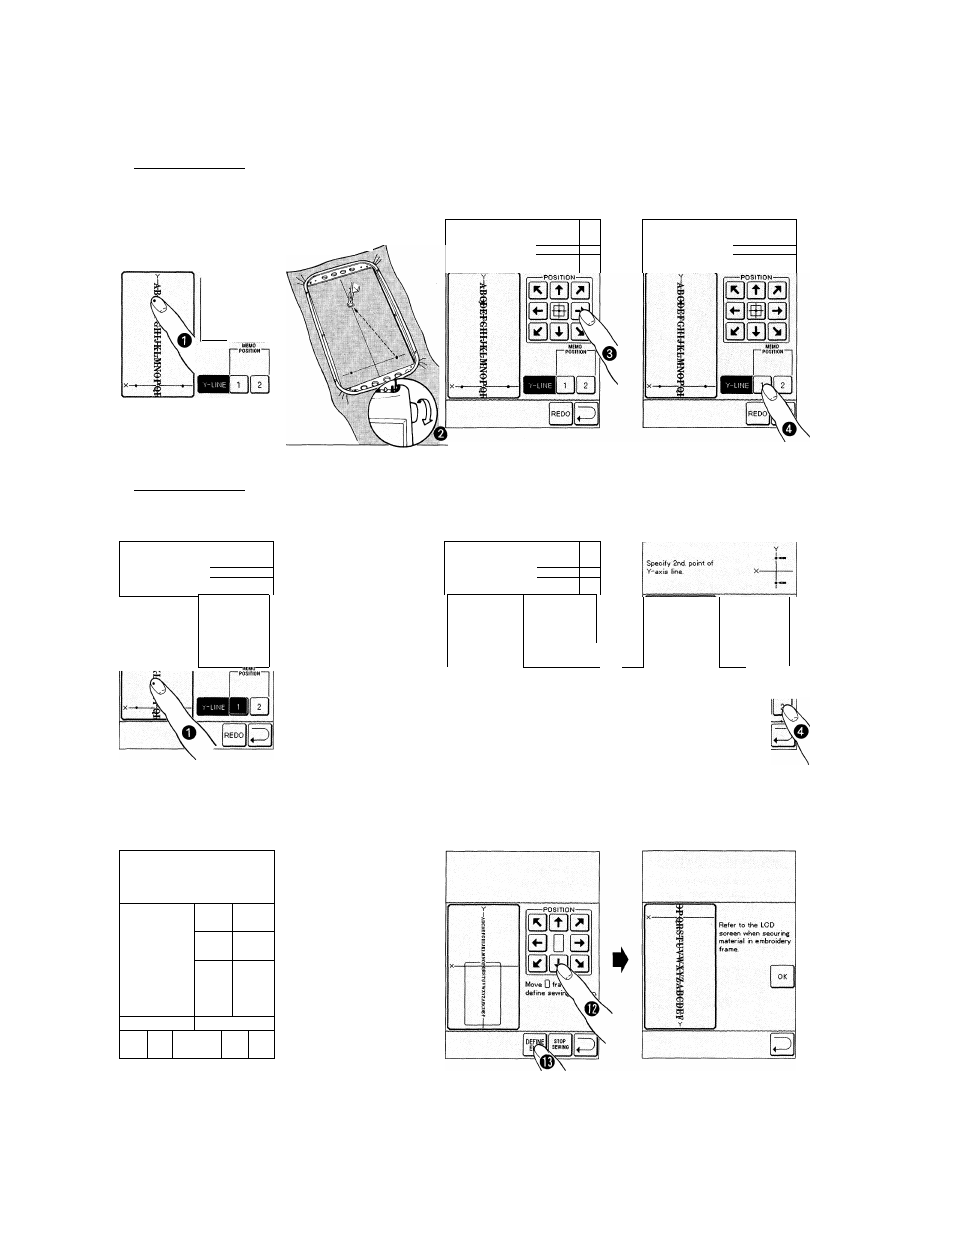
How to establish
needle entry point c
' Press touch-screen in
upper center portion and
a marker dot will appear.
Specify 1st. point of
Y“axis line.
------- r"U3t IIUIM-------
0
(
1)0
0®S
000
Embroidery frame
will automatically
shift placing needle
above vertical line.
OTurn handwheel to
^ ascertain that needle
rests above vertical
marker line^
3
Press needle position key
to adjust so that needle
is directly above line.
After adjusting with needle
position keys, turn handwheel
to check needle position.
4
Once needle entry point
is properly established
on Y-axis line, press
first- point position
memory key.
Specify 1st. point of
Y-axis line.
X-------
Y
Specify 1st. point of
I"”
Y-axis line.
X—
|—
D
How to establish
needle entry point d
Press touch-screen in
lower center portion and
a marker dot will appear.
Y
Specify 2nd point of
Y-axis line.
X------- -------
T"“
Embroidery frame
will automatically
shift placing needle
above vertical line.
OTurn handwheel to
^ ascertain that needle
rests above vertical
marker line.
3
Press needle position key
to adjust so that needle
is directly above line.
After adjusting with needle
position keys, turn handwheel
to check needle position.
4
Once needle entry point
is properly established
on Y-axis line, press
second- point position
memory key.
>
r
Specify 2nd point of
Y-axis line.
X-------
------ POSITION------
0(00
\^r\\
Y
f—-POSITION----------
0(00
' , ' ■ Y .
------ ^POSITION-----
0(00
0®0
\ % 'A \
i
{Emm
0®0
000
\ \ A
vA
\
00
[\ \
1
i
000
r
B
I—P0SITI0N~|
* In the event it is necessary to correct X-Y axis positioning press
redo
key.
Press start/stop
* button.
ABCDEFGHIJKLM
Y
§
%
I
i
___
{Is-:
__
00 1 min
00 1 min
—----
02X02
cm cm
Start isewing.
NEXT
PftTTERN
REV
MEM
HELp||l4^ Al
12
13
location of
^ second part of
design to be sewn.
Second
designation
0
0
Sewing machine
is embroiderirg
first part of
design.
4A Resecure material
^in embroidery frame.
Center design within frame
using touch-screen
positioning arrows.
Press key.
96