Attaching buttons – SINGER XL1000 Quantum User Manual
Page 38
Attention! The text in this document has been recognized automatically. To view the original document, you can use the "Original mode".
Attaching Buttons
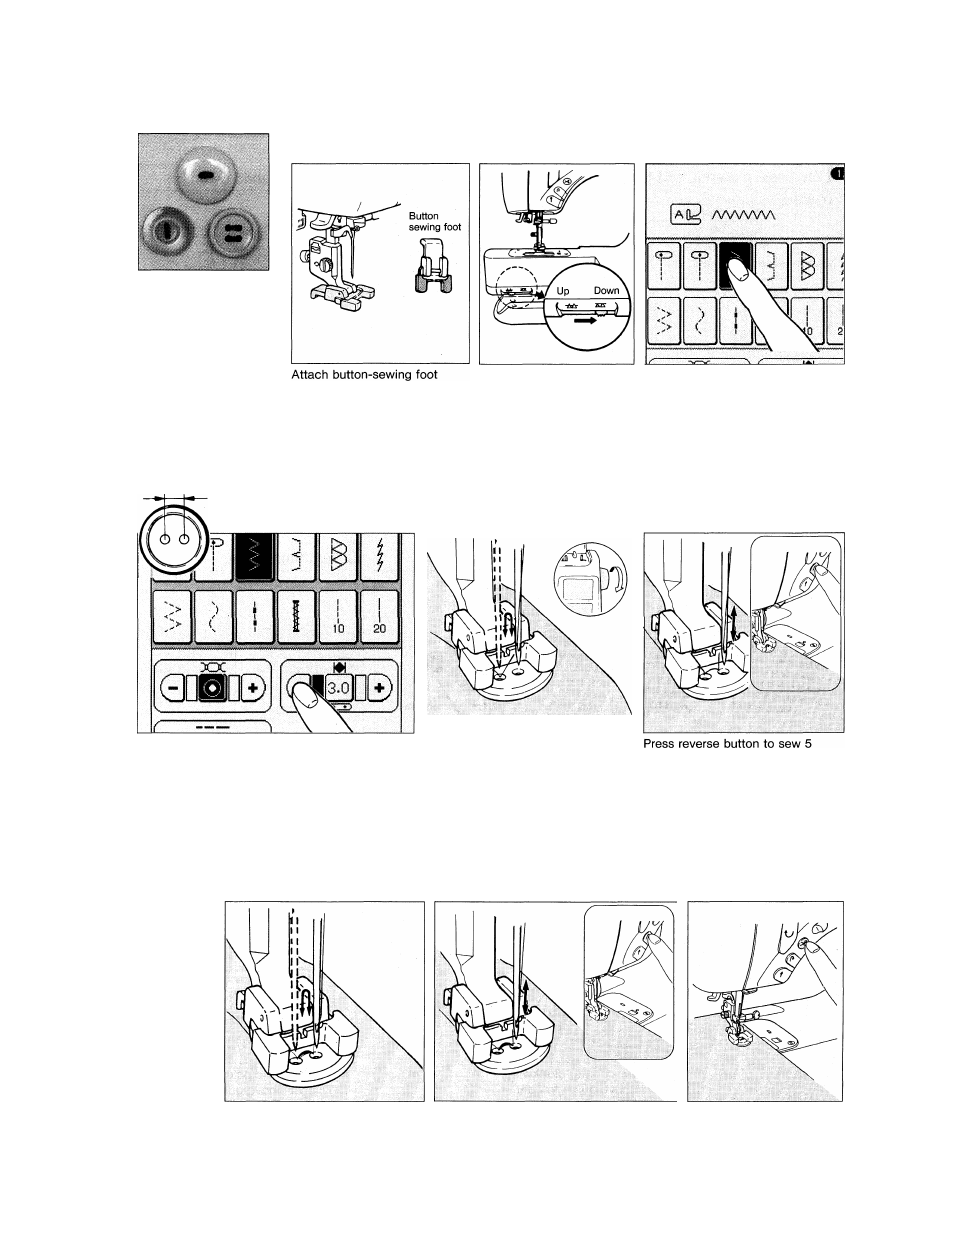
1
Use correct presser foot.
2
Lower feed dogs.
I
Select zigzag stitch pattern.
The Zigzag stitch is
used to attach both 2
and 4-hole buttons.
The button-sewing foot
must be attached when
aewing a button.
supplied in accessory bag.
4
Measure distance between
holes in button to be sewn.
Press stitch width buttons to match holes in
button to be sewn.
NOTE: 3.0mm width will generally sew all size
buttons.
Place fabric on machine,
S
and place button under
button sewing foot.
Turn handwheel by hand to confirm
that needle exactly enters holes in
button.
► Tack thread in place.
tacking stitches to secure.
Slowly press on speed
7
controller allowing needle
to sew
8
to
10
stitches.
8
Press reverse button to sew 5
tacking stitches to secure.
9
Press thread cutting
button, trim thread.
37
Caution:
Due to irregular shape of some buttons button foot may not clamp securely.
Do not attempt to sew these or buttons with a shank using sewing machine.