How to establish needle enti7 point a, How to establish needle entry point b, 1i 1 – SINGER XL1000 Quantum User Manual
Page 96
Attention! The text in this document has been recognized automatically. To view the original document, you can use the "Original mode".
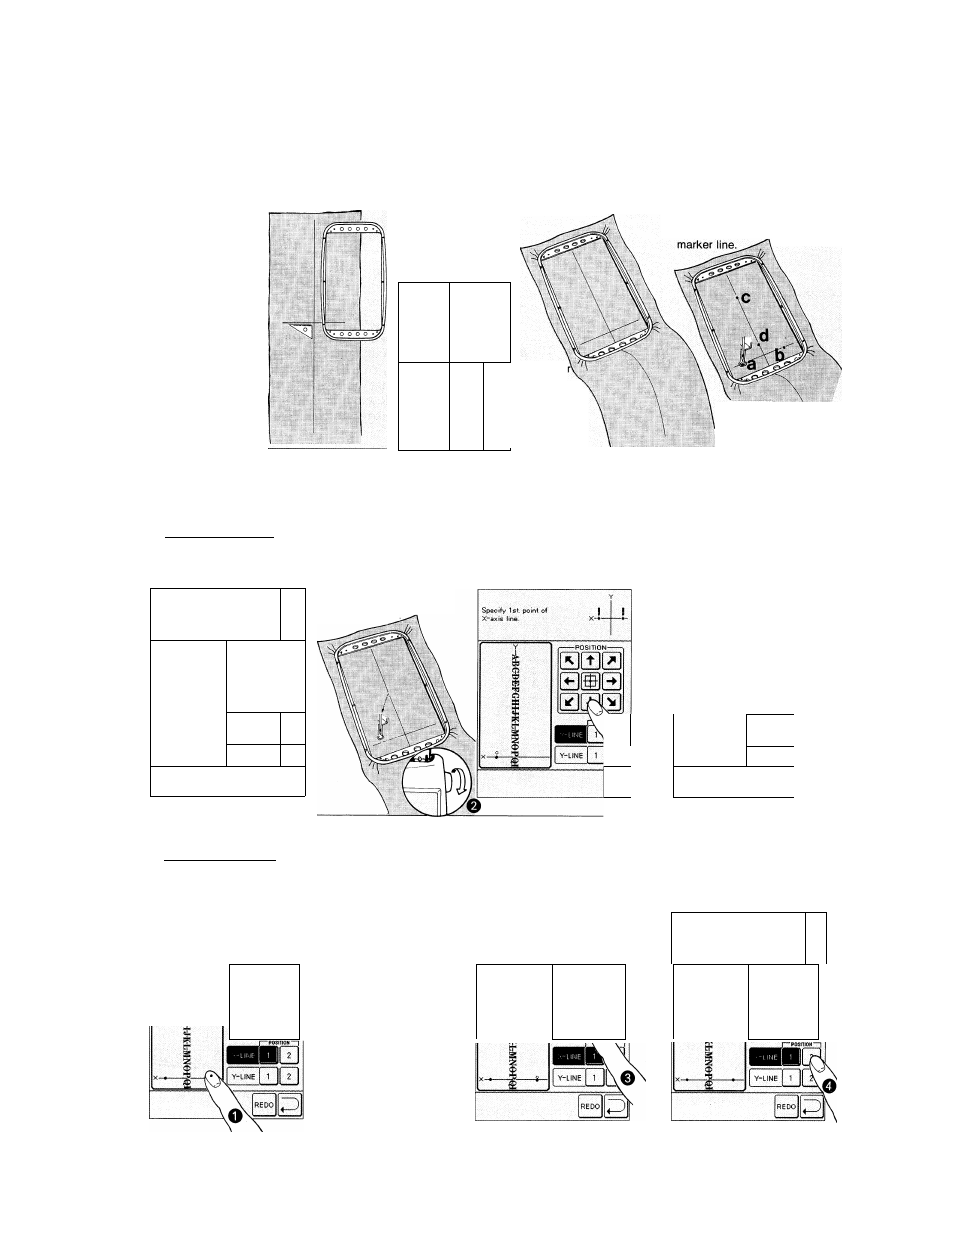
With assistant marker
1. Draw a vertical
marker line on
material.
2. Draw a horizontal marker line at right
angles to vertical line on material in sewing
area of embroidery frame.
* How to draw
horizontal line if
square is not
available:
- n
1
j
3. Secure material
in embroidery
frame, (see
page 94)
Four come
holes of
embroidery
frame provides
right angles
with respect
^to vertical line.
4. Use touch-screen
to position frame
and establish needle
entry points a and b on
horizontal marker line
and c and d on vertical
* Point intervals
must be 5cm
(2 inches) or more.
10
Using touch-screen to establish needle entry points a, b, c and d
D
How to establish
needle enti
7
point a
Press touch-screen in
lower left portion and
a marker dot will appear.
Memorise 2 points on each
X and Y axis lines by
positioning frame and axis J
lines under needle.
Touch to move to X-Y axis
input screen.
Y
■ , ■ "Y".
1I
1
X -^* --------------- ------
r—-POSITION----------
0(1)0
0®0
000
M riO
IION—1
0
1 Y-LINE I 1
0
a
Embroidery frame
will automatically
shift placing needle
above horizontal line.
OTurn handwheel to
^ ascertain that needle
rests above horizontal
marker line,
[ Press needle position key
to adjust so that needle
is directly above line.
After adjusting with needle
position keys, turn handwheel
to check needle position.
[ Once needle entry point
’ is properly established
on X-axis line, press
first- point position
memory key.
Specify 1st. point of
X-axis tine.
%
i
as0
0D0
000
vl
1
1K©\
1 Y-LINE 1 1
a
)
How to establish
needle entry point b
' Press touch-screen in
lower right portion and
a marker dot will appear.
Specify 2nd. point of
Embroidery frame
will automatically
shift placing needle
above horizontal line.
OTurn handwheel to
^ ascertain that needle
rests above horizontal
marker line.
J Press needle position key
to adjust so that needle
is directly above line.
After adjusting with needle
position keys, turn handwheel
to check needle position.
' Once needle entry point
' is properly established
on X-axis line, press
second- point position
memory key.
Specify 2nd. point of
X-axis line.
J
!
Specify 2nd. point of
X-axis line.
xJ-
r——POSITION—
000
w
Y
%
------- POSITION---------
000
1
(——POSITION——,
000
011)0
\\ \
m
\
%
0@0
1
01)0
000
\\
■
\
000
1
000
95