Manual buttonholes – SINGER XL1000 Quantum User Manual
Page 64
Attention! The text in this document has been recognized automatically. To view the original document, you can use the "Original mode".
Manual Buttonholes
1
Select desired
stitch pattern.
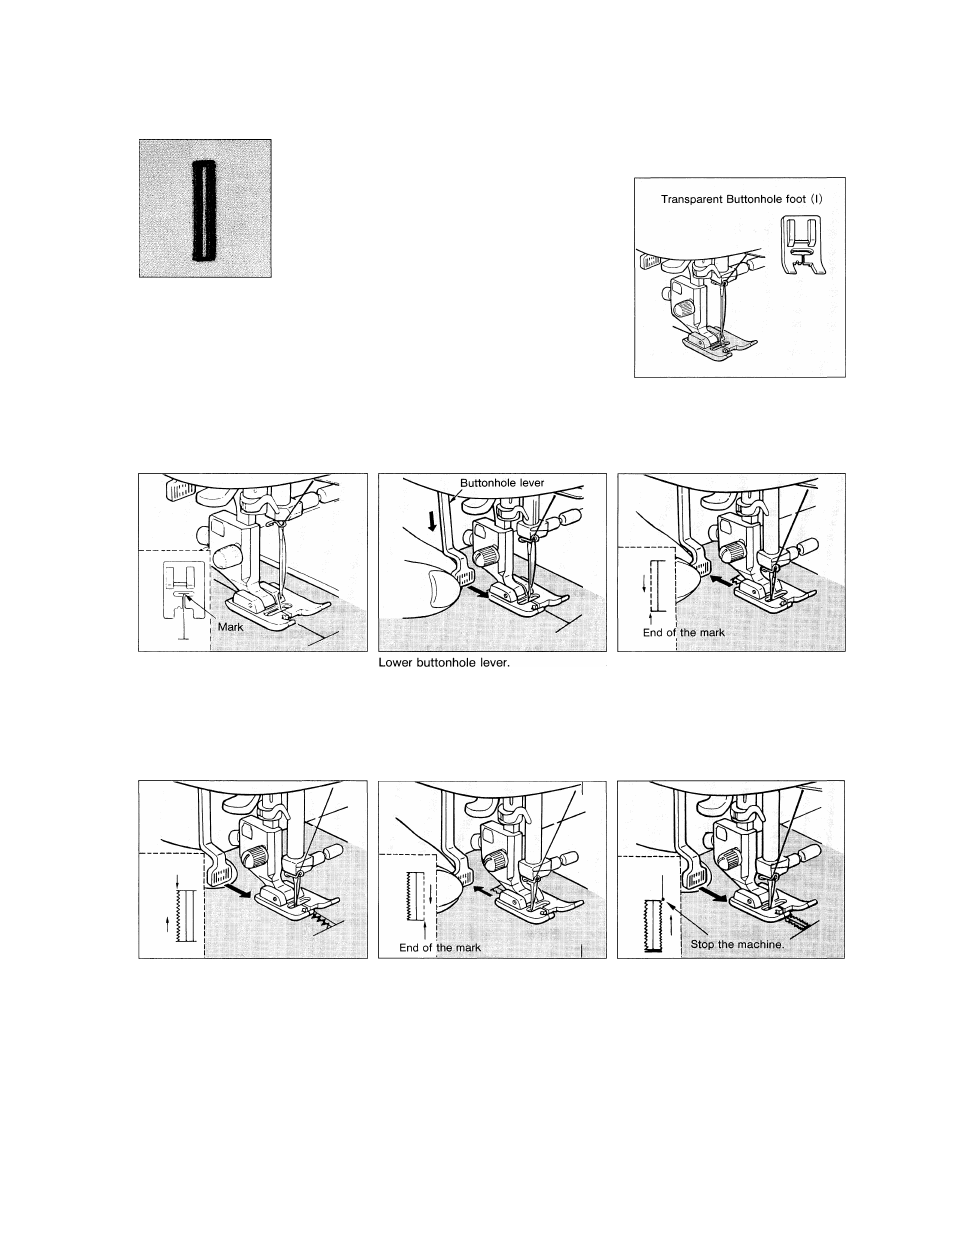
* Automatic foot can make buttonholes up to 1 1/2:
use transparent foot to create larger buttonholes.
*To make ribbon casings
Other uses for Transparent foot I.
* For french machine-sewing: mock whip and roll,
pin-tucking and entredeux, are better controlled
because there is a groove in bottom of foot.
* For satin stitching.
0
0
D D D
D 0 9
0
, Change foot.
Mark material to indicate buttonhole
placement.
Lower buttonhole foot so that mark is at
center of needle hole in foot.
When needle reaches end of marker line,
slightly press buttonhole lever towards
rear of machine.
Start sewing while slightly
7
pulling buttonhole lever towards
q
front of machine.
O
When needle reaches beginning of mark,
slightly pull lever towards front of
machine.
* Machine starts straight stitching on
right-hand parallel section of button
hole.
When needle reaches end of mark,
slightly press buttonhole lever towards
rear of machine.
* Machine starts zigzag stitching on
right-hand parallel section of button
hole.
*
* If sewing machine does not operate as described above, stop machine and press buttonhole pattern key again
It will start buttonholing from beginning.
When needle reaches beginning of mark,
slightly pull lever towards front of
machine and sewing machine will start
bartacking, perform fastening stitching
and stop.
63