Sew all patterns in third hooping position, A! 4, J cindep 441 – SINGER XL1000 Quantum User Manual
Page 108
Attention! The text in this document has been recognized automatically. To view the original document, you can use the "Original mode".
13. Use touch-screen to establish needle entry
points for 3rd hooping.
Y Determine both X-axis points.
handwheel to ascertain
needle is directly above lines.
^Determine both Y-axis points.
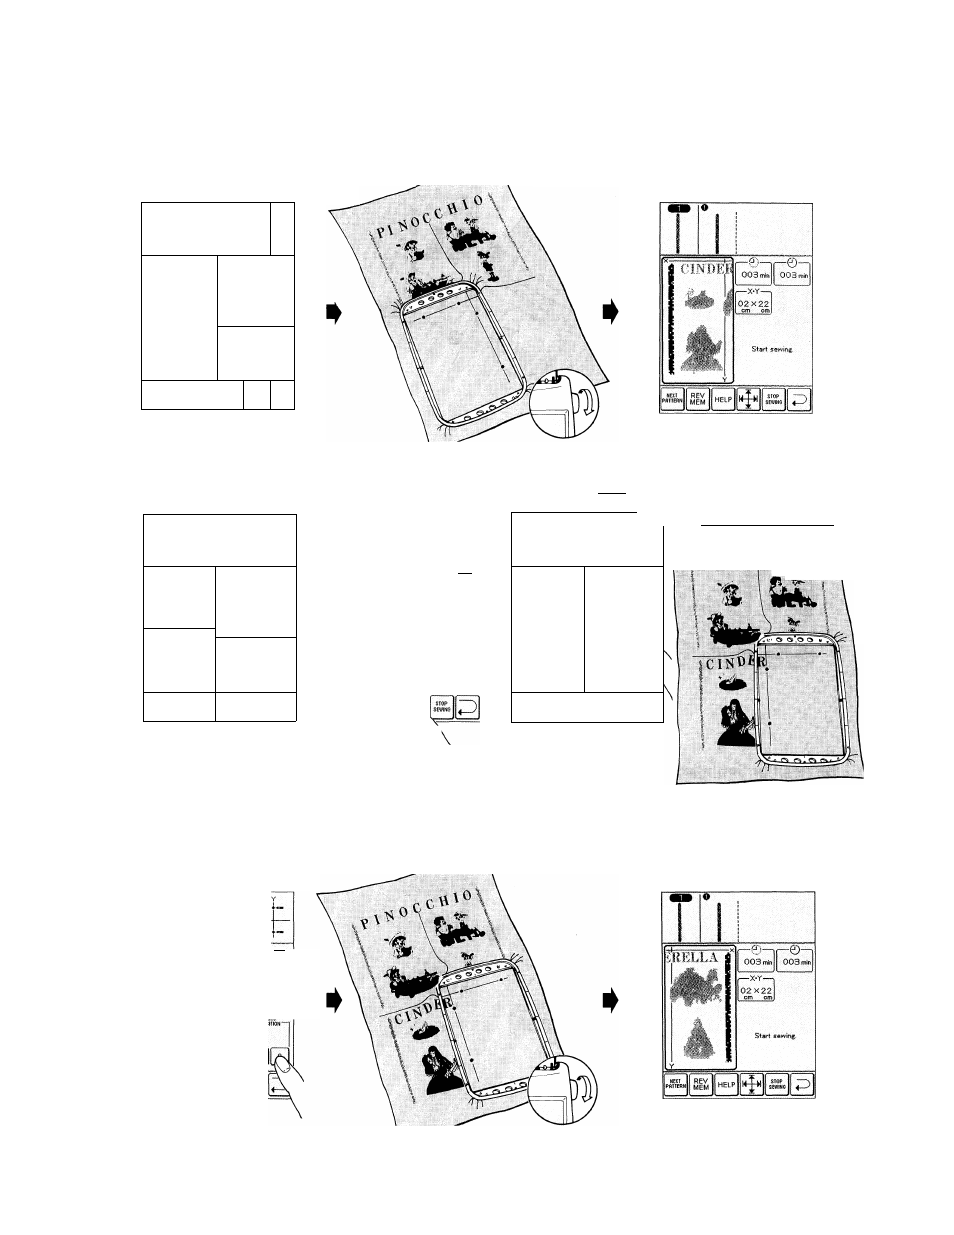
14. Sew all patterns in
third hooping position.
Specify 2nd. point of
Y-axis line. X
-
"j CINDEP
441
Y
---- -POSITION——
вша
B®B
ВШВ
MEMO
1—
POSITION
—
j
REDO
15. Position embroidery frame and secure material for 4th hooping.
^ This screen will appear
when sewing is complete.
ODefine location of
^ fourth part to be sewn.
^ After securing material Illustration of how to
in frame press
Y
PINOCCHIO
------ POSITION------
Baa
BD0
aaa
CINDERELLA
È i à
Move 0 frame to
define sewing section.
define
]
stop
end
sewing
CINDl ¡IELLA
A! 4
——----rwoi MUIN"*------
0Ш0
BD
Move 0 frame to
define sewing section.
t Press
key.
ÌRELLA j
m\
nsTSK to the Lvu
screen when securing
material in embroidery
frame.
[ài
Y
key. secure material In
Jourth hooping position.
P
1
N
0
C C H I
0
i
16. Use touch-screen to establish needle entry
points for 4th hooping.
Y Determine both X-axis points. Turn handwheel to ascertain
needle is directly above lines.
^Determine both Y-axis points.
17. Sew all patterns in
fourth hooping position.
Specify 2nd. point of
Y-axis line.
¡BELLA
M
A
r U ОI M U ..... >
вша
ВШВ
BBBi
107