Attatching a button – SINGER 5160 User Manual
Page 72
Attention! The text in this document has been recognized automatically. To view the original document, you can use the "Original mode".
S I N G E R
Attatching a button
Buttons are easily and quickly attached, with straight
stitching and simple zigzag stitching.
RECOMMENDED INITIAL SETTINGS
Pattern: Straight stitch and zigzag stitch
Needle position: Left
Stitch width: Adjustable
Foot: Button sewing presserfoot
Attach: Feed cover plate
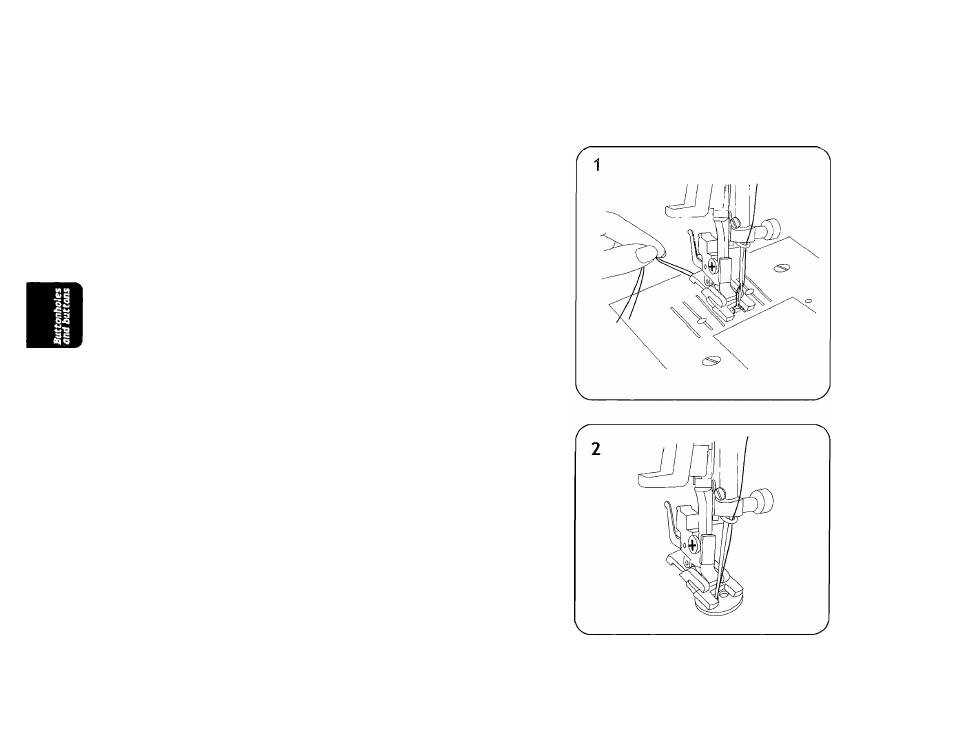
1. Set machine for straight stitching.
2. Raise the bobbin thread and pull both threads to the
back of the presserfoot (illustration 1).
3. Place the fabric and button under the presser foot.
Turn hand wheel toward your direction observing if
needle enters the center of the left hole of the
button (illustration 2). Adjust fabric and button if
necessary.
4. Lowerthepresserfootand takeacoupleof stitches.
Bring the needle up out of the button.
70
- 401A (116 pages)
- Simple 3116 (94 pages)
- 1507 (88 pages)
- 1507WC (88 pages)
- 112W140 (32 pages)
- 147-2 (30 pages)
- 114-33 (43 pages)
- 119-3 (23 pages)
- 14K1 (10 pages)
- 147-104 (34 pages)
- 116-1 (20 pages)
- 115-2 (38 pages)
- 14U286 (40 pages)
- 14U286B (21 pages)
- 114-4 (29 pages)
- 142W25 (10 pages)
- 147-81 (28 pages)
- 118 (16 pages)
- 136W105 (22 pages)
- 114-41 (20 pages)
- 147-4 (28 pages)
- 105-3 (30 pages)
- 1027 (36 pages)
- 147-26 (37 pages)
- 12W208 (25 pages)
- 128-4 (25 pages)
- 109-320 (14 pages)
- CP17 (47 pages)
- 147-6 (56 pages)
- 132B26 (9 pages)
- 114-2 (36 pages)
- 1371A3 (86 pages)
- 14CG754 (53 pages)
- 147-50 (39 pages)
- 14T967DC (3 pages)
- 109-520 (13 pages)
- 14SH654 ULTRALOCK (48 pages)
- 147-86 (30 pages)
- 105-20 (23 pages)
- W303 (13 pages)
- 147-38 (53 pages)
- 114-22 (45 pages)
- 1375A1 (33 pages)
- 107-2 (31 pages)
- 1200A (4 pages)