Top Flite TOPA0160 User Manual
Page 56
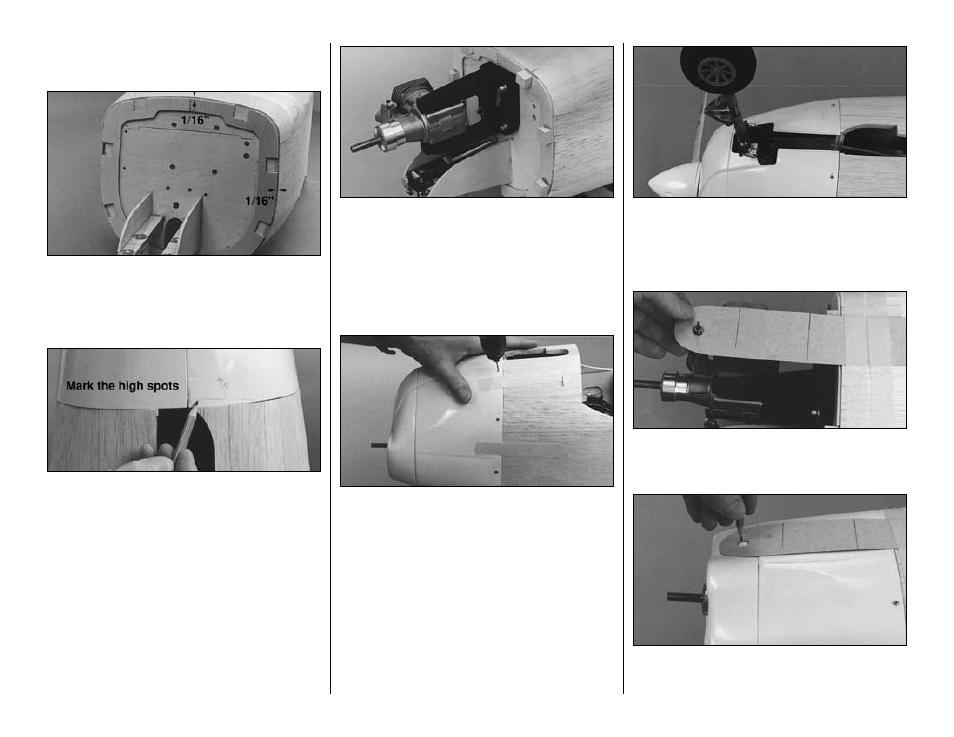
❏
3. Tape the cowl together with masking tape. Test
fit the cowl to the fuse. Glue the seams with thin CA.
❏
4. Test fit the die-cut 1/8” [3.2mm] plywood cowl
rings on the firewall. If necessary, sand the edges of
the cowl rings so they are inset from the edges of the
balsa fuselage sides approximately 1/16” [1.6mm].
Glue the cowl rings to the firewall.
❏
5. With the engine mounted, fit the cowl to the
fuselage. Mark the
high spots on the aft edge of the
cowl where you need to remove material so it
accurately fits the fuselage and aligns with the
backplate of your spinner. At first the cowl will be too
long but as you
zero-in on the fit, place the backplate of
your spinner on your engine to help you align the front
of the cowl. This is a
cut-and-fit procedure that takes a
little time, but it’s one of those areas where you can
really show your craftsmanship. Take your time and
remove small amounts of material at a time.
Note: If the head of the engine, the needle valve or
carburetor interferes with the cowl, remove them for
the time being. We also had to grind a small area on
the corner of the nose gear retract unit.
❏
6. Test fit eight 1/2” x 1/2” x 5/8” [12.7 x 12.7 x
15.9mm] maple cowl mount blocks in the notches
in the cowl ring. Sand the blocks so they match the
shape of the cowl. Glue them in place. Mark the
center of each cowl mount block on the fuselage.
Test fit the cowl to the fuselage to make sure none of
the blocks interferes with the cowl.
❏
7. Securely tape the cowl to the fuselage. Using
the marks as a guide, drill 1/16” [1.6mm] holes
through the cowl and the cowl mount blocks 1/4”
[6.4mm] in front of the aft edge of the cowl.
Hint: After you drill each hole, screw in a #2 x 3/8”
[9.6mm] screw to keep the cowl accurately aligned
as you proceed.
❏
8. Remove the cowl and enlarge the holes in the
cowl only with a 3/32” [2.4mm] drill bit.
❏
9. Test fit the cowl to see how it fits. Use #2 x 3/8”
[9.6mm] screws to hold it in place.
❏
10. If you have fixed landing gear, cut a slot in the
bottom of the cowl to clear the landing gear wire. If
you have retractable landing gear, remove whatever
material is necessary so the retractable nose strut
and steering arm will clear the cowl.
❏
11. Remove the cowl and make a template out of
thin cardboard to locate the needle valve. Tape it to
the fuselage.
❏
12. Replace the cowl on the fuselage and hold it
in place with just a couple of the screws. Transfer the
hole in the template to the cowl.
-56-