Top Flite TOPA0160 User Manual
Page 54
If you are installing the optional cockpit kit
(TOPQ8413) in your T-34B, you can skip the
following steps and follow the instructions supplied
with the cockpit kit.
❏
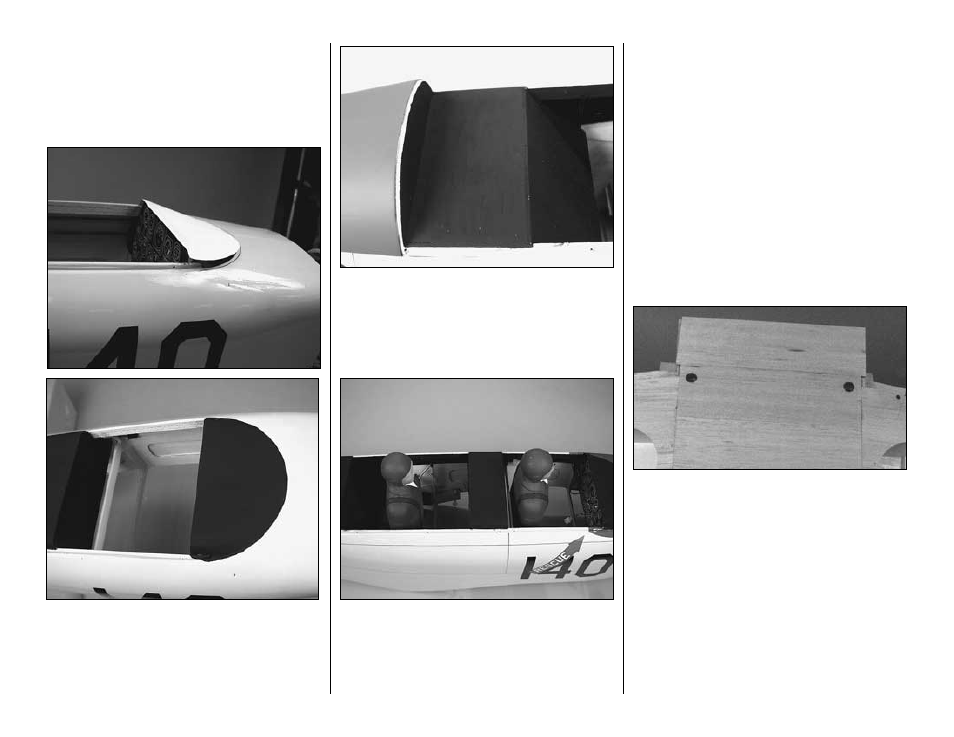
6. Fit and glue a die-cut 1/8” ply instrument panel
in place where shown on the plans. Cut a piece from
a manila file folder, using the pattern on the plan, to
fill the area between the front of the fuselage and the
instrument panel. Paint the material flat black after it
is glued into place.
❏
7. Use some leftover 3/32” [2.4mm] balsa sheeting
to fill the rear cockpit area as shown on the plan and
in the photo above. Paint the area black.
❏
8. Remove the top of former F5 to make room for
your pilots. We used 1/4 scale Williams Brothers pilots
(the 1/5 scale pilots were undersize) and glued and
shaped some balsa to the bottom of the pilot so it would
extend lower into the fuselage. The pilots are glued to
some 1/4” x 3/8” [6.4 x 9.3 mm] basswood sticks.
SHEET THE BOTTOM OF THE WING
CENTER SECTION
❏
1. Install your servo extension cords, “Y”
connectors and air lines if you are installing retracts.
The servo extension cords don’t have to be
connected to the servos and the air lines don’t have
to be connected to the retracts but they should be
installed so you can finish the sheeting. Plan this
carefully. Be certain you have connected both aileron
extension cords into the same “Y” connector and
both flap extension cords into the same “Y”
connector. Give yourself plenty of slack on the wires
and air lines so you will be able connect everything
after you cover your model.
❏
2. Sheet the bottom of the wing center section with
two 3/32” x 3” x 30” [2.4 x 76.2 x 762mm] balsa
sheets and leftover 3/32” [2.4mm] balsa if needed.
Before you glue the sheet that goes over the wing
bolts, first cut two 1” [25.4mm] lengths from the 9/16”
[14.3mm] diameter x 8” [203.2mm] cardboard tube.
Cut holes in the sheeting for the cardboard tubes.
Glue that sheet in position with the cardboard tubes.
Glue the cardboard tubes to the sheeting and wing
bolt plates. After the glue dries, cut and sand the
tubes flush with the sheeting.
Hint: Temporarily fit the flaps to the wing and cut the
ends of the bottom aft sheet to provide the correct
spacing at the ends of the flaps.
-54-