Top Flite TOPA0160 User Manual
Page 30
BUILD THE FLAPS
Skip this section if you are not building flaps.
❏ ❏
1. Use a fine razor saw to cut only the ends of
the flap from the wing along the holes you poked in
the top sheeting.
❏ ❏
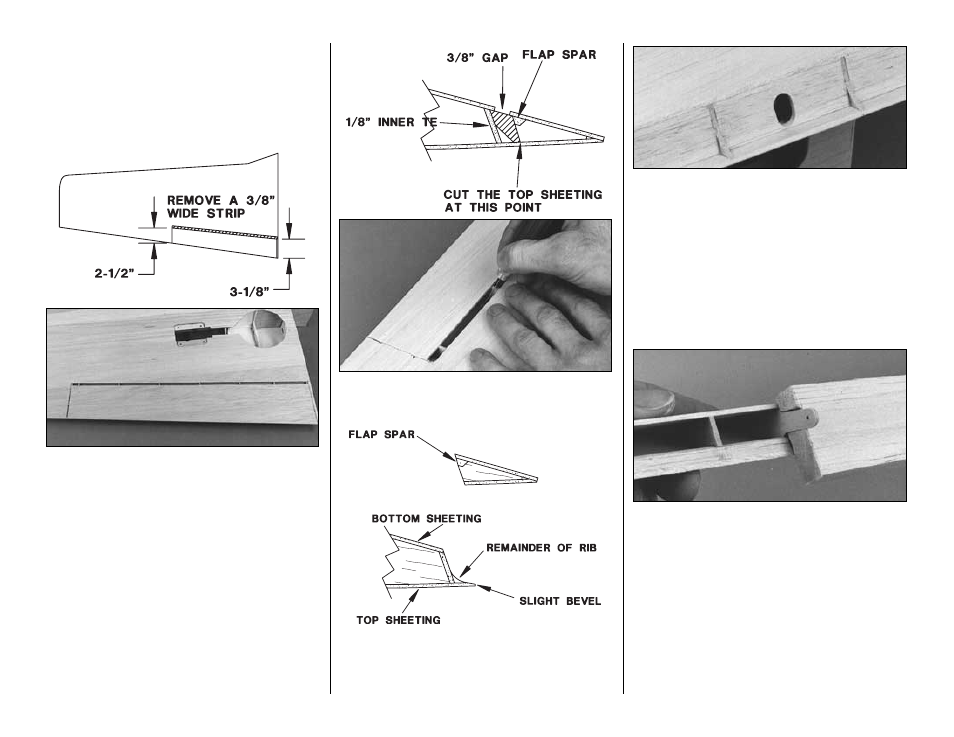
2. Use a ballpoint pen to lightly mark the flap on
the bottom of the wing as shown in the sketch.
Remove the 3/8” [9.5mm] strip of sheeting from the
bottom. This will expose the ribs so you know where
to cut them to separate the flap from the wing.
❏ ❏
3. Use a razor saw to cut through the ribs and
top sheeting as shown in the sketch.
❏ ❏
4. Trim the TE of the wing in the flap area and
the LE of the flap as shown in the sketch. A 3/4”
[17.8mm] dowel wrapped with 150-grit sandpaper
can be used to round out the rib stubs.
❏ ❏
5. Cut a hole in the inner wing TE for the flap
horn at the location shown on the plan. The hole
should be biased toward the top of the wing.
❏ ❏
6. Place the flap over the plan and mark the
location of the die-cut 1/16” [1.6mm] ply flap horn.
Fit but do not glue the flap horn into the flap.
Note: Each flap has a different location for the flap
horn so make sure you use the correct wing plan for
the flap you are working on.
❏ ❏
7. Cut the 5/8” x 1-3/8” x 18” [15.9 x 34.9 x
457mm] balsa flap LE into two pieces that fit on both
sides of the flap horn. Cut a 1/16” [1.6mm] notch in
the longer LE to accommodate the flap horn. Glue
the longer LE to the flap so the top edge is flush with
the top of the flap.
❏ ❏
8. Remove the flap horn. Temporarily tack
glue the short flap LE to the flap with a few drops of
thick or medium CA. Sand the ends of the flap LE so
they are even with the ends of the flap. Carve and
sand the top and bottom of the flap LE flush with the
top and bottom of the flap.
-30-