Top Flite TOPA0160 User Manual
Page 22
❏ ❏
5. Remove the T-pins from the bottom spar. The
weights on the aft sheeting will hold your wing flat.
❏ ❏
6. Trim the forward outer wing skin so it fits the
wing. The aft edge of the skin should contact the aft
skin (in the center of the spar) and the front edge of
the skin should extend past the leading edge of the
wing by approximately 1/4” [6.4mm]. The root end of
the sheet should accurately align with the glue joint
between W4 and W4-A and the tip of the sheet
should extend past W14 by about 1/16” [1.6mm].
Note: The grain direction of the forward outer skin
runs parallel to the leading edge of the wing.
❏ ❏
7. Wet the top of the forward outer skin with a 50/50
mix of alcohol and water so it will bend easier. Glue it to
the wing using weights or T-pins to hold it down.
❏ ❏
8. If you haven’t already done so, glue two more
3/32” x 3” x 30” [2.4 x 76 x 762mm] balsa sheets
together for the forward inner skin. From that sheet,
cut a piece that fits between ribs W2 and W4 and
glue on a third piece cut from leftover 3/32” [2.4mm]
balsa to fill up the rest of the space. Note that the
grain direction is parallel to the leading edge
between ribs W2 and W4. Trim the sheet to fit the
wing. Glue it in position.
❏ ❏
9. After the glue on all the sheeting is dry,
remove the T-pins you can reach and lift the wing off
your building board. Remove any remaining T-pins.
❏ ❏
10. Clean the glue blobs and wood chips off
your workbench so they won’t leave dents in your
beautiful wing sheeting. Turn the wing over and
carefully cut the jig tabs off the ribs.
❏ ❏
11. Reinforce all glue joints that don’t look strong.
It is particularly important that the joints between the
spar web and both spars are securely glued.
❏
12. Position the left wing plan on your building
board and cover it with Plan Protector or waxed
paper. Return to step 1 on page 19, and repeat the
steps to build the left wing panel.
FINISH THE OUTER WING PANELS
Start with the right wing panel so your progress
matches the photos.
❏ ❏
1. Glue a die-cut 3/32” [2.4mm] balsa sub-rib W2D
to rib W2 where shown on the plan. The sub rib provides
additional gluing area when the sheeting is installed.
Note: The photo below shows W2A being glued into
position. The photo does not show W2D, which
should already be in place. (We made a change after
the photo was taken).
❏ ❏
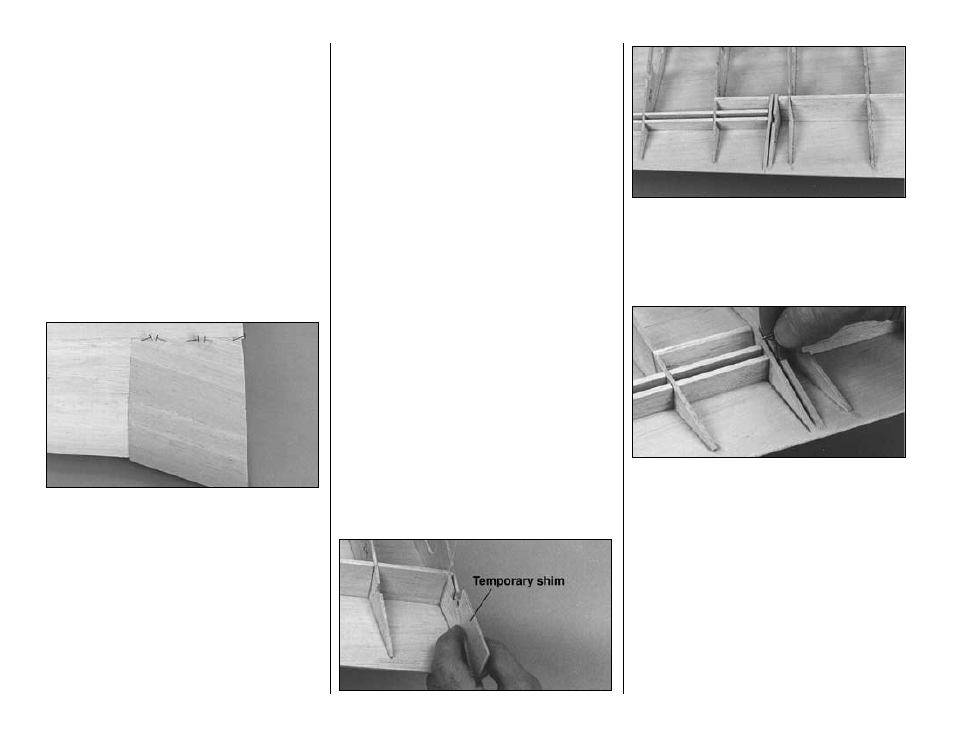
2. Glue the die-cut 3/32” [2.4mm] balsa flap ribs
W2A and W8A and aileron ribs W9A and W14A to the
wing where shown on the plan. Note that W8A and
W9A are perpendicular to the aileron spar W17. Hint:
Temporarily place a
shim made from 1/16” [1.6mm]
leftover plywood between the ribs for perfect alignment.
❏ ❏
3. Stick a pin through the wing sheeting in a few
places along the space between W8A and W9A, along
the space between W2A and W2D, and along the
space between W14A and W14. These pin points will
indicate where to cut the sheeting to separate the ends
of the flap and aileron from each other and the wing.
-22-