Top Flite TOPA0415 User Manual
Page 47
❏
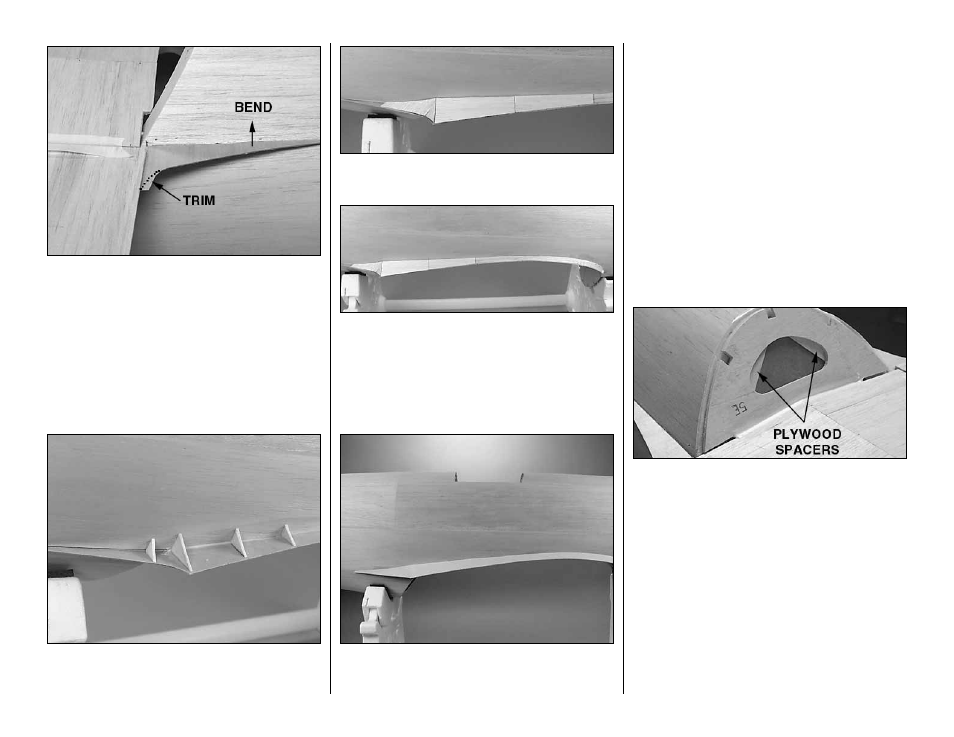
4. Use a hobby knife to carefully score the fillet
bases at the TE of the flaps. Make a sharp bend in
the fillet bases toward the bottom of the fuse where
you scored them. Glue the fillet bases to the fuselage in
alignment with the lines you marked earlier. Trim the
fillet bases even with the TE of the flap.
❏
5. Take the wing off the fuse and trim the inner
edges of the fillet bases even with the fuse crutches.
❏
6. Use the templates on the plan to make two sets of
fillet gussets from leftover 3/32" balsa. Glue the
gussets to the fillet bases and the fuse sides as shown.
❏
7. Cover the fillet gussets joining the fuse to the
fillet bases with leftover 1/16" balsa.
❏
8. Cut the 1/2" x 30" balsa tri stick into two 15"
pieces. Make saw cuts in the tri stock and glue it to
the fillet base and the fuse. Glue an additional piece
of leftover 1/16" balsa over the tri stock.
Now for the fun part...
This is a photo of the balsa filler just after application.
As you can see, little sanding will be required when
it dries.
❏
9. Use lightweight balsa filler to build up a smooth
fillet covering the balsa sheeting and tri stock and
blending the fuse to the fillet base. The more time
you spend applying and smoothing the filler, the less
sanding you will have to do after it dries.
❏
10. Sand the fillets as necessary, blending them to
the fuse.
Build the belly pan
❏
1. Set the fuse upside-down in your building stand
and bolt the wing to the fuselage. Mark the locations
of the die-cut 1/8" plywood belly pan formers 3C
and 4C on the bottom of the wing.
Refer to this photo for the following three steps.
❏
2. Bevel the bottom edge (remember, the bottom
is the bottom of the plane even if it is upside-down in
your stand right now) of the die-cut 1/8" plywood
belly pan former 5E to accommodate the sheeting
when it is added later. Test fit 5E and make sure that
when in position on the trailing edge of the wing, it is
the same height as 5D so the fuse sheeting and the
belly pan sheeting will align.
❏
3. Cover former 5D on the fuselage with wax
paper so you don’t inadvertently glue 5-E to it. You
can use 3M 75 Repositionable spray adhesive to
hold the wax paper in position.
❏
4. Glue 5-E to the bottom of the wing with 1/16"
plywood spacers between it and former 5-D.
-47-