Top Flite TOPA0415 User Manual
Page 44
❏
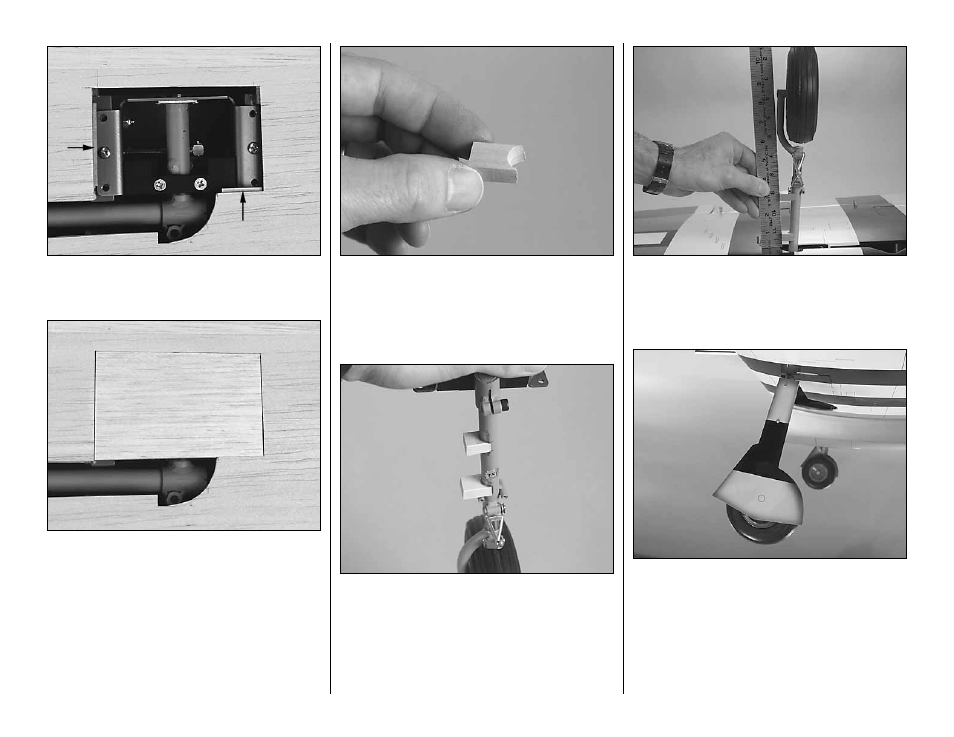
4. Glue strips of leftover 1/32" plywood under the
balsa sheeting inside the landing gear cutouts to
support a balsa landing gear cover.
❏
5. Make landing gear hatch covers from leftover
3/32" balsa. After the model is covered, the hatch
covers can be attached with clear tape.
You can make the optional wheel covers now, or wait
until the model is covered. Since the landing gear
struts do not retract fully into the wing, the wheel
covers extend below the wing and should not be on
the model when in flight. Therefore, the wheel covers
shown in the photos on the box cover are intended
for static display only.
❏
6. Make wheel cover mounts by drilling 1/2"
holes through a 1/2" thick basswood sheet (not
included with this kit). Cut or sand away surrounding
material until you have a block with a half-circle on
one end as shown in the photo. Make four of these.
❏
7. Use 30-minute epoxy to permanently glue two
mounts to each landing gear strut as shown in
the photo.
❏
8. Cut out two wheel covers from 1/8" lite ply (not
included with this kit) using the pattern supplied on
the plan.
❏
9. Trim the ends of the blocks so the covers will align
with the gear. Use a straightedge for alignment. As you
can see in the photo, the length of the blocks determines
how close you can get the covers to the gear.
❏
10. Attach the gear covers to the mount blocks with
#2 x 1/2" screws (not included). When it’s time to cover
the model, cover the landing gear covers to match the
invasion stripes on the bottom of the wing (if the trim
scheme you’ve chosen has invasion stripes).
While we’re finishing the wing, let’s go ahead and
work on the optional machine guns...
-44-