Top Flite TOPA0415 User Manual
Page 45
We made the machine guns on our prototype after
the wing was covered, but they are easier to make
now, before the wing is covered.
❏
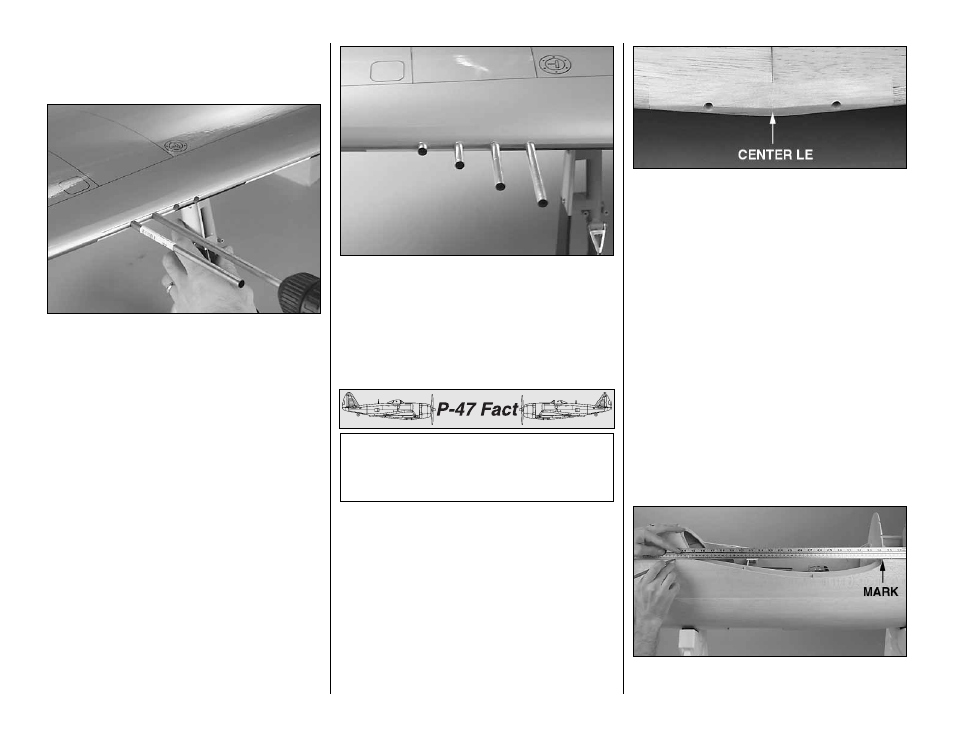
11. Refer to the wing plan and mark the location
and spacing of the machine guns on the LE of the
wing. Use a 9/32" brass tube sharpened on one end
to drill holes through the LE and the 1/4" balsa inside.
Hint: After you drill the first hole, insert a brass tube.
Use it as an alignment cue for drilling the rest of the
holes in that wing half. This way all your machine
guns will align.
❏
12. After you’ve drilled all the holes for the
machine guns in both wing halves, cut the 9/32"
brass tube into eight 1-1/4" pieces. Deburr the ends
of each tube.
❏
13. Glue the tubes into the wing. Use a bar sander
to sand the ends of the tubes so they are flush with
the LE.
❏
14. Make the machine guns from three sizes of
telescoping K & S brass or aluminum tubing (1/4",
7/32", 3/16"). Cut the tubes to the correct length, glue
them together with thick or medium CA, then
square-off and deburr the ends.
❏
15. Lightly coat one end of each machine gun with
a dab of CA. Allow to fully harden. This will provide
enough interference to hold the machine guns in the
brass tubes in the wing, yet allow for removal during
transportation.
FINAL CONSTRUCTION
Mount the wing to the fuselage
❏
1. Use 30-minute epoxy to securely glue both 1/2"
x 1-1/4" x 1-1/4" maple wing bolt blocks in the fuse
where shown on the plan. As you can see in the
photo at step 6, one corner of the blocks has been
rounded for a finished appearance.
❏
2. Temporarily position the wing dowels in the
wing, then glue the center LE (prepared earlier) into
position. Remove the dowels, then shape the center
LE to match the shape of the wing and the LE’s.
You may permanently glue the dowels in place as
described in the following step, or wait until the
model is covered.
❏
3. Use a piece of leftover music wire or something
similar to apply 30-minute epoxy to the holes in the
aft dowel braces where the dowels fit and in the
holes in the LE of the wing. Apply epoxy to the
dowels as you twist them into position, thoroughly
spreading the epoxy. Wipe away excess epoxy
before it hardens.
❏
4. Securely tape the flaps to the wing in the up
position. Place the fuse upside-down in a building
cradle and set the wing in the fuse. Mark both sides
of the fuse where the wing LE contacts it (refer to the
following photo). Remove the wing from the fuse.
❏
5. Place a straightedge on one side of the fuse
across the line you marked and the aft edge of the
There were several versions of the “D”, beginning
with the D-1, featuring an additional pair of cowl
flaps. The D-5 featured water injection and two-point
bomb or drop tank shackles on the belly.
-45-