Top Flite TOPA0415 User Manual
Page 15
❏
13. Cut eight 1-1/2" long hinge blocks from a 1/4"
x 1/2" x 30" balsa stick. Glue the hinge blocks to the
fin TE and rudder LE spar where shown on the plan.
If you plan to use flat hinges, you may wish to make
the hinge blocks longer.
❏
14. If necessary, trim the left side of the rudder LE
spar so it is even with the left side of the ribs.
❏
15. Build the two fin jigs, similar to the stab jigs,
from the die-cut 1/8" plywood parts.
❏
16. Position the fin on top of the jigs and align
them with ribs 1 and 4. Glue the left fin and rudder
skins into position.
❏
17. After the glue from the previous step has
dried, remove the fin from the jigs. Use a bar sander
with 80-grit sandpaper to roughly sand the leading
edge to remove excessive glue. Sand the ends of the
sheeting even with the tip of the fin and rudder.
❏
18. Cut the rudder from the fin. Sand the LE of the
rudder and the TE of the fin to remove the remaining
unwanted portions of the ribs.
❏
19. Cut the rudder LE to the length shown on the
plan from the 3/8" x 1-1/2" x 18" balsa stick. Use thick
or medium CA to securely, but temporarily, tack glue
the rudder LE to the fin.
❏
20. Use a razor plane followed by a bar sander to
trim the rudder LE to match the fin. Glue the rudder
to the rudder LE. Be certain the tip of the rudder
aligns with the tip of the fin.
❏
21. Cut the fin tip and the rudder tip from the 3/4"
x 1-1/2" x 5" balsa block and glue them to the fin and
rudder. Be certain you don’t accidentally glue the fin
tip to the rudder LE. Hint: Use the drawings of the fin
and rudder tip as patterns to shape them.
❏
22. Use a razor plane and a sanding block to
shape and round the tips. Refer to the cross section
on the plans frequently during this process.
❏
23. Glue the 1-3/8" x 1-3/4" x 4-1/2" balsa rudder
base block to the bottom of the rudder. Shape the
bottom of the block to match the rudder. Break the
rudder free from the fin.
Hinge the elevators and rudder
❏
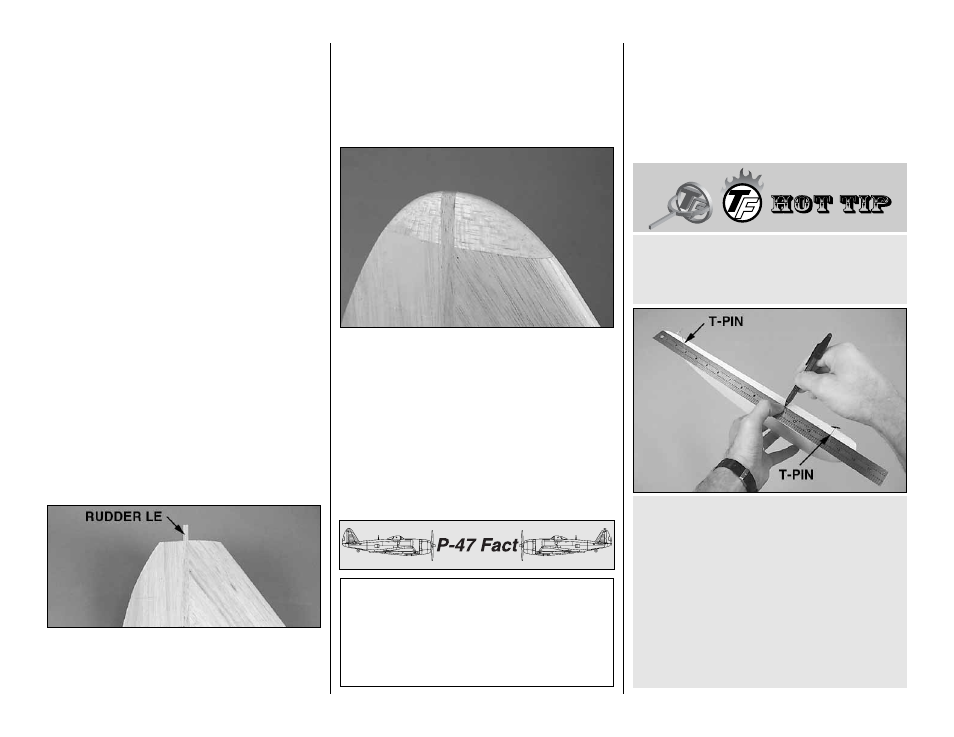
1. Refer to the Hot Tip that follows, then mark the
locations of the hinges on the elevators and stab.
A. Insert T-pins through the center of the elevator
LE near both ends. Position a straightedge along
the T-pins and mark a centerline with a fine point
ballpoint pen.
B. Do the same for the other elevator and the TE
of the stab.
C. Mark the locations of the hinges along the
centerlines you drew.
HOW TO ACCURATELY MARK THE
CENTERLINES OF THE CONTROL
SURFACES FOR HINGING.
The P-47 was manufactured by Republic Aircraft
Corporation, which at one time was named
Seversky Aircraft Corporation, started by two
fellow Russians, Alexander De Seversky and
Alexander Kartveli. For a great history of the early
development of the P-47, see:
home.att.net/-Historyzone/Seversky-Republic.html.
-15-