Top Flite TOPA0415 User Manual
Page 13
❏
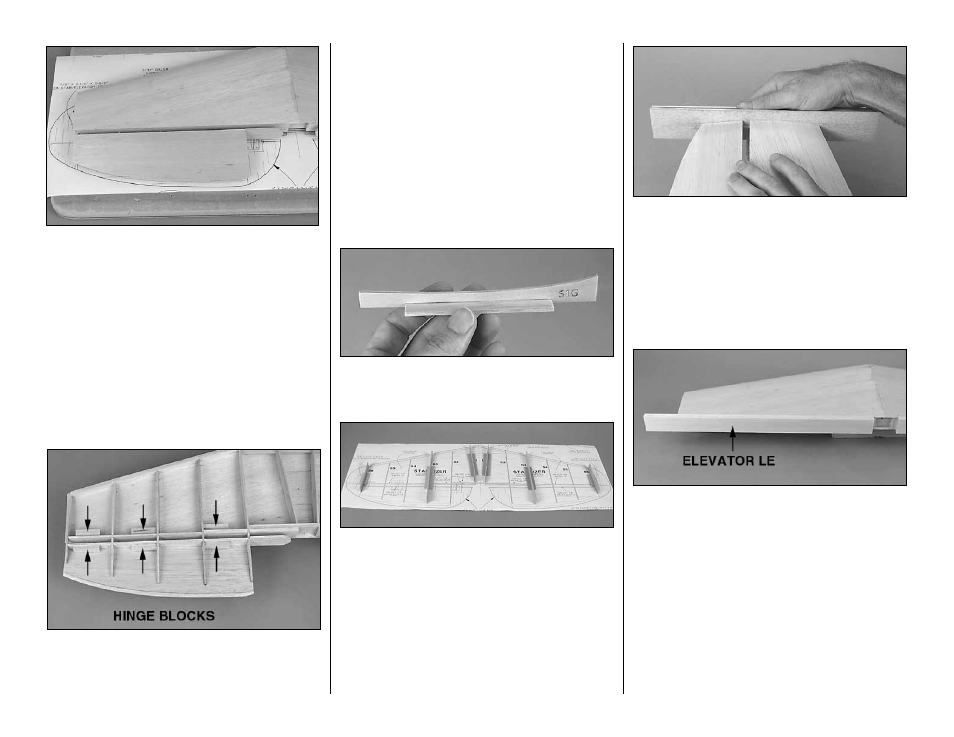
21. If you haven’t done so already, trim the top
edge of the elevator LE spars even with the top of the
ribs. Glue the top elevator skins to the top of the
elevators. As shown on the cross section on the plan,
the beveled edges are on the inside.
❏
22. Remove the stab and elevators from your
building board. Save the jig sticks for use on the fin.
❏
23. Use a hobby knife to trim the jig tabs from the
bottom of the ribs, finishing with a bar sander and
80-grit sandpaper so the ribs appear as though the
jig tabs were never there. While you’re at it, trim the
bottom of the LE so it matches the ribs.
❏
24. Cut eighteen 1-1/2" long hinge blocks from a
1/4" x 1/2" x 30" balsa stick. Glue the hinge blocks to
the stab TE and elevator LE spar where shown on
the plan. NOTE: The hinge block sizes shown on the
plan are intended to accommodate Robart large
hinge points. If you plan to use flat hinges, the hinge
blocks may need to be longer.
❏
25. If necessary, trim the bottom of the elevator LE
spar even with the bottom of the ribs. Glue the
bottom elevator skins to the elevators. Be certain the
TE of the top and bottom skins align and are
thoroughly bonded together.
❏
26. Use leftover 3/32" sheeting to sheet the
bottom of the stab between ribs S1 just the same as
you did on the top of the stab.
❏
27. Build the six stab cradles (three for each side
of the stab) from the die-cut 1/8" plywood pieces
as shown.
❏
28. With the stab plan positioned over your flat
building board, place the stab cradles over their
respective locations on the plan. Note that the front
of the cradles is the end with the embossed lettering.
Hint: Hold the cradles to the plan with 3M 75
Repositionable Spray Adhesive.
❏
29. Place the stab on the cradles aligned with the
plan. Glue the bottom skins into position. A slow
drying glue such as aliphatic resin is preferred. Place
weights on top of the stab to hold the skins down.
❏
30. After the glue from the previous step has
dried, remove the stab from the cradles. Use a bar
sander with 80-grit sandpaper to remove excessive
glue. Sand the ends of the stab and elevator
sheeting even with the tips.
❏
31. Cut both elevators from the stab. Sand the LE
of the elevators and the TE of the stab to remove the
protruding portions of the ribs.
❏
32. From the 3/8" x 1-1/4" x 36" balsa stick, cut two
elevator LE’s to the length shown on the plan. Use
a couple drops of thick or medium CA to temporarily
tack glue the elevator LE’s to the stab.
❏
33. Use a razor plane followed by a bar sander to
trim the elevator LE’s to match the top and bottom of
the stab. Permanently glue the elevators to the
elevator LE’s. Be certain the tip of the elevators align
with the tip of the stab.
❏
34. Cut the stab and elevator tips from the plan and
use them as patterns to make both stab and elevator
tips from two 7/8" x 2-1/4" x 5-5/8" balsa blocks.
-13-