Top Flite TOPA0415 User Manual
Page 37
joiners in the wing. If this is the case, stick a piece of
Great Planes Adhesive Backed 80-grit sandpaper to a
leftover 1/4" x 3/8" basswood stick and use it as a mini
sander to remove the obstruction.
❏
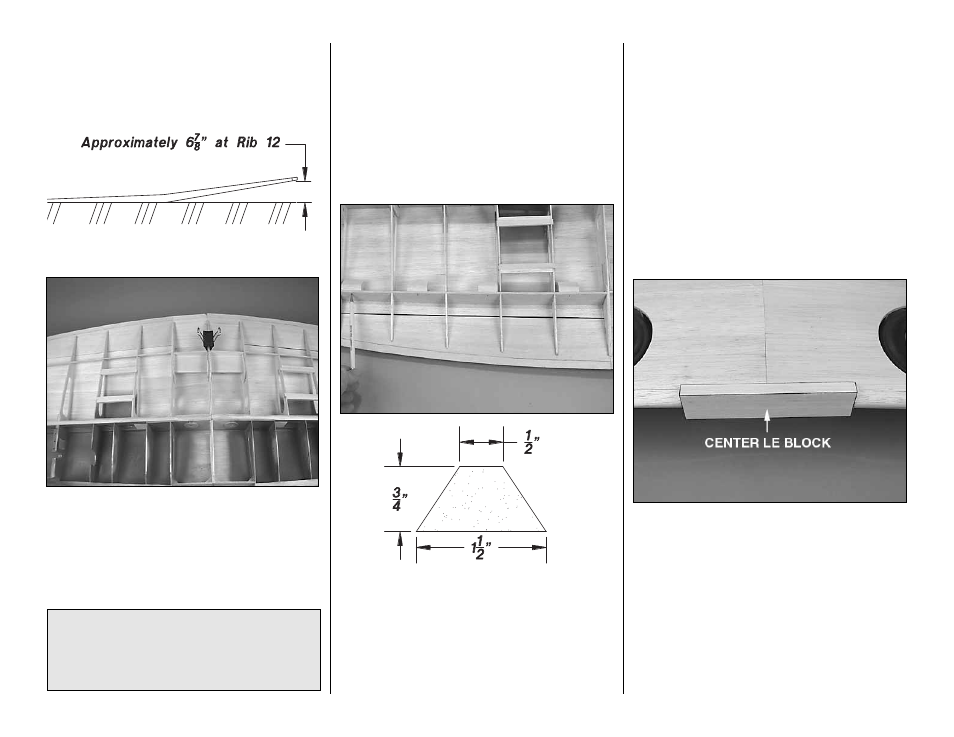
4. Without using glue, test fit the wing panels
together with the wing joiner and the wing bolt plate.
How did it come out? Make adjustments where
necessary for a good fit and to achieve the correct
dihedral. As shown in the sketch, one wing tip at rib
12 should be 6-7/8" above the workbench when the
other half of the wing is laying flat.
❏
5. Once you have achieved a good fit of the wing
panels with the wing joiner and the wing bolt plate,
separate the wing panels, apply 30-minute epoxy to
all joining pieces, then permanently glue the wing
halves together. Hold with clamps until the epoxy
fully hardens.
Sheet the bottom of the wing
❏
1. Cut eight 1-1/2” long flap hinge blocks from
the 12” shaped balsa stick shown in the sketch. Glue
the flap hinge blocks to the inner TE of both wing
panels where shown on the plan. Use a ballpoint pen
to make a dimple on the outside of the inner TE’s
corresponding to the center of the hinge blocks. This
will help you identify where to drill the holes for the
hinges later.
❏
2. Cut eight 1-1/4" long hinge blocks for the
aileron hinges from the 1/2" x 3/4" x 12" balsa stick.
Glue the hinge blocks to the outer TE of both wing
panels where shown on the plan.
NOTE: Make the hinge blocks longer if you plan to
use flat hinges instead of hinge points.
❏
3. Sand the bottom edges of the spars, hinge
blocks and wing ribs even and remove glue bumps
that will interfere with the bottom sheeting.
❏
4. If installing optional machine guns (made from
brass or aluminum K & S tubing, not included), glue
leftover 1/4" balsa to the aft edge of the LE between
ribs 6 & 7 as shown on the plan.
❏
5. Trim the ends of the 5/8" x 1-1/2" x 8" balsa
center LE block to fit against the forward dowel
plates between the LE’s. Temporarily fit the center LE
block into position, then use a ballpoint pen (or a
5/32" brass tube) to mark the location of the dowel
holes on the back of the block (disregard the fact that
the bottom of the wing is sheeted in this photo, as
yours is not yet sheeted).
❏
6. Use a 5/32" brass tube sharpened on the end
or a 5/32" drill to drill holes through the center LE
block at the marks you made. Set the center LE
aside for now.
IMPORTANT!
Make certain your 30-minute epoxy provides
enough working time to complete the following
step. It might help to make a dry run to see how
long it takes you to position all of your clamps.
-37-