Curved a-b guidance – TeeJet CenterLine 230BP User Manual
Page 20
CenterLine 230BP
98-05112 R4
19
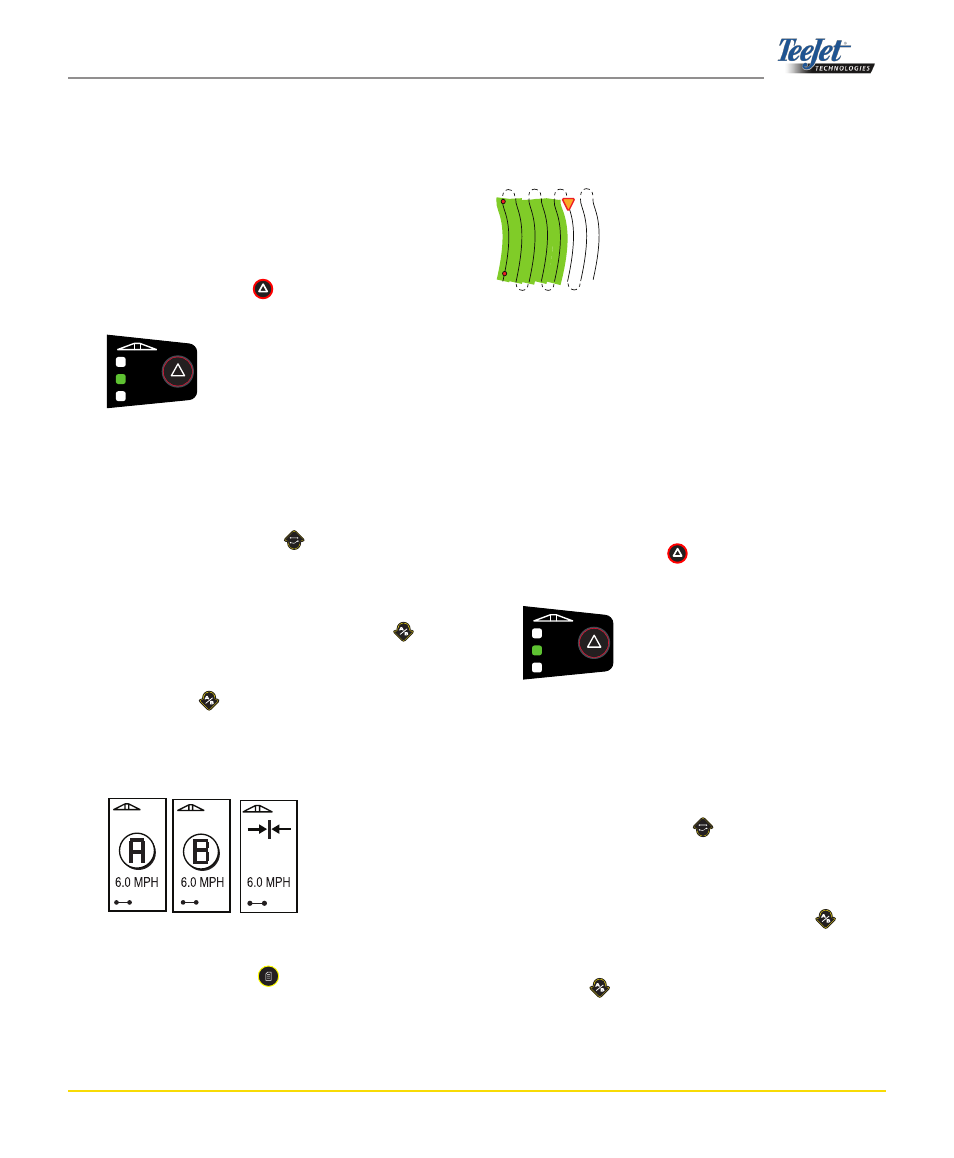
Curved a-b Guidance
Curved A-B Guidance is similar to Straight A-B Guidance
except that the reference line is curved.
NOTE:
Curved Guidance is recommended not to
exceed 30
0
within the A-B guideline.
NOTE:
Steps 1 - 3 are not applicable if a SmartCa-
ble or SDM is not installed on the system.
1. Turn the controller master switch to the “On” position.
The individual boom section switches should remain
in the “Off” position.
2. To activate automatic boom section control, press the
Swath Status Switch key until Auto Mode is illumi-
nated on the console.
3. In areas where application is not desired, manually
turn “Off” the rate controller master switch to shut off
the booms. Turn the master switch “On” to resume
application.
4. Use the Guidance Mode key to select Curved A-B
guidance.
5. Drive to the desired location of Point A. While the
vehicle is in motion, press the Mark A-B key to
establish Point A. Point B will be displayed on the
screen. Drive to the location of Point B and press the
Mark A-B key again to establish the A-B line. The
CenterLine 230BP will begin providing navigation in-
formation with the lightbar and Navigation Screen.
NOTE:
Steps 1 - 3 are not applicable if a SmartCa-
ble or SDM is not installed on the system.
1. Turn the controller master switch to the “On” position.
The individual boom section switches should remain
in the “Off” position.
2. To activate automatic boom section control, press the
Swath Status Switch key until Auto Mode is illu-
minated on the console.
3. In areas where application is not desired, manually
turn “Off” the rate controller master switch to shut off
the booms. Turn the master switch “On” to resume
application.
4. Use the Guidance Mode key to select Straight
A-B guidance.
5. Drive to the desired location of Point A. While the
vehicle is in motion, press the Mark A-B key to
establish Point A. Point B will be displayed on the
screen. Drive to the location of Point B and press
the Mark A-B key again to establish the A-B line.
The CenterLine 230BP will immediately begin pro-
viding navigation information with the lightbar and
Navigation Screen.
6. Use the Change Page key to advance the screen
views.
a
B
aLL on
auto
Man
aLL on
auto
Man
Establish
Point A
Establish
Point B
+0
+0
+0
0.0
Navigation
Screen