Isobus job computer : ic18 sprayer, Calibrations, Implement speed sensor – TeeJet IC18 SPRAYER JOB COMPUTER User Manual
Page 24: Flow sensor
19
98-05204 R1 UK
OVER
VIE
W
SE
TUP
APPENDIX
GE
TTING ST
AR
TED
OPER
ATION
ISOBUS Job Computer : IC18 Sprayer
Calibrations
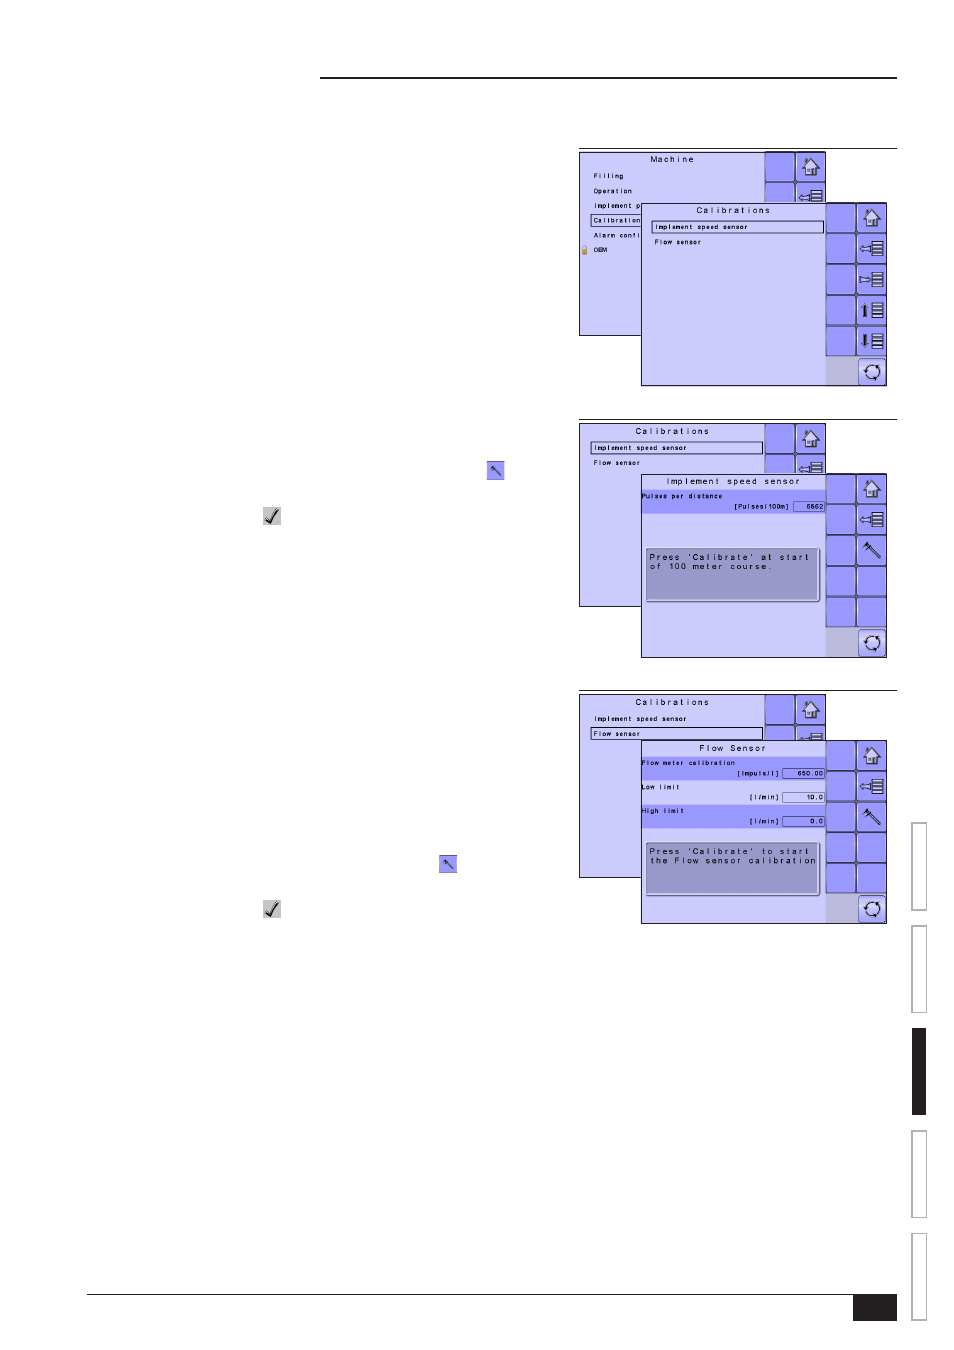
Figure 3-23: Calibrations
Figure 3-24: Implement Speed Sensor
Figure 3-25: Flow Sensor
Calibrations establishes either manual or automatic settings of the sensors.
NOTE: For specific calibration options to appear, a specific sensor needs to be
installed. Sensor availability is activated on the Sensor Presence screen in
the OEM section.
Implement Speed Sensor
The Implement Speed Sensor establishes the wheel pulses over a specified
distance. This value can be established manually or calibrated automatically.
Manual Calibration
Manual calibration establishes the pulses based on a user entered value.
• To select the Pulses per Distance, use the number pad or slide bar.
Automatic Calibration
Automatic calibration establishes the pulses using the automatic calibration
function.
• To calibrate the pulses per distance, select CALIBRATION KEY .
• Follow the series of instructions displayed.
• Select the ACCEPT KEY to complete the calibration
The counted wheel pulses will be displayed during the automatic calibration.
Flow Sensor
The Flow Sensor establishes the pulses per gallon/liter. This value can be
established manually or calibrated automatically.
Manual Calibration
Manual calibration establishes the calibration and limits based on user entered
values.
• To select the Flow Meter Calibration, use the number pad or slide bar.
• To select the Low Limit, use the number pad or slide bar.
• To select the High Limit, use the number pad or slide bar.
Automatic Calibration
If the number of pulses per gallon/liter for the flow meter is not known or to make
sure the value is correct, automatic calibration establishes the calibration and limits.
• To calibrate the flow sensor, select CALIBRATION KEY .
• Follow the series of instructions displayed.
• Select the ACCEPT KEY to complete the calibration
The pulses counted will be displayed during the automatic calibration.
An option to enter a Collected Volume is displayed if there is no calculated volume.
• To enter the Collected Volume, use the number pad or slide bar.