Neuspeed 49.10.93 User Manual
Page 5
Page 5
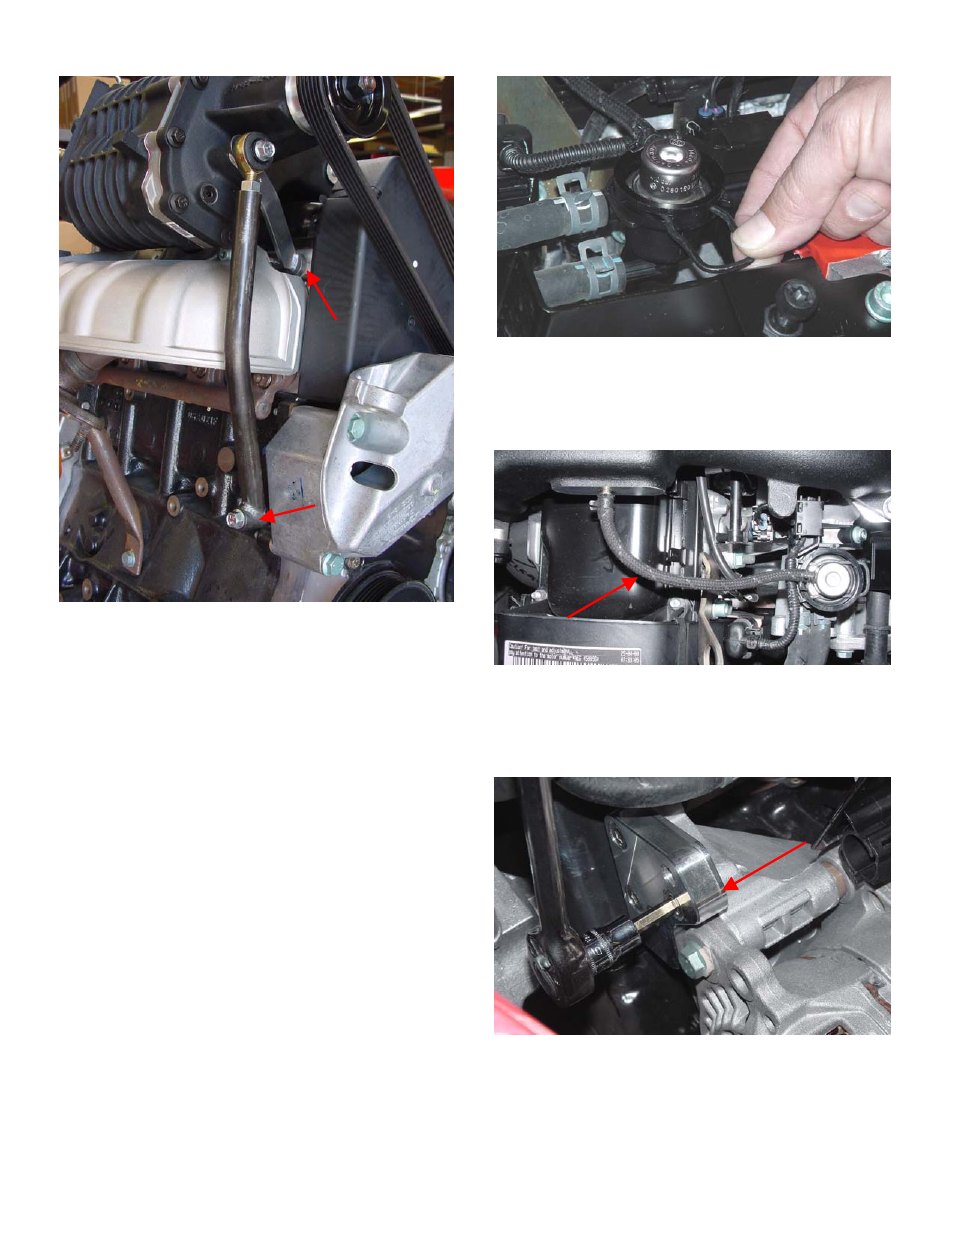
13. PASSENGER SIDE REAR SUPERCHARGER SUPPORT
BRACE INSTALLATION: Insert the supplied new
8X1.25X40mm bolt through the lower boss of the support brace
– align with threaded boss on engine block and tighten by hand.
Now check to see that rod end aligns with hole on boss on
supercharger ( you can rotate this support on lower mounting bolt
away from supercharger to turn rod end) – make adjustment (in-
or-out) for perfect alignment. Position Head Stay bracket by
inserting button end into the hole located in the lower right-hand
corner of cylinder head. Insure that the slot on the bracket aligns
with the threaded boss on the supercharger. The Head Stay fits
next to supercharger, then the rod end. Insert supplied
8X1.25X35 bolt through assembly. Push and hold Head Stay
firmly against head as you torque bolt to 18ft. lbs. Now tighten
jam nut, and torque lower support rod bolt to 18ft. lbs. With the
supercharger supports properly in place and tightened, remove
one manifold mounting bolt at a time (except right rear bolt. See
THROTTLE CABLE INSTALLATION #32) – apply Loctite
#262 (supplied) to each bolt and re-torque.
14. FUEL PRESSURE REGULATOR REMOVAL: NOTE: Dirt
can accumulate around fuel pressure regulator. Use air pressure
to clean out around regulator so that any dirt will not fall into
fuel rail. Remove vacuum hose from regulator, and then remove
retaining clip. Lift out regulator.
15. 4-BAR FUEL PRESSURE REGULATOR
INSTALLATION: Lube O-ring and install supplied new 4-bar
regulator into bore. Push down on regulator and install factory
retaining clip. Connect vacuum hose from regulator to
supercharger plenum port.
16. BELT TENSIONER MOUNTING PLATE
INSTALLATION: Position new mounting plate as shown using
supplied new 6mm hex socket bolts, apply Loctite and torque to
18ft. lbs.