Muse Research Receptor manual v1.2 User Manual
Page 93
7: Graphic UI - Mix View
93
Receptor Manual
Use the Output Assignments panel to route the output of any channel to a particular hardware output or (for
Channels 1-16, and Effects Bus 1 and 2) to the Master channel bus. Output routings are displayed in a simple
grid, where a blue button indicates that an output is active and a white button indicates that an output is not
active.
Receptor’s 19 channels, consisting of instrument channels 1-16, Effects Bus 1 (B1), Effects Bus 2 (B2), and the
Master (M) channel appear in columns. All possible output routings appear in rows, and include:
•
Master Bus - this is the default routing for the 16 instruments channels and two effects busses. When you
route a channel to the Master bus, it’s output signal appears on the output(s) assigned to the Master (M)
Channel. Click the Master Bus button beneath any channel number to turn the output on or off for that
channel.
•
Analog L/R + ADAT 1/2 - The Analog L/R and ADAT 1/2 outputs are duplicated on Receptor. Whatever
appears on the analog output appears on the ADAT 1/2 output and vice-versa. Although you may route
any channel directly to this output, Receptor’s Master Channel is permanently routed to the Analog L/R +
ADAT 1/2 output. So, if you’re wanting to route some channels to separate outputs for submixing purposes,
you’ll probably want to choose another output pair. Click the Analog L/R + ADAT 1/2 button beneath any
channel number to turn the output on or off for that channel.
•
ADAT 3/4 - You may route the output of any channel to ADAT 3/4. This is ideal if you wish to set up
separate submixes or apply external effects to one or more Receptor channels. Click the ADAT 3/4 button
beneath any channel number to turn the output on or off for that channel.
•
ADAT 5/6 - You may route the output of any channel to ADAT 5/6. This is ideal if you wish to set up
separate submixes or apply external effects to one or more Receptor channels. Click the ADAT 5/6 button
beneath any channel number to turn the output on or off for that channel.
•
ADAT 7/8 - You may route the output of any channel to ADAT 7/8. This is ideal if you wish to set up
separate submixes or apply external effects to one or more Receptor channels. Click the ADAT 7/8 button
beneath any channel number to turn the output on or off for that channel.
•
S/PDIF L/R - You may route the output of any channel to the stereo S/PDIF output. This is ideal if you
wish to set up separate submixes or apply external effects to one or more Receptor channels. Click the
S/PDIF L/R button beneath any channel number to turn the output on or off for that channel.
To close the Output Assignments panel and keep your changes, click the Close button. To close the Output
Assignments panel and cancel all changes made since opening the panel, click the Cancel button. To reset all
Receptor channels to their default output assignments, click the Defaults button.
NOTE 1: The same Output Assignments panel opens no matter which channel’s Output Assignment Selector
you click. Opening the Output Assignments panel gives you a quick one-screen overview of Receptor’s entire
output configuration.
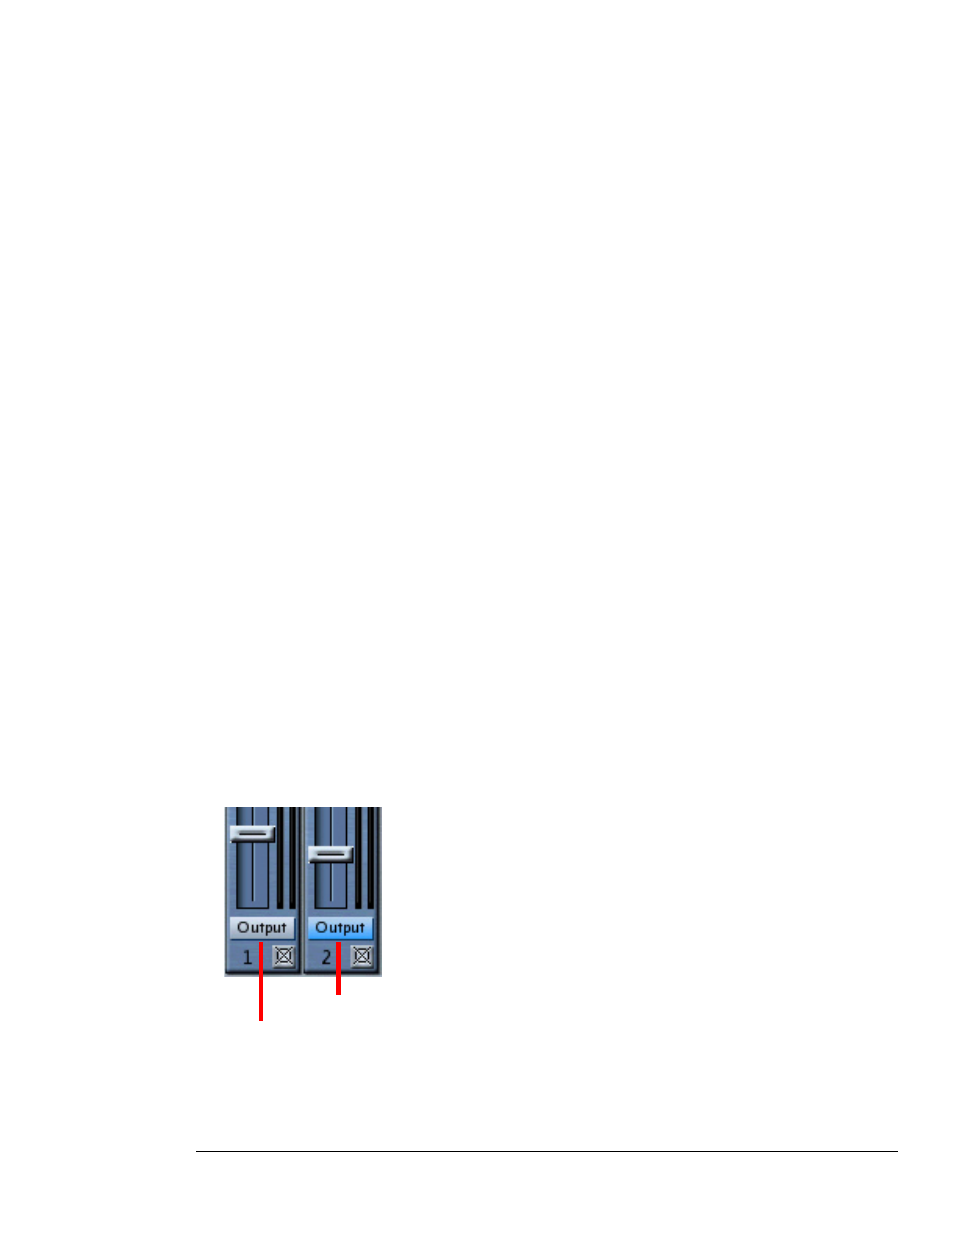
The Output Assignment Selector at the bottom of each panel has two color states. If the button is gray, it
means that the channel is set to its default output assignments. If the button is blue, it means you are currently
overriding the default output assignment for that channel.
Default Output Routing
Custom Output Routing