Getting receptor’s ip address – Muse Research Receptor manual v1.2 User Manual
Page 162
12: Connecting Receptor to a Computer
162
Receptor Manual
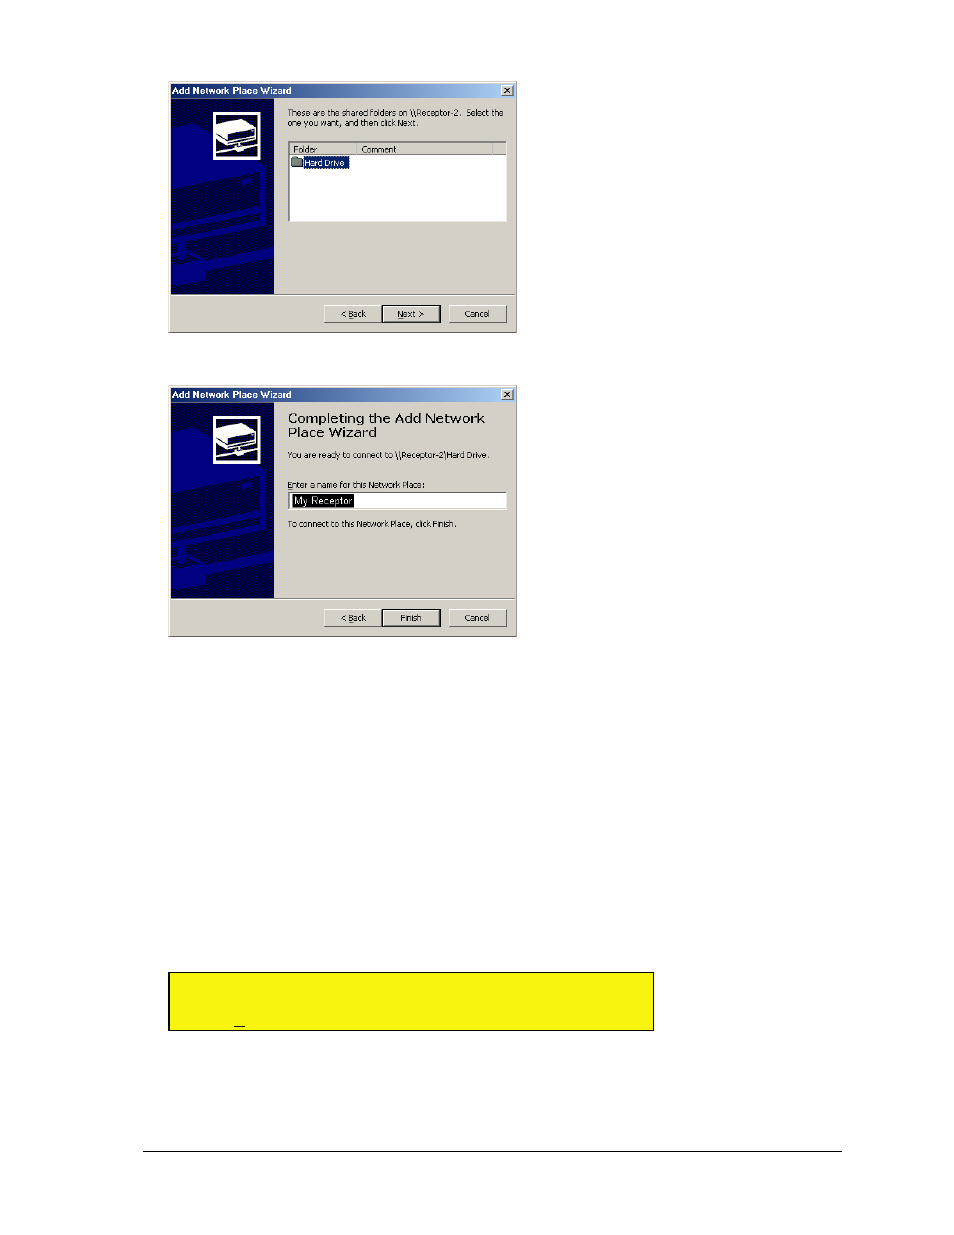
5
In the following screen, make sure “Hard Drive” is selected, and then click
Next.
6 In the next dialog you have the option of entering a new name for your Receptor disk. Type whatever name
you want, then click
Finish.
A new window will open for this Network Place, displaying the contents of Receptor’s hard drive. Note, also, that My
Network Places now contains a new item with the name you typed above.
7
To make it easy to access your Receptor in the future, you may want to create a shortcut to this file and
place it in a convenient place (like your PC’s desktop).
Double-click the shortcut any time you want to mount Receptor’s hard drive on your PC. As long as Receptor’s name
stays the same, Windows will always find your Receptor — even if its IP address changes or you switch connection
methods (such as switching between a network connection and a crossover connection).
Getting Receptor’s IP Address
Some networking methods may require you to enter Receptor’s IP address. There are two ways to get
Receptor’s IP Address.
•
Using the Front Panel — On Receptor’s front panel, press SETUP, then rotate the top display knob until
you see the TCP/IP Address parameter on the top line. The bottom line shows Receptor’s IP address, in the
format nnn.nnn.nnn.nnn
S U
T C P / I P
A d d r e s s
< >
III III
1 9 2 . 1 6 8 . 0 0 1 . 1 1 5