6 editing, saving, and metering, Modifier basics, Editing, saving, and metering – Muse Research Receptor manual v1.2 User Manual
Page 73: Modifier basics, 6editing, saving, and metering
6: Editing, Saving, and Metering
73
Receptor Manual
6
Editing, Saving, and Metering
This chapter discusses how to:
•
Edit patches
•
Save, copy, delete, and rename patches
•
Meter the signal level at various points in the mixer
These functions are all performed using the three Modifier buttons on Receptor’s front panel.
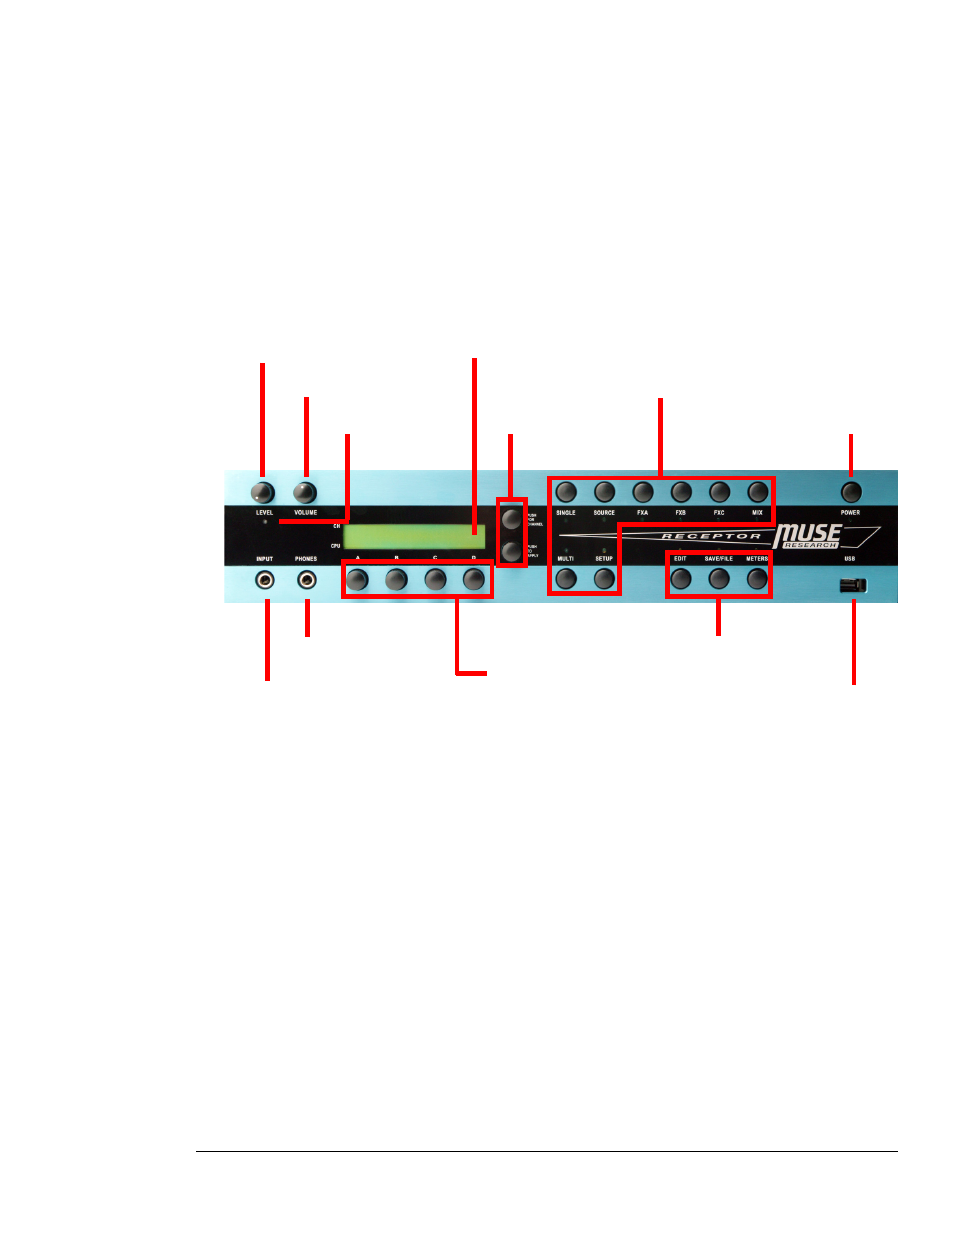
Input Level
Master Volume
Input Level LED
LCD
Display Knobs
View Buttons
Power Button
Guitar/Instrument Input
USB Port
Headphone Jack
Modifier Buttons
Soft Knobs
Modifier Basics
Basically, a Modifier button acts upon the patch or signal represented by the correspondingly lit View button.
•
If the EDIT button is on, then you can select what you edit by pressing the corresponding View button and
selecting the desired channel. For example, if you wanted to edit the plugin assigned to FX B on Channel 2,
you would press EDIT, then FXB, then push/turn the top display knob to select Channel 2.
•
If the SAVE/FILE button is on, then you can select what you want to save by pressing the corresponding
View button and selecting the desired channel. For example, if you wanted to save the patch assigned to
the SOURCE plugin on Channel 1, you would press SAVE, then SOURCE, then push/turn the top display
knob to select Channel 1.
•
If the METERS button is on, then you can select what you want to monitor by pressing the corresponding
View button and selecting the desired channel. For example, if you wanted to see what the signal level is
at the output of Channel 3, you would press METERS, then MIX, then push/turn the top display knob to
select Channel 3.