Heli-Max HMXE0250 User Manual
Page 29
❏
5. Position the second blade on the tray, with the mark at
the center. Add balancing or electrical tape to the lighter end
until the bubble indicates that both sides are level. The C.G.
of both blades is now matched. If the tape ends overlap,
make sure the overlapping end points to the
trailing edge of
the blade.
❏
6. Your Heli-Max Blade Balancer includes four sizes of
blade mounting plates and a nylon mounting bolt. Select the
mounting plate that best fits the holes in the blade grips.
Secure the mounting plate and two blades to the balancer
with the nylon mounting bolt.
❏
7. Add tape to the C.G. of the lighter blade until the bubble
level indicates that the two blades balance. Using a different
tape color in this step will remind you that future
adjustments will require both balancing steps.
PITCH CURVES
❏
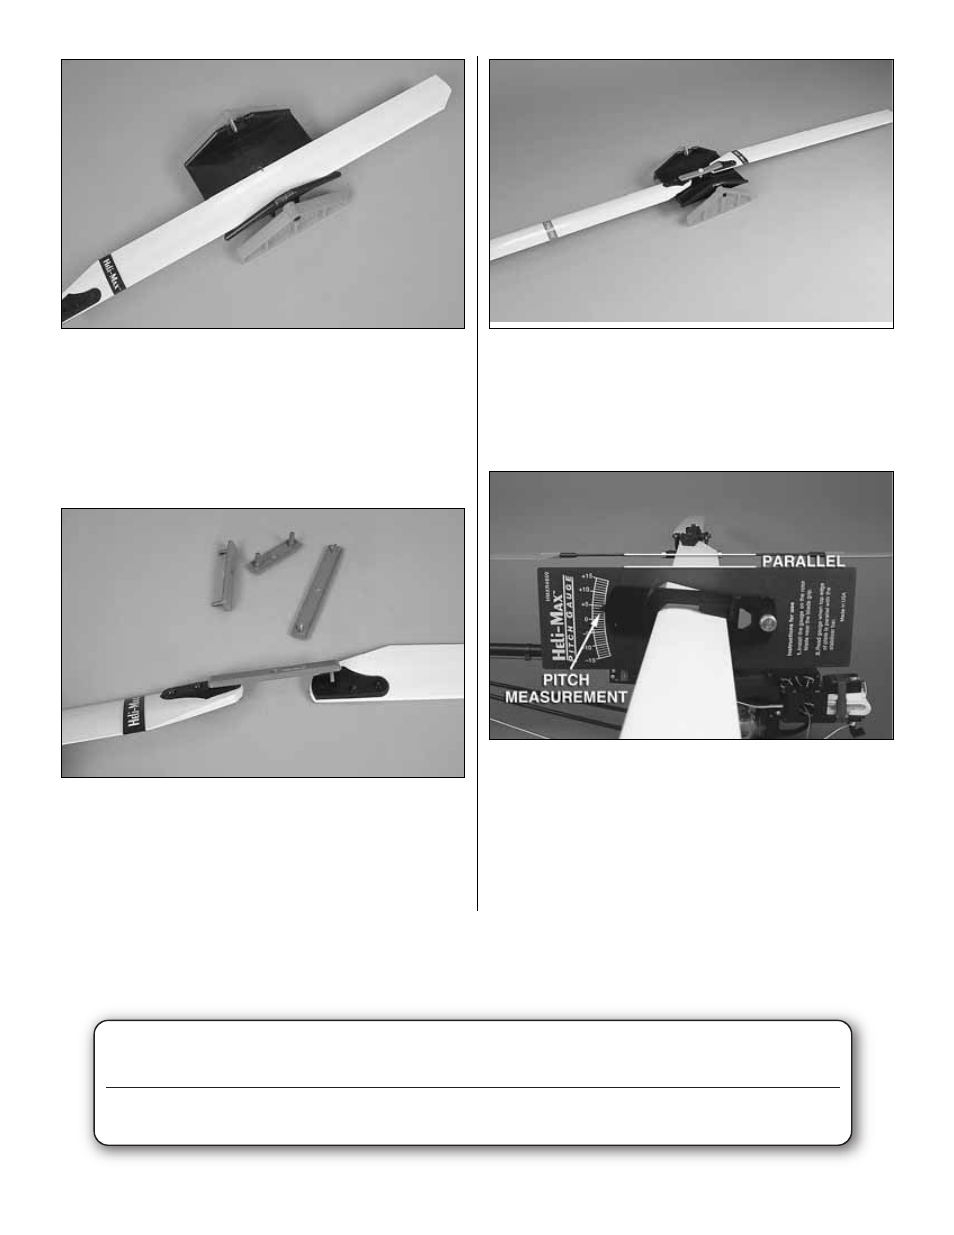
1. The pitch gauge is used by setting the desired pitch on the
gauge and adjusting the blade pitch until the top (or bottom) of
the gauge is parallel with the flybar. Make sure the flybar is level
while doing this. If you need to make an adjustment to the pitch
of the blades, then adjust the long linkages that connect the
swashplate to the mixer arm. The goal is to have positive 10° at
full throttle/collective and negative 10° at low throttle/collective.
Then use the pitch curves within the radio to adjust the
collective pitch range.
29
PITCH CURVE
POINT 1
POINT 2
POINT
3
POINT
4
POINT
5
Norm
a
l
45% / -2°
55%
65% / +4.5°
8
2% 100%
/
+10°
Hold
3
0% / -4°
47%
65% / +4.5°
8
2% 100%
/
+10°
PITCH CURVE SETUP
Warning: Beginners should use a maximum negative 2° collective with the throttle stick at idle. It helps to reduce the
sensitivity of the collective and prevents hard landings when the throttle is brought back to idle. Later, once you advance and
need more negative collective, simply make adjustments in the transmitter.