Heli-Max HMXE0250 User Manual
Page 10
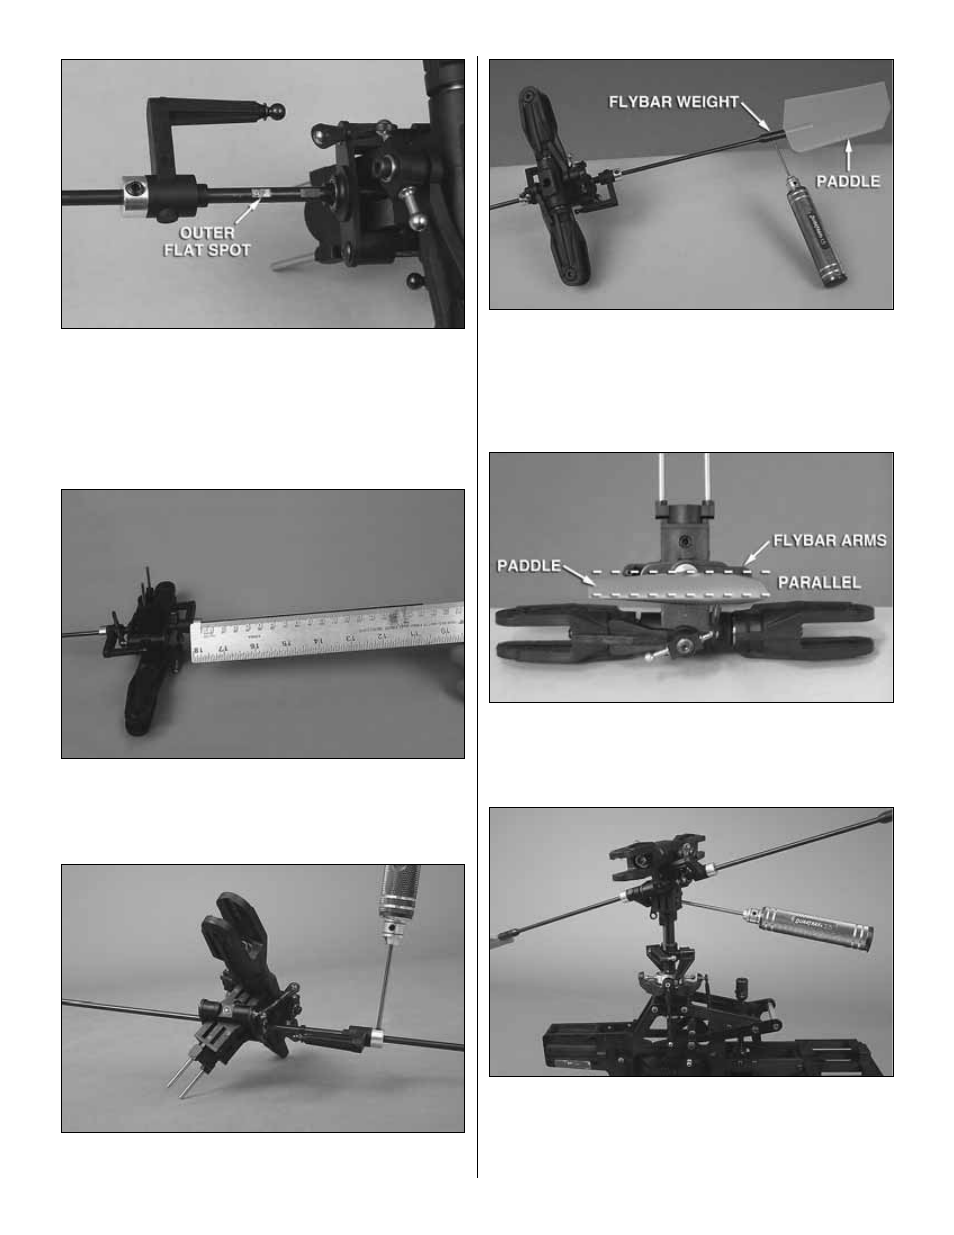
❏
2. Remove the set screws from the flybar arms and align the
hole with the flat spot on the flybar. Apply a small amount of
thread locker to each of the set screws and re-install. Only lightly
tighten them at this time as the flybar needs to be centered.
❏
3. Using a ruler, center the flybar as shown above. The
measurement should be approximately 181mm for each side.
❏
4. Once the flybar is centered, tighten the flybar arm
set screws.
❏
5. Install the two 3x3mm set screws into the flybar
weights. Slide the weights onto the flybar with the beveled
end facing inward. Thread the paddles onto the flybar at
least 1" [25.4mm]. Measure from the outside of the flybar
arm to the beginning of the paddle. Make sure both paddles
are the same distance out and facing forward as shown.
❏
6. Align the paddle with the flybar control arms as shown
above. The paddles and arms must be parallel. Slide the
flybar weights all the way out against the paddles and tighten
the set screws.
❏
7. Slide the head onto the main shaft and align the bolt hole
in the head block with the hole in the main shaft. To help align
the two holes, insert a 2.0mm hex driver into the hole. Insert the
3x16mm SHCS through the head block and main shaft. Place a
3mm nylon lock nut on the opposite side and tighten the bolt.
10