Great Planes Giant Aeromaster Kit - GPMA0502 User Manual
Page 39
D 4. Reinstall the engine on the firewall. If the muffler hits
the fuselage balsa bottom blocks, trim the blocks so they
clear the muffler by at least 1/8". Use a piece of thin
cardboard or plastic to make a template for the cutout in the
cowl for the head of the engine and the carburetor. Tape
the template to the fuselage side accurately indicating the
position of the head.
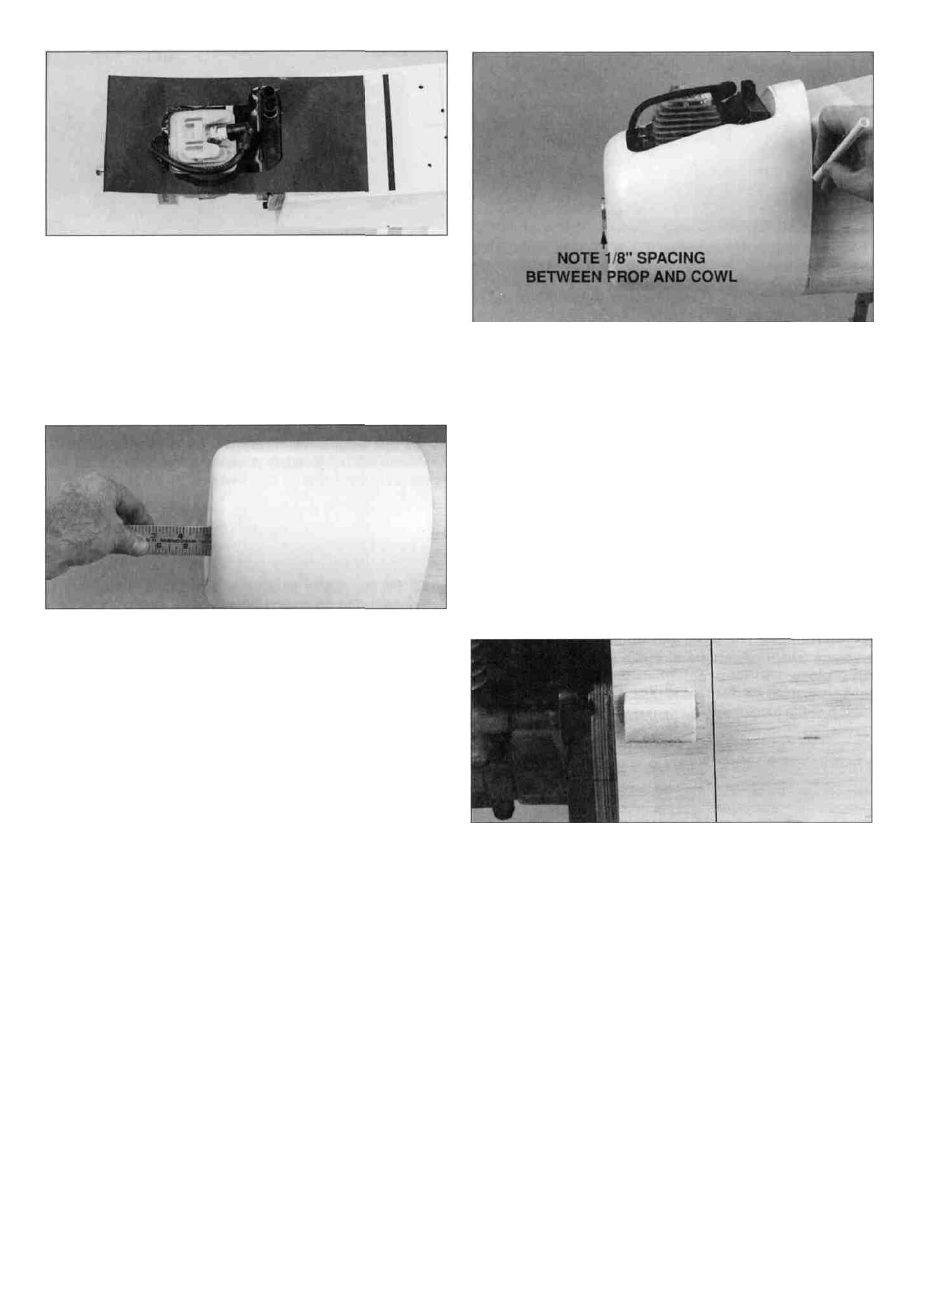
D 8. Drill a hole that is slightly larger than the crankshaft,
through the center of a flat stick. Mount the stick tight
against the drive washer on your engine. With the drive
washer centered at the front of the cowl, align the cowl so
there is approximately 1/8" clearance between the stick and
the cowl. Use a ballpoint pen to mark the fuselage sides at
the aft edge of the cowl.
D 9. Remove the cowl, then use 6-minute epoxy to glue
the two 1/2" x 5/8" x 1" hardwood cowl mounting blocks to
the fuselage sides in the location shown on the plan 1/4" in
front of the lines you marked that indicate the aft end of
the cowl.
D 5. Measure the distance between the firewall and the front
of the drive washer (it should be 7-1/8"). Remove the engine
from the fuselage. Then position the cowl on the fuselage so
the forward edge is 1/8" aft of the measurement you just
made. Use a ballpoint pen to lightly mark the location of the
rear of the cowl on the fuselage top.
D 6. Align the cowl with the mark you made on the
fuselage. Then use a felt-tip pen to transfer the hole in the
template onto the cowl.
Note: The hole on the template may be slightly aft of the
actual position of the head of the engine due to the upward
sweep of the template when the cowl is in position.
D 7. Remove the cowl and template, then remount the
engine. Cut the hole in the cowl and test fit it on the
fuselage. You may want to make the cuts slightly forward of
the template outline to allow for the upward sweep of the
template. Adjust the position and size of the hole as
needed. The location of the hole determines the clearance
between the front of the cowl and the back of the prop.
D 10. Shape the cowl mount blocks with your bar sander
and 150-grit sandpaper to match the shape of the cowl.
Test fit the cowl and make adjustments to the blocks
if necessary.
D 11. Position the cowl on the fuselage, centering the drive
washer in the opening in the front of the cowl. Use a felt-tip
pen to mark the cowl for the cowl mounting screws. Drill a
3/32" hole through the cowl and cowl mounting blocks at
the marks. Remove the cowl and enlarge the holes in the
cowl to 9/64".
Hint: Cut the hole in the cowl slightly undersize at first so
you can make adjustments to its position.
D 12. Mount the cowl to the fuselage with two #6 x 1/2"
button head screws and two #6 washers supplied with
this kit.
39