Great Planes Giant Aeromaster Kit - GPMA0502 User Manual
Page 32
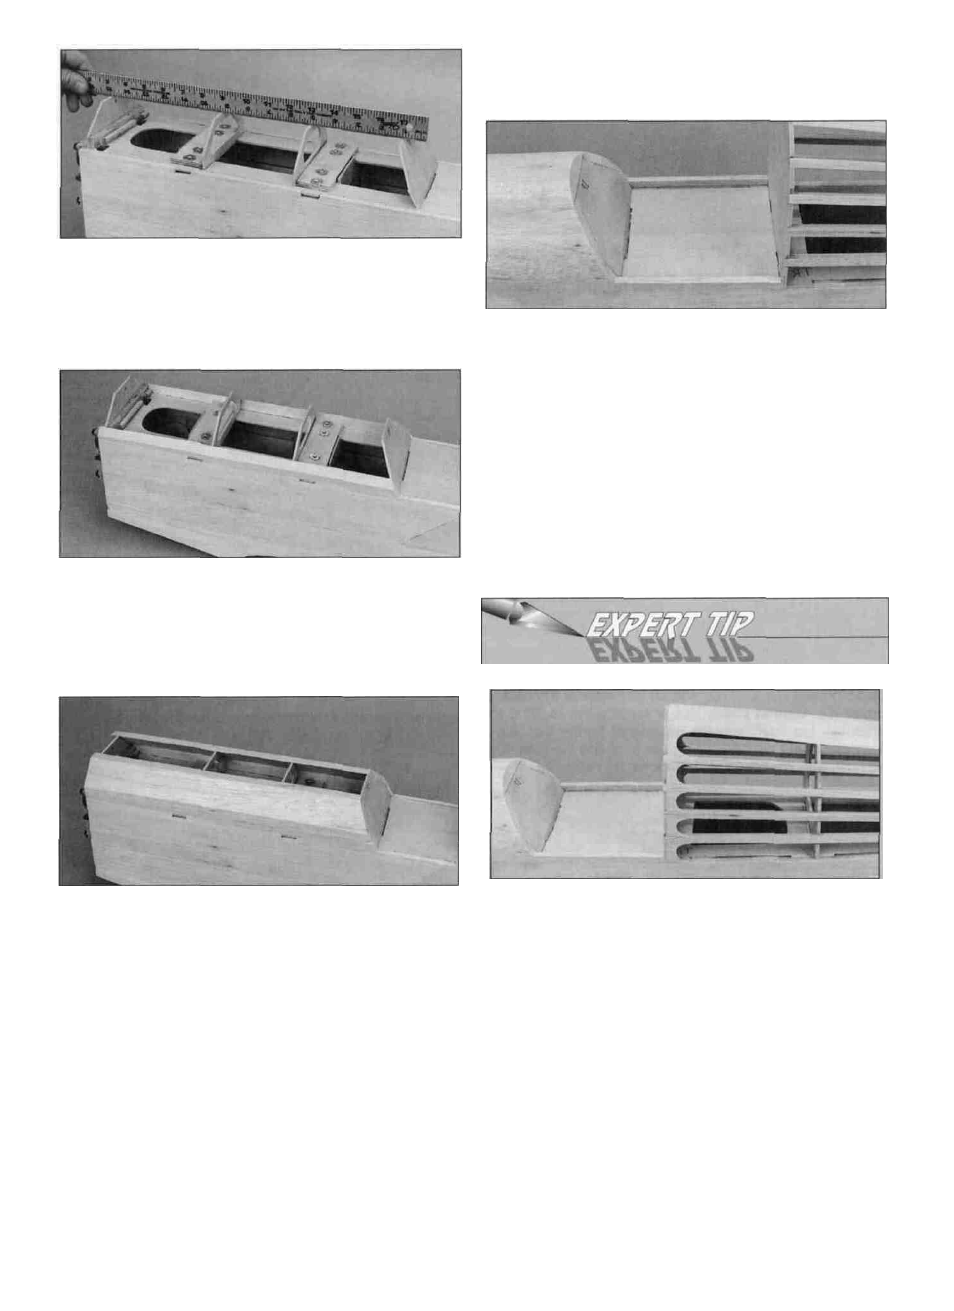
D 9. Position the die-cut 1/8" plywood formers (K) and (L)
perpendicular to the top deck. Glue in position with thin CA.
Place a straightedge along the tops of the firewall, (K) and
(L). Place the instrument panel (IP) in position angled so the
top edge touches the straightedge. Glue in place with
thin CA.
pen to draw a centerline on the front top sheet. Use a razor
plane and a sanding bar to round the front top sheets and
blend them into the fuselage sides.
D 13. From two of the leftover 1/4" x 1/4" balsa stringers
make cockpit sides to fit between the instrument panel and
former (E).
D 10. Use medium CA to glue 3/8" x 7/8" x 16" balsa front
top side sheet to the top of the fuselage and to the sides
of formers (A), (K), (L) and (IP). The forward end of the
sheet should be flush with the front of the fuselage sides.
After the CA cures, sand the top edge to match the angle of
the former and the aft edge flush with the instrument panel.
D 11. Use medium CA to glue 3/8" x 2-3/8" x 16" balsa
front top angled sheet to the top of the side sheet and the
angled side of formers (A), (K), (L) and (IP). The forward
end of the angled sheet should be flush with the front of the
fuselage sides. After the CA cures, sand the top edge flush
with the top of the formers and the aft edge flush with the
instrument panel.
D 12. Use medium CA to glue a 3/8" x 3" x 15" balsa front
top sheet to the angled sheet and the top of formers (A),
(K), (L) and (IP). The forward end of the top sheet should
be flush with the front of the fuselage sides. After the CA
cures, sand the edges flush with the top angled sheet and
the aft edge flush with the instrument panel. Use a ballpoint
To provide a larger area to attach the covering, we
made scallops between the stringers on the turtle deck
and former (E).
* Make the scallops from leftover 3/32" wing sheeting.
* Cut the sheeting 3/4" wide. Fit the sheeting between
the stringers.
* Glue the scallops to the stringers and former (E).
* Use a hobby knife and sandpaper wrapped around a
dowel to cut a radius at the aft end of the scallop.
After all the scallops are installed, sand the scallops
flush with the stringers and former (E).
32