Hinge the tail surfaces – Great Planes Giant Aeromaster Kit - GPMA0502 User Manual
Page 12
D 3. Make the rudder ribs from the 3/8" x 1/2" x 30"
balsa stick, then glue them in position. Make the 1/8"
cross bracing from a 1/8" x 1/4" x 30" balsa stick. Note
that the cross bracing overlaps the same as on the
elevator. Glue the cross bracing in position.
C. Use playing cards or business cards to adjust the
height of the pen until you can mark the centerline. Mark
the hinge centerline at each hinge location.
D 4. Remove the rudder from your building board. Inspect
all the glue joints and add CA to any joints that don't look
strong. Use your bar sander to sand the ends of the LE
and TE so they are flush with the rudder tip and rudder
bottom. Sand a radius on the TE and rudder bottom to
match the plan. Sand the entire top and bottom surface of
the rudder until it is flat and even.
D. Use the same technique to mark the centerline along
the entire length of both elevators.
Hinge The Tail Surfaces
D 1. Place the stab and elevator over their locations on
the plan and lightly mark the hinge locations on the TE
of the stab and LE of the elevator with a ballpoint pen.
D 2. Refer to the Expert Tip that follows. Then mark the
centerline of the hinges on the stab and elevators.
How to mark hinge slots
It's important that the hinges are centered and parallel
to the part you are hinging. The best way to start is by
accurately marking the hinge centerline. We'll start with
the stabilizer.
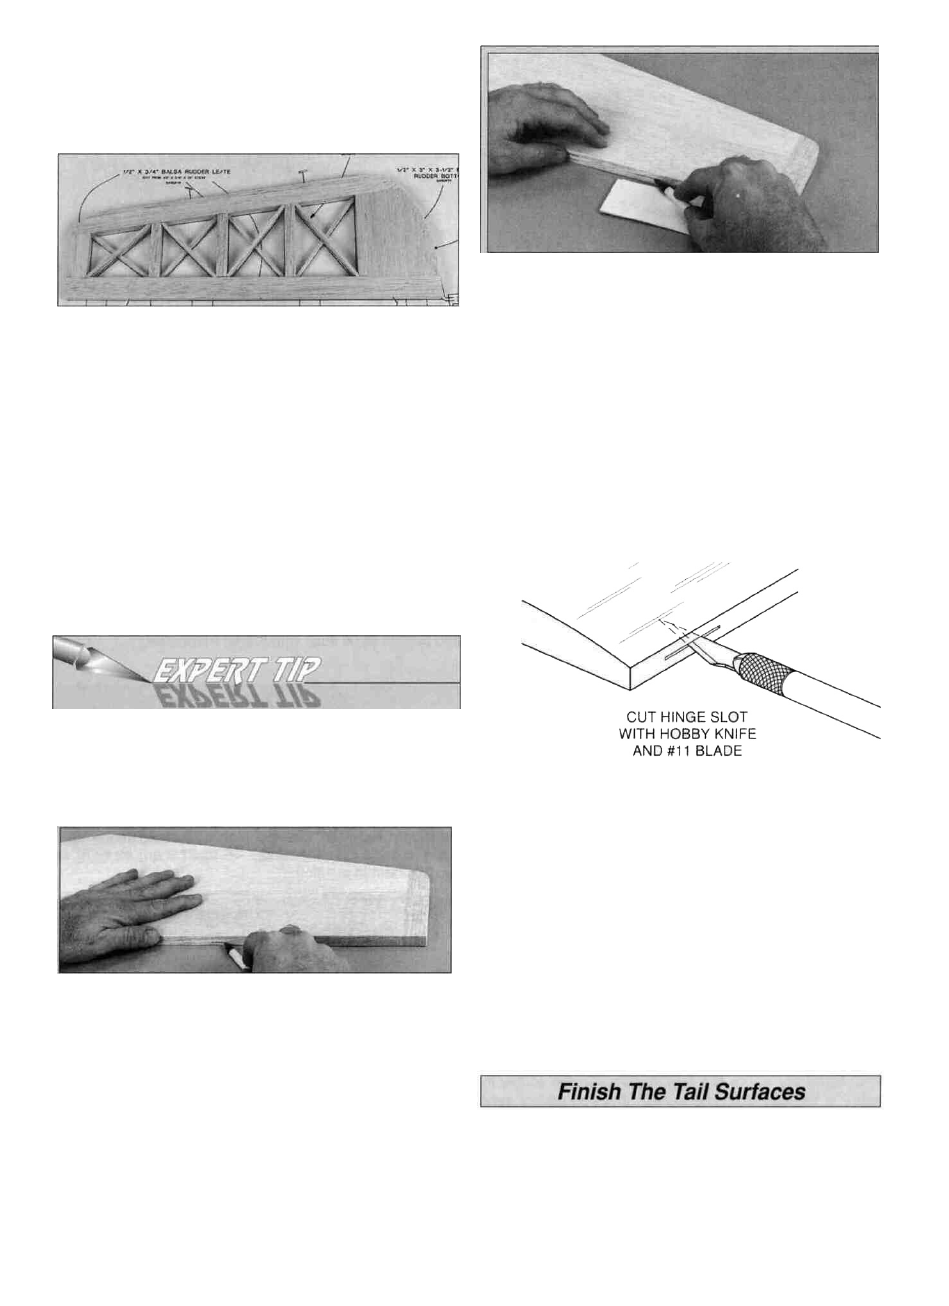
D 3. If using a flat type hinge, cut the hinge slots in the
elevator and stab using a #11 blade. Begin by carefully
cutting a shallow slit at the location to accurately establish
the hinge slot. Make three or four more cuts, going a little
deeper each time. As you cut, slide the knife from side to
side until the slot has reached the proper depth and width
for the hinge.
A. Lay the stabilizer and a ballpoint pen on a flat
surface. Mark a "test line" on the trailing edge of the
stab away from the hinge locations you marked earlier.
B. Flip the stab over and mark another line in the same
location as the first. If you see only one line, then it is on
center. Proceed and mark the hinge centerline at each
hinge location. If you see two lines you will have to
adjust the height of the pen until you can mark
the centerline.
D 4. Follow the same procedures to hinge the rudder and fin.
D 1. Refer to the Expert Tip that follows and shape the
leading edge of the elevators to a "V" as shown on the plans.
12