Great Planes Giant Aeromaster Kit - GPMA0502 User Manual
Page 33
D 1. Use 30-minute epoxy to glue the 1/4" x 1-3/8" x 4-1/2"
ply forward and aft wing mounting plates in the notches of
the wing saddle doubler
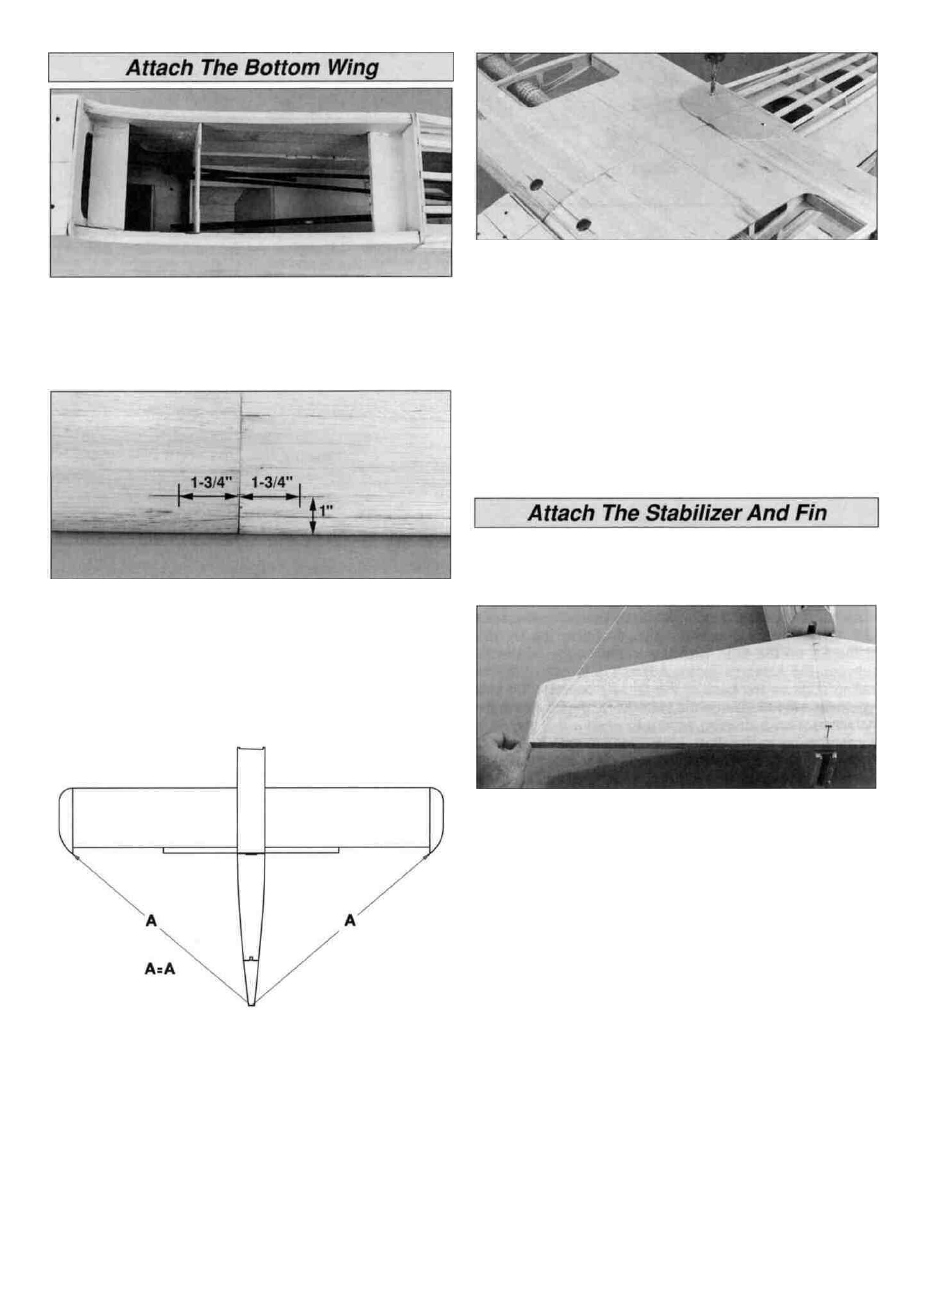
D 2 On the bottom of the lower wing, draw a line 1" back
from the LE On this line, place marks 1-3/4" on each side
of the center of the wing At the marks, cut a 5/8" hole
through the sheeting only.
D 3. Seat the wing in the wing saddle and visually center it
on the fuselage Pin a string to the center of bottom rear
deck at the aft end Then extend it out to a wing tip Put a
piece of tape on the string to mark the intersection of the
string and the wing tip Swing the string over to the other tip
and see if the distance is the same (see diagram) Make
slight adjustments to the angle of the wing until the distance
from the tail to the wing tips is equal.
D 4 Tape the wing in position At both marks on the wing
plate use a 13/64" (or a #7 drill bit) to drill a hole through
the wing and wing mounting plate, perpendicular to the
wing plate At the front of the wing use a 13/64" (or a #7
drill bit) to drill a hole through the wing bolt plate and wing
mounting plate perpendicular to the wing bolt plate
Remove the wing and enlarge the holes in the wing with a
1/4" drill bit Cut threads in each wing mounting plate with a
1/4-20 tap Put a couple of drops of thin CA on the threads
After it has fully cured, run the tap back through the holes
to clean up the threads Bolt the wing to the fuselage with
four nylon 1/4-20 wing bolts and leave it in place for the
next few steps
D 1. Draw an accurate centerline on the top of the stab,
perpendicular to the stab TE.
D 2 Center the stab on the stab plate using the centerline
you drew in step #1 Study the aft end of the structure from
8-10 feet back If the stab tips are not equidistant above
the wing, carefully sand the high side of the stab plate until
the stab is aligned Using the pin and string technique"
accurately align the stab with the fuselage Once the stab is
accurately aligned, pin the stab to the stab plate
D 3 Carefully use a ballpoint pen to lightly mark where
both of the fuselage sides contact the bottom of the stab.
D 4 Remove the stab from the stab plate but leave the
T-pins in the stab Apply a film of 30-minute epoxy to the stab
plate and the stab between the lines you made in step 3
D 5 Reposition the stab on the stab plate and insert the
T-pins into the same holes Use the pin and string to
confirm the stab alignment then use weights, more T-pins
or clamps to hold the stab in position Wipe away excess
epoxy before it cures, then recheck alignment Do not
disturb the model until the epoxy cures.
33