Great Planes Giant Aeromaster Kit - GPMA0502 User Manual
Page 21
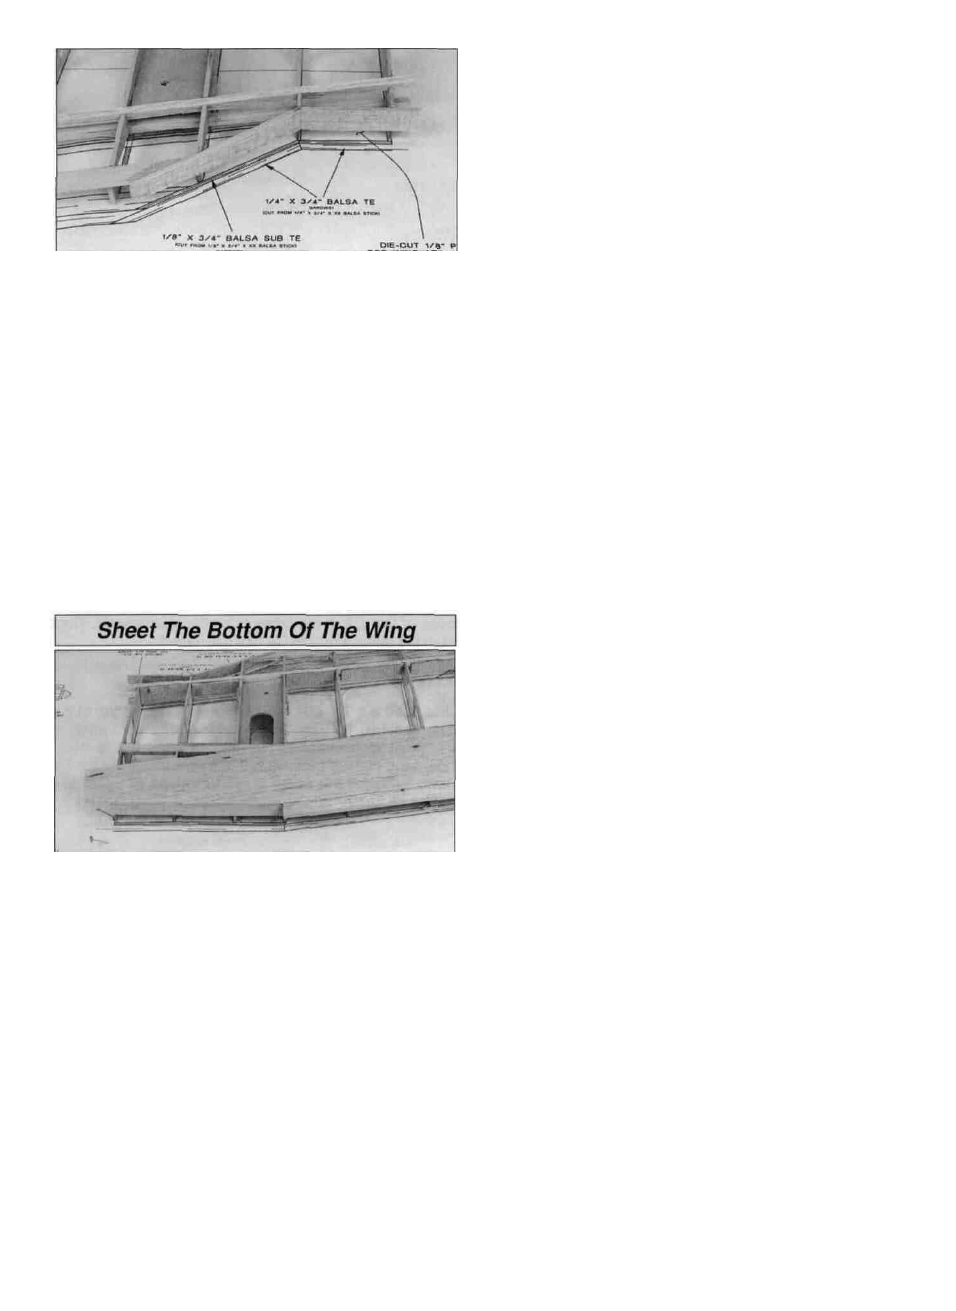
D D 8. From the 1/8" x 3/4" x 8" balsa stick, make a sub
TE to fit between ribs R-1T and the just installed in step 7.
Center the sub TE on the aft end of the ribs and the balsa
TE and glue with thin CA. Use a sanding bar with 220-grit
sandpaper to sand the top of the sub TE flush with the
ribs and the TE.
D D 9. From the 3/32" x 3" x 24" balsa sheets, make
shear webs to fit on the front and back of the main spar
between ribs R-2T and R-3 and from ribs R-4 to R-5T.
The front shear webs extend to rib R-6. Also, glue shear
webs to the front of the aft balsa spars from ribs R-1T to
R-5. The grain of the shear webs runs perpendicular to
the spars and must be securely glued to the spars.
D D 10. Use medium CA to glue the die-cut 1/8" balsa
gusset to rib R-5 and the shear web. Sand the TE flush
with rib R-5. Then glue the die-cut 3/32" balsa rib caps to
ribs R-5 and R-6.
D D 1. Fit a 3/32" x 3" x 36" balsa sheet to the bottom of
the wing panel by first sanding a bevel on the front edge
of the sheet so it matches the leading edge of the wing.
Before you glue the LE sheet in position, remove the
T-pins from the front jig tabs in the wing ribs. Reinstall the
T-pins through the ribs right behind the main spar.
Position the front of the sheet against the LE and flush
with the side of rib R-6. Glue it in position with thin CA.
Wet the sheet so it will bend easier. Then, carefully lift the
sheet away from the ribs and apply a bead of medium or
thick CA to the top of each rib. Working quickly, pull the
sheet back toward the main spar as you press it down to
the ribs and spar. Then glue the aft edge of the sheet to
the main spar with thin CA. Use masking tape, T-pins or
weights to hold the sheet to the ribs until the CA cures.
Using a hobby knife and a sanding bar, trim the sheet
flush with the sub LE.
D D 2. Lightly sand the TE area so that the TE and aft
balsa spar are flush with the top of the ribs. From a
3/32" x 3" x 36" balsa sheet, cut a TE sheet in half. Save
the other half for the top TE. Glue the sheet to the TE and
ribs so that the forward edge is flush with the forward
edge of the aft balsa spar. The sheet overhangs the balsa
rib cap, at rib R-5, by 1/32". Do not trim the sheet at the
TE. Using a hobby knife and a sanding bar, trim the sheet
flush with the balsa rib cap at R-5.
D D 3. Glue a 3/32" x 3/8" x 30" balsa cap strip on the
top of rib R-6. The cap strip should be flush with the
outside of the rib and extend past the TE by 1/2". Use the
leftover cap strip to sheet the aft balsa spar from rib R-5
to R-6. The cap strip should be flush with the front of the
aft balsa spar.
OPTIONAL AILERON SERVOS IN THE TOP WING
On our test models, the Giant Aeromaster flew great
with aileron servos in the lower wing only. But, if you
would prefer to have aileron servos in both wings, the
aileron servo hatch is installed following the same
procedure as the bottom wing.
1. Use 6-minute epoxy to glue the 1/4" x 3/8" x 3-3/4"
hardwood hatch blocks into the notches in ribs R-5T
and R-PT. After the epoxy has cured, cut hatch guides
from 1/4" x 1/4" x 30" balsa stick. The guides fit
between the hatch blocks and are flush with the top of
rib R-5T and R-PT.
2. Center the die-cut 1/16" birch ply aileron servo
hatch over the opening for the aileron. Tape the hatch
in place and drill six 1/16" pilot holes at the embossed
marks on the aileron hatch and into the hatch blocks.
Remove the hatch and place a drop of thin CA in each
hole in the hatch block. Wipe off the excess CA and
after the CA has cured, reinstall the hatch. Secure the
hatch to the wing with six #2 x 3/8" flat head screws.
3. Use medium CA to glue 3/32" balsa cap strips to the
ribs at the side of the aileron servo hatch. Mark the rear
location of the strut slot on the side of rib R-PT. From
the leftover 3/32" x 3" x 36" balsa sheet used on the
lower wing aileron servo hatch, fill the gap between the
hatch and the LE sheet and the hatch and the TE sheet.
Leave a 1/32" gap around the hatch to allow for the
thickness of the covering. Save the leftover sheet for
use around the hatch on the other wing panel.
4. Use the marks you placed on the side of rib R-PT to
locate the rear strut slot. Use a sharp hobby knife to
trim the sheet from over the slot.
D D 4. To locate the slot for the front strut tab in rib R-PT,
place a mark 1/2" and 1-1/2" from the aft edge of the main
spar. Use the side of rib R-PT as a guide to mark the
sides of the slot. Using a sharp hobby knife trim the sheet
from over the slot.
21