Great Planes Giant Aeromaster Kit - GPMA0502 User Manual
Page 10
D 7. Place one of the stab skins on your building board.
Apply an even bead of medium or thick CA to one side of
the stab framework. Place the framework in its proper
position on the skin and press it down firmly until the glue
has set. Repeat this step f o r the other side of
the stab.
D 8. After the glue has cured, remove the stab from the
building board and t r i m the s h e e t i n g close to the
framework. Use a bar sander or large sanding block and
220-grit sandpaper to sand the top and bottom skins flush
with the stab framework. Cut the tips from the 1/2" x 7/8"
x 24" balsa stick. Glue the tips onto the end of the stab
and sand a radius on the corner of the LE.
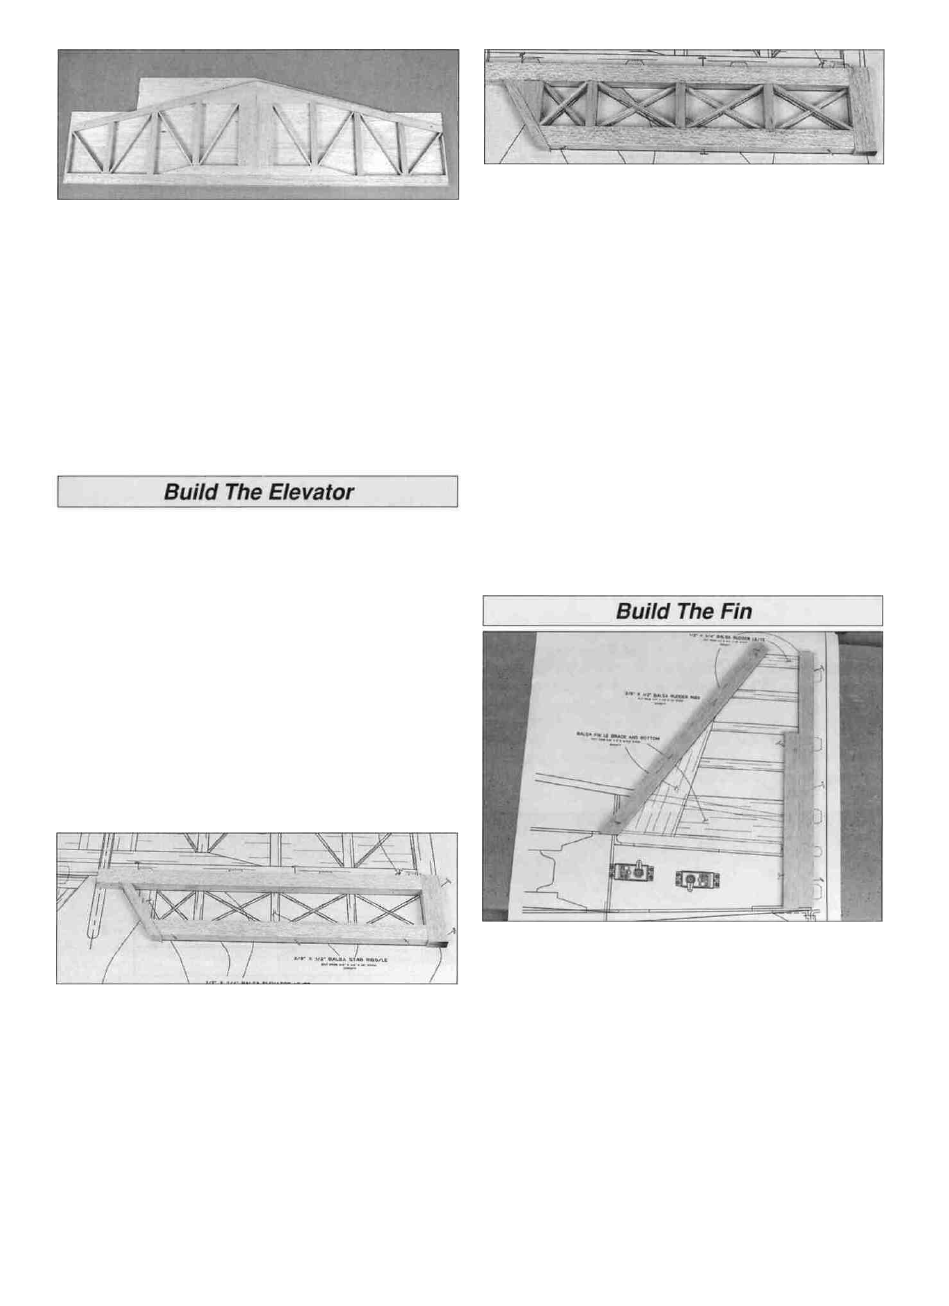
D D 1. Place a piece of wax paper over the elevator plan.
Cut the 1/2" x 7/8" x 24" balsa stick 3-5/8" long to make
an elevator tip. Pin the elevator tip to the plan, allowing
the tip to overhang by 1/16" at the LE and TE.
D D 2. Cut a 1/2" x 3/4" x 30" balsa stick in half to make
the elevator leading edge and elevator trailing edge. Use
the plan or a straightedge as a guide to make sure the
elevator LE is straight as you glue and pin it in position.
D D 3. Cut and sand the end of the elevator TE to match
the plan. Again, use the plan or a straightedge as a guide
to make sure the elevator TE is straight as you glue and
pin it in position.
D D 4. From the 3/8" x 1/2" x 30" balsa stick, cut and
glue the elevator root to the LE and TE. Leave an
overhang of 1/16" at the TE. This will be sanded off after
the elevator is removed from the building board.
D D 5. Make the 3/8" elevator ribs from the 3/8" x 1/2" x
30" balsa stick. Then glue them in position. From the 1/2"
x 3" x 3-1/2" balsa block, cut the elevator horn block and
glue it in position.
D D 6. Make the 1/8" cross bracing from a 1/8" x 1/4" x
30" balsa stick. Note that the cross bracing overlaps. The
bottom bracing should be flush with the bottom of the
elevator and the top bracing should be flush with the top
of the elevator. Glue the cross bracing in position. We
recommend cutting these cross braces with a single-edge
razor blade.
D D 7. Remove the elevator from your building board.
Inspect all the glue joints and add CA to any joints that
don't look strong. Cut the end of the leading edge so that
it extends past the end of the elevator about 1/16". Use
your bar sander to finish the job by sanding the ends of
the LE and elevator tip so they are flush. On the end of
the elevator root, sand a radius to match the plan. Sand
the entire top and bottom surface of the elevator until it is
flat and even. Be careful that you do not sand any
particular area of the elevator too thin or gouge the
elevator cross bracing and ribs by snagging them on
the sandpaper.
D 8. Go back to step 1 and build the second elevator
following the same procedure.
D 1. Place a piece of wax paper over the fin plan. Cut the
3/8" x 3/4" x 24" balsa stick 13-3/4" long to make a fin TE.
Pin the fin TE to the plan, allowing the TE to overhang the
top by 1/16". Cut the remaining 3/8" x 3/4" balsa stick
9-1/8" long to make a fin TE doubler. Glue the fin TE
doubler to the fin TE so that the top end of the TE doubler
is positioned correctly over the plan and the bottom end
overhangs. Cut the second 3/8" x 3/4" x 24" balsa stick to
make the fin LE. Trim one end of the fin LE to the angle
shown on the plan and allow the other end to overhang
the top slightly. Use the plan or a straightedge as a guide
to make sure the fin TE and LE are straight as you pin
them in position.
10