Great Planes Giant Aeromaster Kit - GPMA0502 User Manual
Page 38
D D 8. Drill a 3/16" hole in the wheel pant at the mark.
Back up the wheel pant mount with a piece of plywood so
you do not split it as the drill goes through.
D D 9. If the axle you are using does not fit through the
wheel hub of your 4" wheel, enlarge the wheel hub with a
3/16" drill bit.
D D 10. Test fit the wheel in the wheel pant using the
following procedure.
D D 13. Before painting the wheel pants, fill the seams
with putty filler such as Squadron White Putty or resin filler
such as Bondo . We use Bondo most of the time as it cures
quickly and is easy to sand but usually it must be
purchased in large quantities. Squadron putty works well
but it takes overnight to dry and usually requires at least
two applications because it shrinks as it dries.
D 14. After the filler cures, wet sand the wheel pants with
400-grit sandpaper to prepare them for primer.
A. Install a 3/16" wheel collar on the axle followed by the
wheel and a second collar.
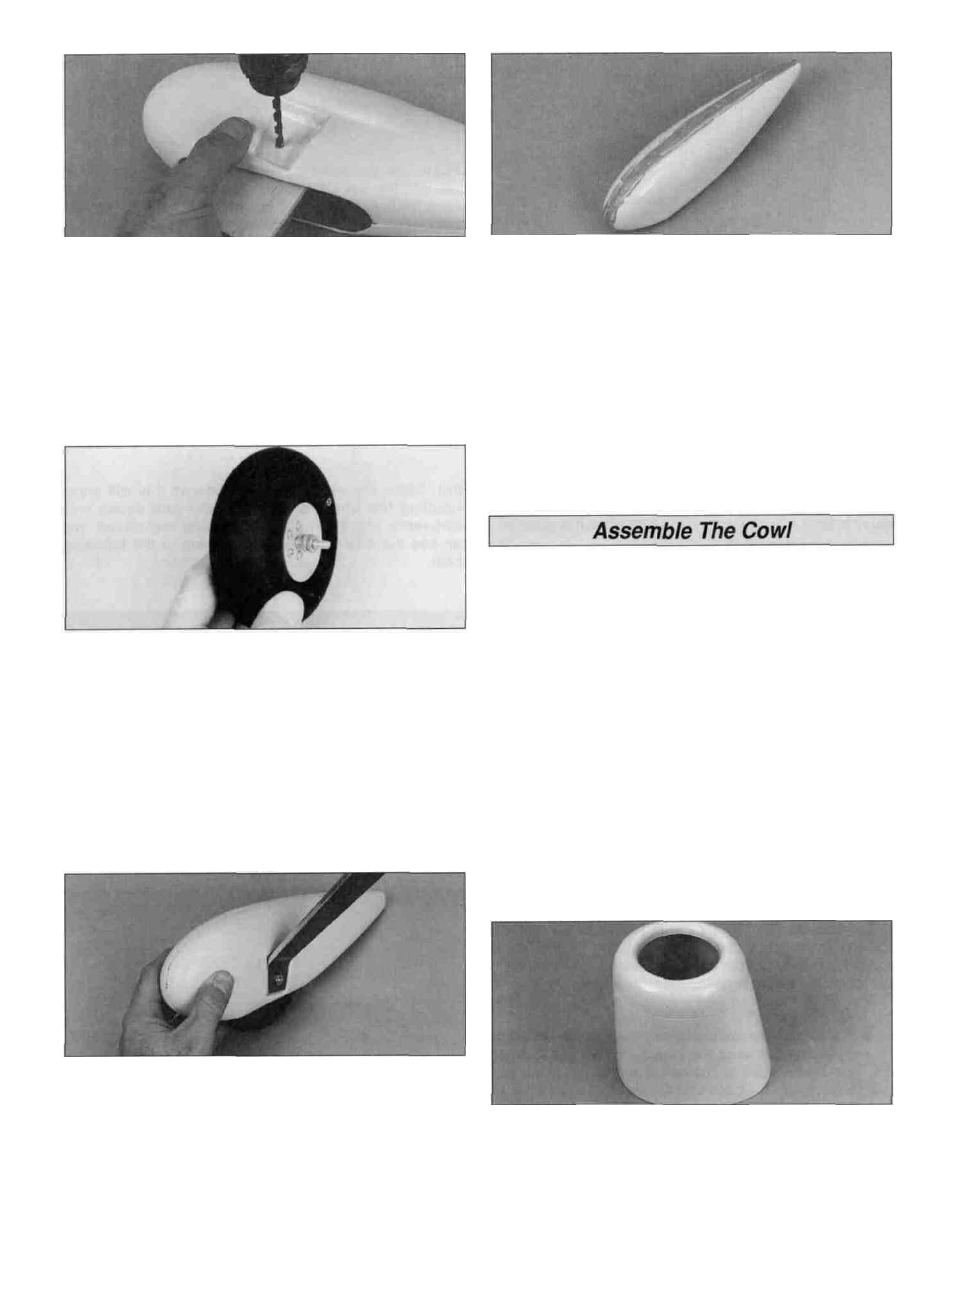
D 1. The cowl is assembled following the same procedure
as the wheel pants. Cut the cowl along the cut lines. Then
use your bar sander to true all the edges. For now, the
opening in the front of the cowl only needs to be roughly cut
out. Use coarse sandpaper to roughen the inside of all the
overlapping areas so the glue will stick.
B. Insert the wheel in the pant with the threaded end of the
axle inserted in the plywood wheel pant mount.
Note: When you install the wheel after the wheel pant has
been painted, put masking tape on the bottom of the pant
to avoid scratching the paint.
D 2. Tape the two pieces together, then wick a small
amount of thin CA into the seams of the overlapping joints.
Tape the front of the cowl to the side. Notice that one side
of the cowl front is angled. The angle matches the angle on
the cowl side. Wick CA into the seams of the overlapping
joints. After the CA has cured, remove the tape and make
sure you have thoroughly glued the two pieces together by
inspecting the glue joints and adding thin CA
if necessary.
D D 11. Temporarily mount the wheel pant to the landing
gear with the nut supplied with the axle.
D D 12. Perform the same procedure to assemble and
temporally mount the other wheel pant to the landing gear.
D 3. Use a sharp hobby knife or a power tool with a
sanding drum to accurately cut the engine opening in the
front of the cowl.
38