Chapter 2: using the remote control, The buttons on the remote control – RCA Flat Panel Television User Manual
Page 21
Attention! The text in this document has been recognized automatically. To view the original document, you can use the "Original mode".
Chapter 2: Using the Remote Control
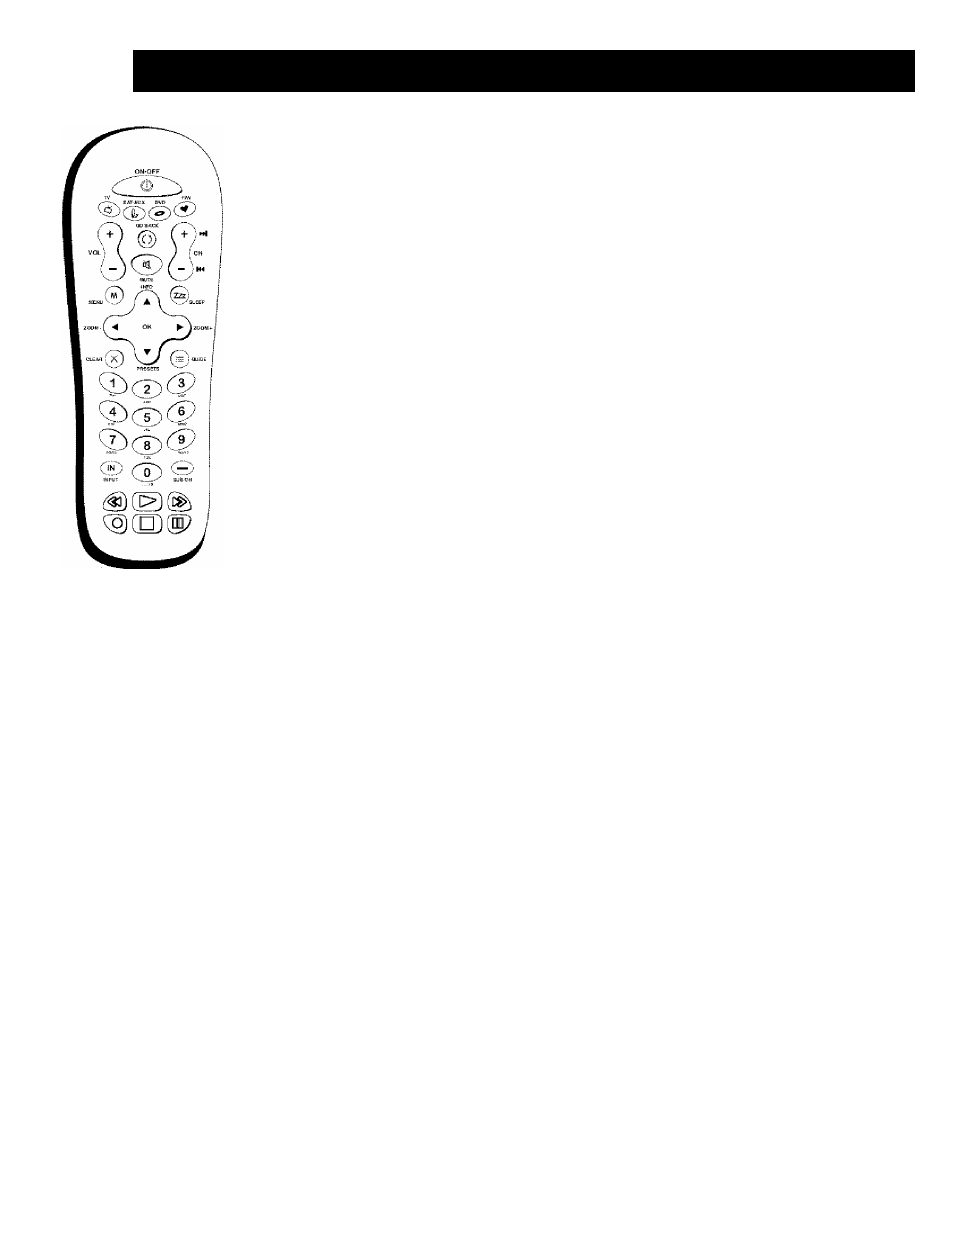
Remote model
R301G1
Tip
To turn off most RCA devices
that are connected to the TV,
press ON’Off twice within two
seconds and hold remote steady
until the mode indicator turns
off.
The Buttons on the Remote Control
Arrows (up, down, left, right)
Use to move through the on-screen menus.
(0-9)
Number Buttons
Enter channel numbers and time settings. Also used in the W menu
to make selections.
To enter a digital channel with a sub-channel, enter the main channel, then to enter the sub
channel, press the SUB CH button and press OK.
CH
+
or CH—
Scrolls tijr or down through the channel or input list. Press once to change
the channel up or down; press and hold to continue changing channels. In DVD mode, if
p.rogranimed, advances or .irewerses the chapters with some DVD players.
CLEAR
Removes on-screen menus and displays.
Cancels
the
commercial
skip timer
if it
is set.
DVD
Places the remote in DVD mode. If Auto Tuning is enabled, pressing the DVD button
turns on the IV and tunes to the correct Video Input Channel for RCA devices. This button
l ights when you pre.ss a valid button i.n. DVD mode (see Modes of Operation
on page 24 for
more details).
FAV (Favorites)
When the FAV key
is pressed,
the TV will
display the
“Channel List”
menu
within the Channel Setup menu. From there, the usei' can edit the “Favorite Channels List.
GO BACK
Returns you to the previous c:han.nel or previous screen in the menu systetn,
GUIDE
Displays the Chan.n.el Guide List which allows you to see programming information,
INFO
Displays
the Channel Banner
with channel and viewing
information.
Press again
to
remove the banner.
INPUT
'IVtggles through the IV’s available input sources (INPUT L INPUT2. INPUTS. INPUT
4. Front Input, HDMIL HDMI2,
and la,st-ac:tive channel.
MENU Makes Main Menu appear
and
disappear.
MUTE
Reduces the lA^’s volume to its minimum level. Pre.ss again to restore volume. The
Audio Output
menu must lae set to Variable Level, Speakers On
to c:ontrol the T\'’s volume.
To program this button, to work with, an audio system, follow the instruclions for Volume
Punchlhrough Feature
on jrage 25.
OK
When a menu item is highlighted, press QK to select the item,
ON»OEF
Turns the lA' on or off. Your HDIA' is equipped with a special lamp sy.stem. In
order to ]ireseive the life of the lamp, the T\' must warm up and cool down properly when you
turn the TV' on and off. When you turn the 'IV' off, the screen ttrrns blue and fades to black.
While the screen is blue, you can still turn the IV' back on. If the screen is Irlack when you try
to tunr it orr, the Ws lamp may be in its cool-down cycle. 'Phe 'iV”s audio comes on, therr the
picture is displayed after a few moments.
In other modes (SAT» AUX, DVD), and if jirogrammed, turns the device on and off.
PRESETS
In dV' mode, toggles through the Picture Presets for the input you’re' currently
turred. hr DVD mode, displays the different airgles, if available, for the D\T) you’re watching.
REVERSE, PLAY, FORWARD, RECORD, STOP, PAUSE
If programmed, provides transport
control for sonre remote-controllable VCRs, DVD players, satellite receivers, etc. The RF.C(4RD
button has a safety featuio which means you must press the button two times to record.
Graphics contained
within ihis
pu-hiication are
Jbt‘
representation onhs