Carl Goldberg GBGA0067 User Manual
Page 28
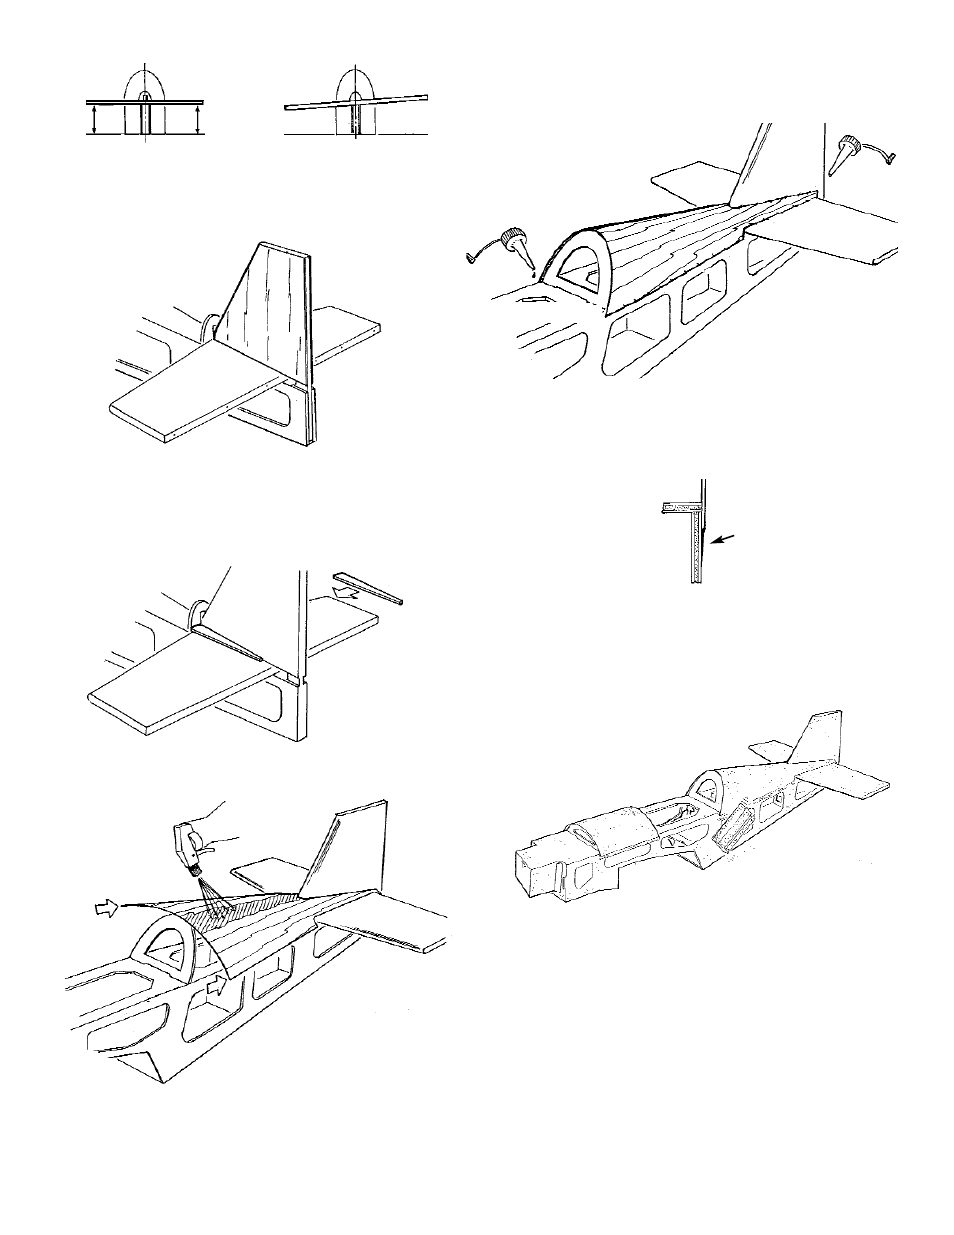
29. Insert the vertical fin L.E. into the slot in Former
J and slide the rudder post into the fuselage.
Check to make sure the fin is at a 90º angle to
the stab and then glue in place.
Glue the two TURTLEDECK BACK-UPS, as
shown.
30. Slide the 1/32” ply TURTLEDECK back around
the fin.
Again using the spray bottle and water, soak the
top center of the turtledeck.
31. When satisfied with the fit, apply glue to the for-
mers, fuselage, fin and stab.
Immediately wrap the turtledeck down onto the
fuse and tape in place until dry.
When thoroughly dry, bevel-sand the plywood
edge where it overlaps the fuse. Also sand the
turtledeck front flush with Former F.
As with the top front sheeting, fill the step with
JET Model Mate™ and sand smooth.
32. Go over the fuselage, sanding all seams and
joints.
Then, finish sand the entire fuse assembly with
fine grit sandpaper to provide a smooth surface
for covering.
THIS COMPLETES THE BUILDING PORTION OF
YOUR MODEL. MAKE SURE ALL PARTS ARE WELL-
SANDED AND ALL NICKS ARE FILLED. THEN PRO-
CEED TO THE “GENERAL INFORMATION BOOK”,
COVERING SECTION. AFTER COVERING THE
MODEL, RETURN TO THE FINISHING SECTION IN
THIS BOOK AND CONTINUE.
Before the glue has set and with the fuse sitting
flat on the work surface, check to make certain
the stab is parallel to the building board.
SLOWLY wrap the plywood around the form-
ers and down onto the fuselage sides.
Check the fit and trim, if necessary.
28
EQUAL OVERLAP
FILL STEP
LIKE THIS
NOT LIKE THIS