Carl Goldberg GBGA0067 User Manual
Page 21
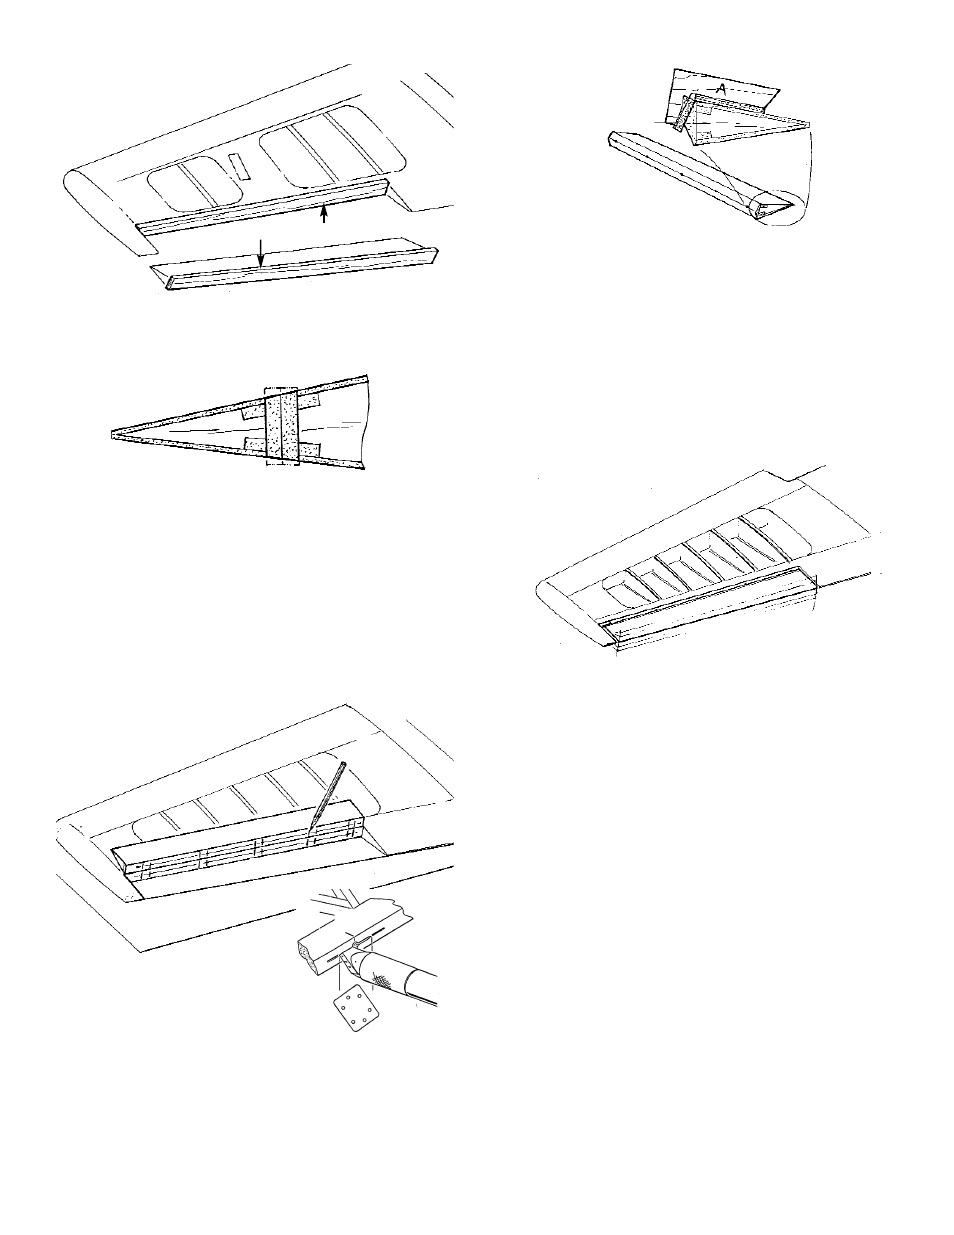
5. Trim to fit and then glue a 1/4” balsa HINGE
SHEETING onto both the ailerons and the
wing.
Sand flush to the wing and to the aileron airfoil
profile.
6. Using the CGP centerline marker, scribe a cen-
terline onto both the aileron and the wing.
Transfer the hinge locations from the plan onto
the wing and the aileron.
7. Following the same procedure used when con-
structing the control surfaces on the tail. Slot
each of the hinge locations.
8. Using the previously constructed Bevel Tool
“A”, bevel both sides of the ailerons.
Test fit the ailerons to the wing, but do not per-
manently install until after they have been
covered.
NOTE: MAKE SURE YOU CAN IDENTIFY THE
LEFT AND THE RIGHT AILERON. YOU WILL NEED
TO SCREW THE CONTROL HORN INTO THE PLY
BACKUP LOCATED INSIDE.
9. Carefully check the wing for any nicks and
deep scratches and fill with CGP Model
Mate™. Finish sand any areas that will detract
from the appearance of your model after it is
covered.
THIS COMPLETES CONSTRUCTION OF THE
WING. SET IT ASIDE UNTIL IT IS NEEDED.
21
SLOT
AILERON BEVEL
GAUGE
CHECK AILERON MOVEMENT
HINGE SHEETING
LIKE THIS