Carl Goldberg GBGA0067 User Manual
Page 18
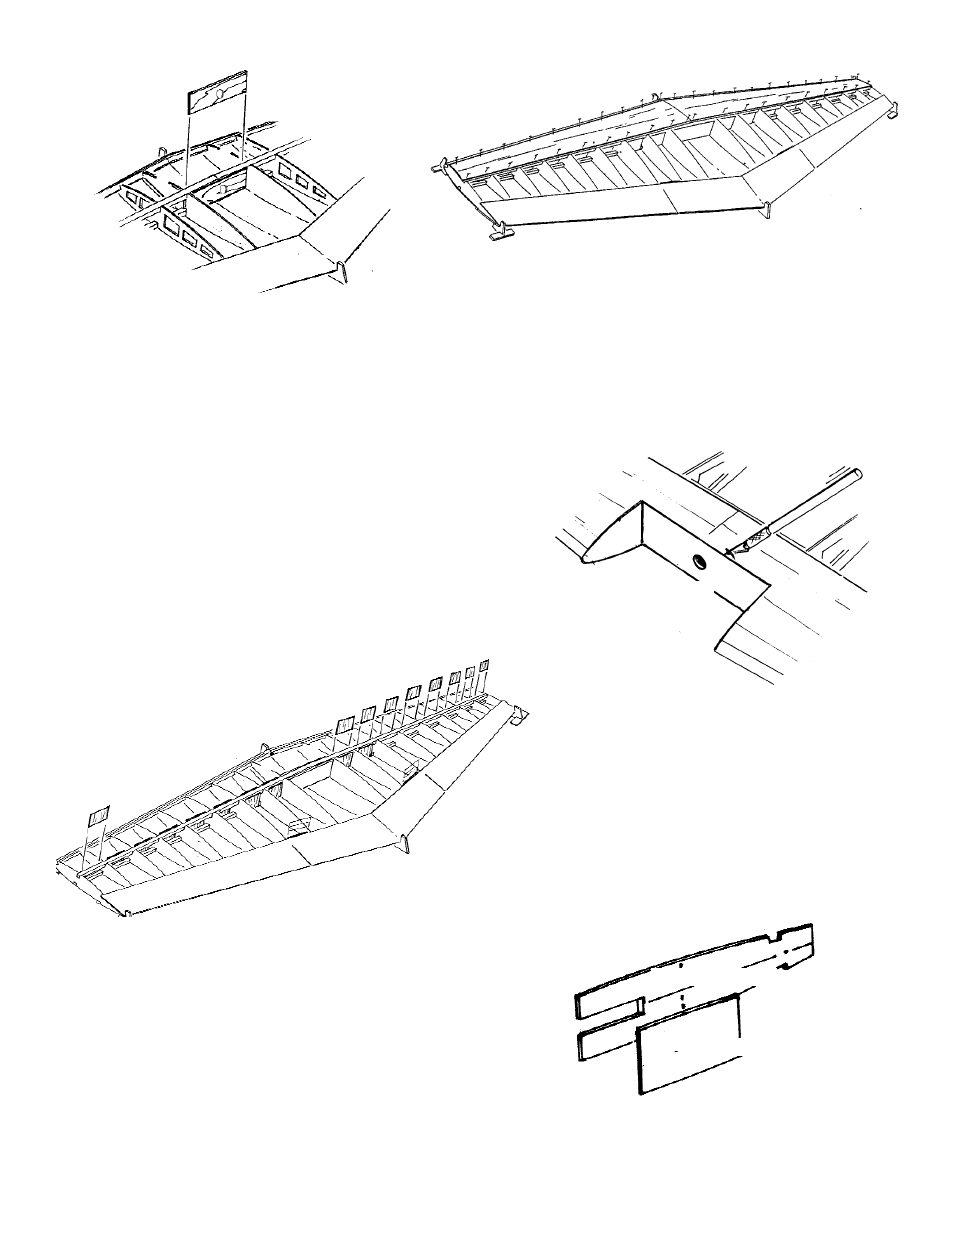
35. Test fit the front and rear WING JOINERS
between the two #2 ribs, as shown. Note the
rear joiner tabs which fit into the rib slots.
Sand any parts, as necessary, to improve the fit
of the two wing halves.
36. When satisfied with the fit, apply JET Epoxy 20
along the centerline of both wing panels and
spars and glue them together.
Epoxy the wing joiners securely in place.
After making sure all elements are correctly
aligned, allow epoxy to thoroughly cure before
proceeding. You may wish to use clamps to hold
the assembly tightly together.
37. Beginning at the wing tips, use Super Jet to glue
the corresponding SHEAR WEBS to the front side
of the top and bottom main spars in each rib bay.
NOTE: The web that goes between Rib #2 and Rib #3
must be trimmed to fit.
Center the Rib #2/3 web between the two ribs
and glue in place.
38. Test fit the L.E. sheeting. When satisfied with
the fit, apply glue to the top of the L.E., the front
rib tops, and the top of the main spar.
Install the sheeting and pin in place, as shown.
Allow to dry thoroughly.
39. When dry, determine the two Rib #2 locations
and make a mark on the leading edge.
Make a second mark at the location of the wing
joiner/spar assembly.
Referring to the above diagram, and taking
care not to cut into the ribs or the wing join-
er, use a razor saw and/or a hobby knife to cut
the L.E. and the L.E. sheeting back to the wing
joiner/spar assembly between the two #2 Ribs.
40. Take one of the WING CENTER RIBS and lam-
inate a WING CENTER DOUBLER to the out-
board side.
18
SHEAR WEBS
WING CENTER DOUBLER
WING CENTER RIB
WING JOINER
RIB #2
RIB #2
FRONT WING JOINER