Carl Goldberg GBGA0067 User Manual
Page 16
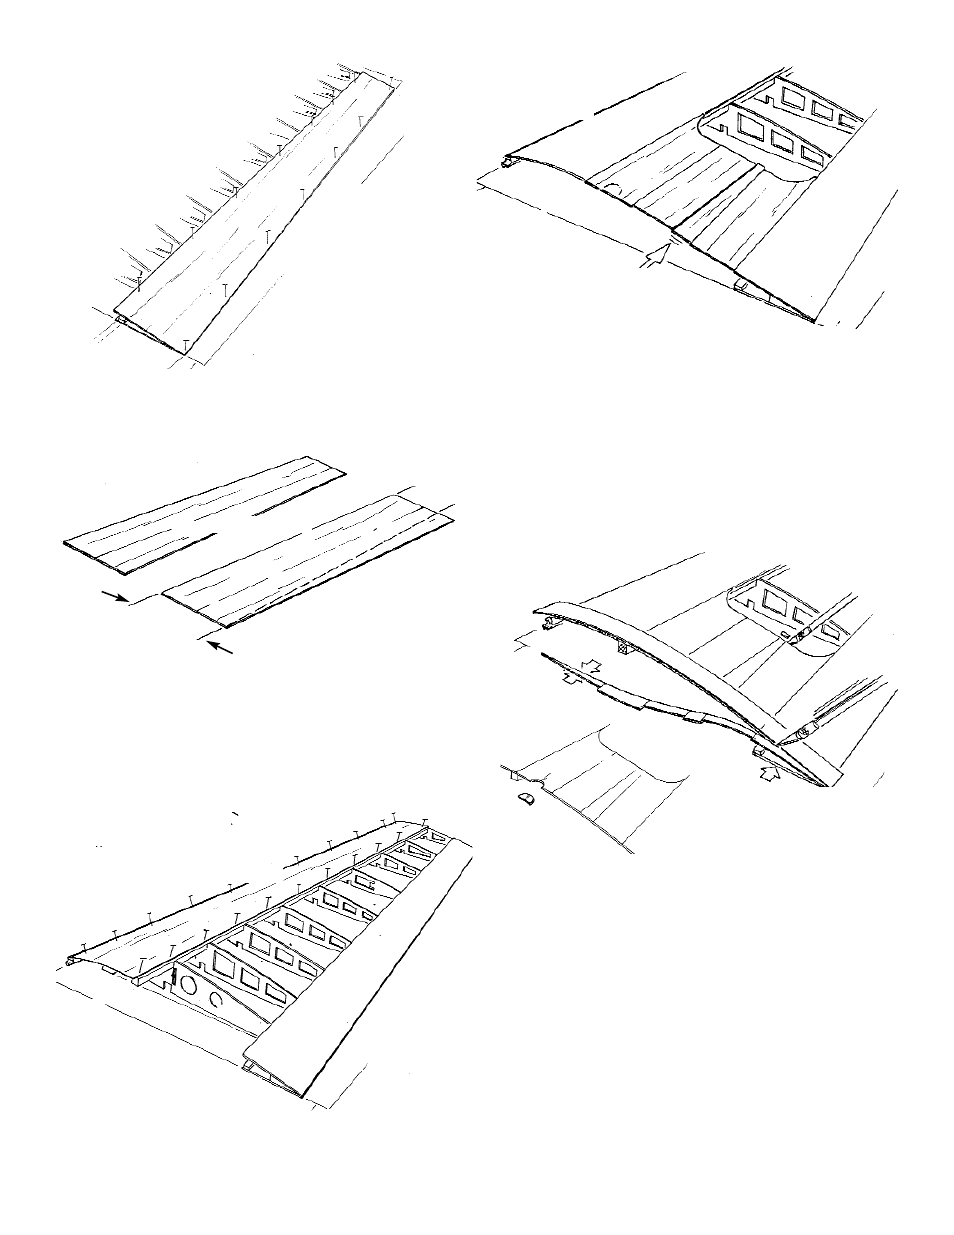
24. Glue the top T.E. SHEETING to the spars, ribs,
and the bottom T.E. sheet.
25. From the remainder of the edge-glued sheeting
used for the T.E., measure a width of 5-3/8” from
one end and 3-7/8” at the other end.
With a straight-edge, draw a line from one mark
to the other. Then cut the sheeting along the
line, creating two tapered pieces.
26. Glue and pin the L.E. sheet to the shoulder on
the leading edge, the rib camber, and the spar.
27. Making sure the servo wire knock-out hole is on
the piece closest o the L.E., glue the three large
pieces of CENTER SHEETING to the ribs, the
L.E. and the T.E..
Pre-fit a wedge-shaped piece of sheeting to fill
the center area.
When satisfied with the fit, apply glue and slide
the piece into place, as shown.
28. Use a flexible straight-edge to trim the sheeting
flush with the wing centerline.
Punch out the knock-out hole in the sheeting to
provide access for the servo wire.
16
T.E. SHEETING
L.E. SHEETING
L.E. SHEETING
5-3/8"
3-7/8"
FLUSH WITH T.E.
SLIDE
ON CENTERLINE
BREAK OUT