Carl Goldberg GBGA0067 User Manual
Page 26
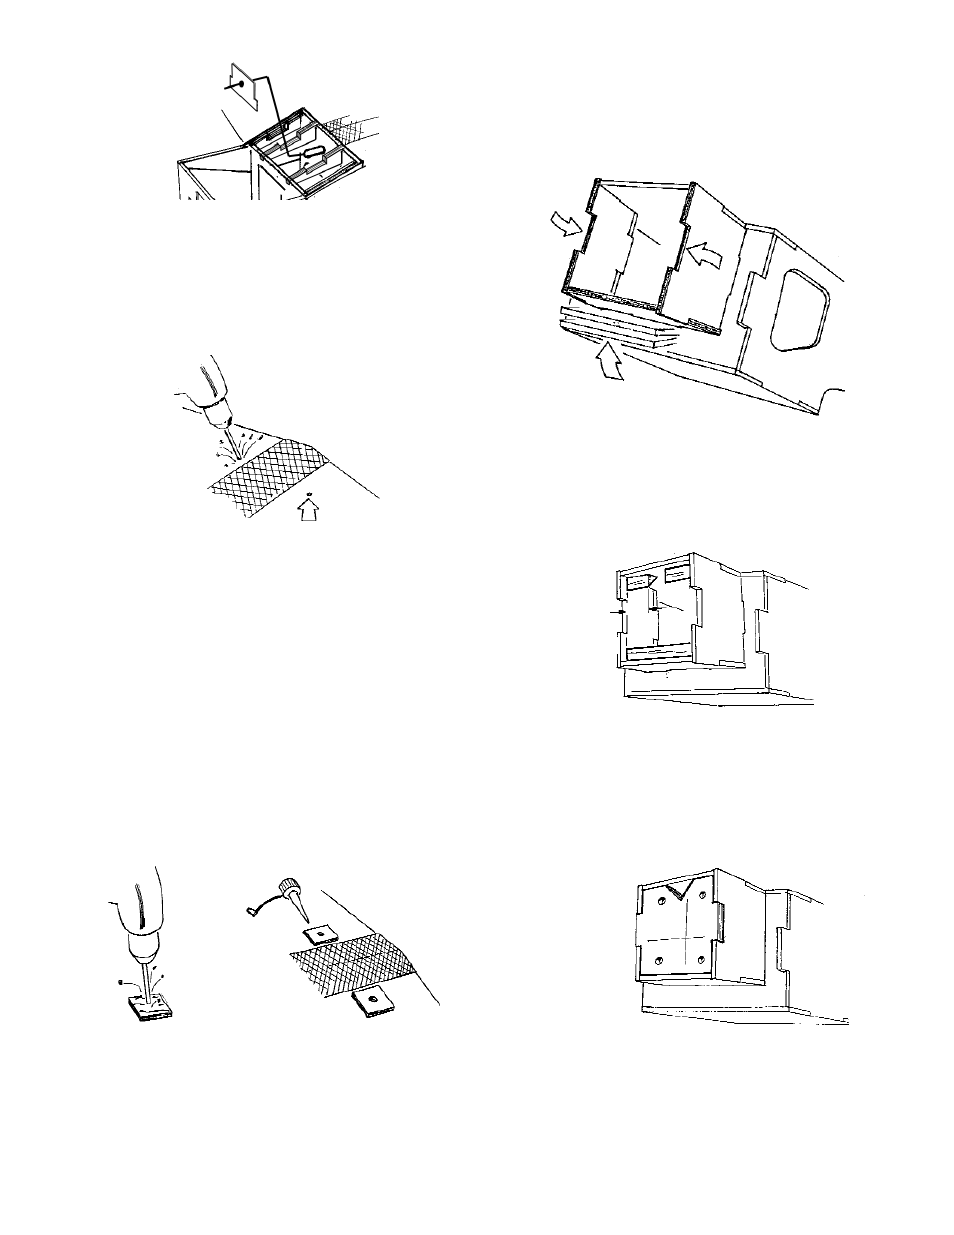
20. Drill a 5/32” hole at the centermark on each
WING BOLT PAD.
Place each pad on a 6/32 x 1” socket head
screw and screw part way down into the blind
nut.
21. Install the MOTOR MOUNT BOTTOM and both
MOTOR MOUNT SIDES to the fuse,as shown.
Use a generous amount of glue, as this is a high
stress area.
22. Using the 1/2” balsa tri stock, trim and fit the
FIREWALL GUSSETS in place. They should be
located 1/4” back from the edge of the motor
mount, as shown.
23. With the blind nuts to the inside and the V-notch
on top, epoxy the FIREWALL into the fuse. Use
plenty of epoxy and let dry thoroughly.
18. Carefully turn the wing/fuselage assembly to an
upright position.
Cut the threaded segment from one of the .078
x 13-5/8” threaded rods and use as a drill bit.
Don’t use anything larger than 7/64”
(.109/2.7mm) in diameter.
Using the blind nuts as locators, drill a pilot hole
through the bottom of the wing.
Remove the wing from the fuselage and, using
the pilot hole as a guide,
19. Test bolt the wing to the fuse and, following the
procedure used before, again check the align-
ment by making sure the dimensions from wing
tip to tail are still equal on each side of the
model.
Being careful not to get glue on the dowel, glue
the WING DOWEL SCAB PLATE over the wing
dowel and to the front side of Former B2.
Glue the LANDING GEAR COVER PLATE in
position.
Make sure the holes are aligned. Then, taking
care to not get glue in the hole or on the
screw, apply CA glue to the bottom of the
wing bolt pad and glue to the wing.
NOTE: Brush On™ Super Jet is excellent for this job.
26
1/14" BACK FROM
FRONT EDGE
1"
"V" NOTCH AT TOP
NO LARGER THAN 7/64"
5/32" HOLE
WING DOWEL SCAB
PLATE