Carl Goldberg GBGA0059 User Manual
Page 9
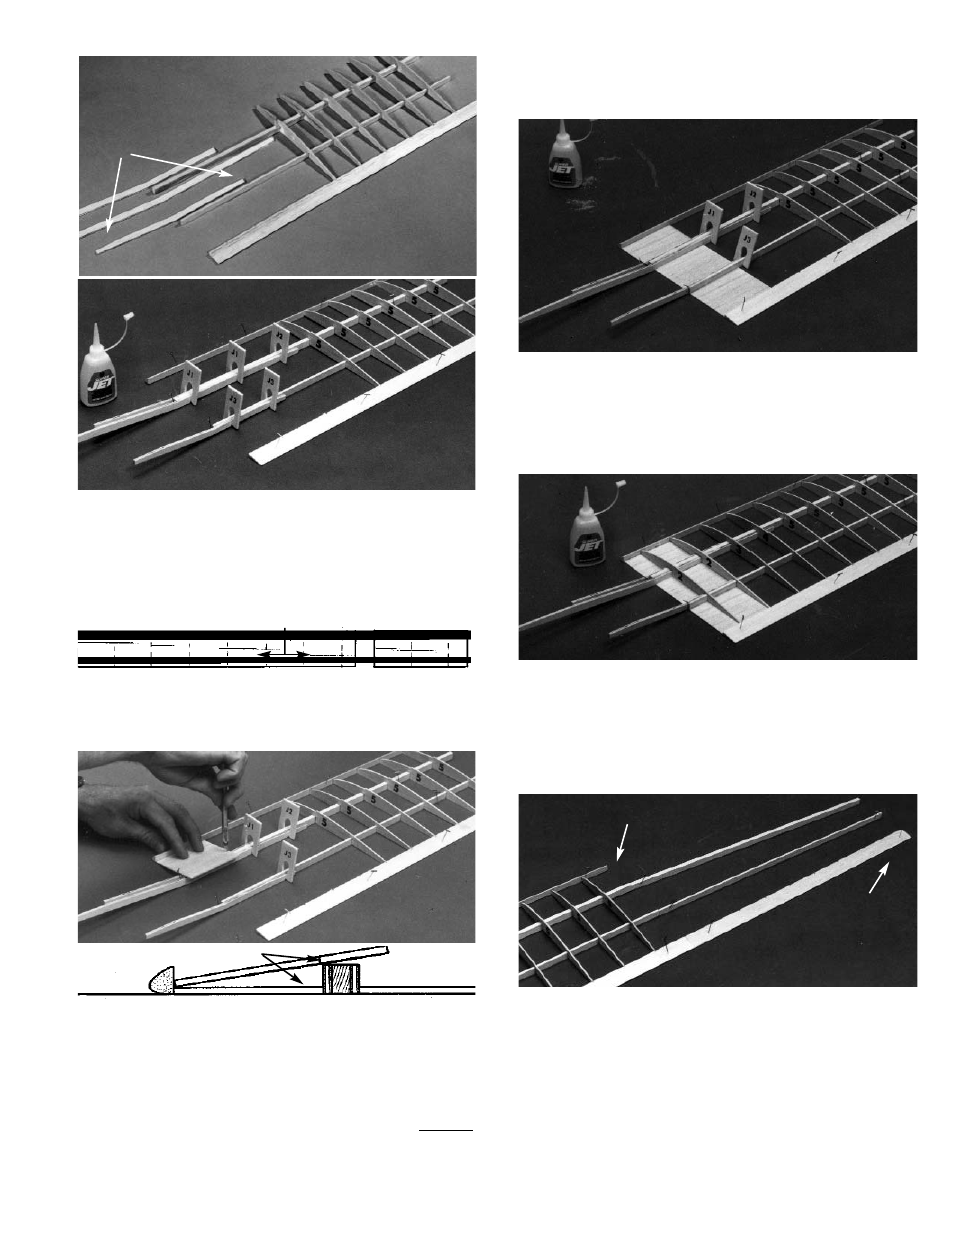
6. Noting that the rear spar joiner has a tapered
end, fit the front and rear spar joiners into posi-
tion as shown.
Glue the joiners to the spars and, referring to
the plan, hold in place with the gauges. Allow
to dry.
7. Taking care to make sure that the grain of the
sheeting will run parrallel to the spars, L.E. and
T.E., cut three 3-1/4” pieces from a 1/16 x 3 x
24” balsa sheet.
8. Slide one piece of sheeting forward until it just
touches the L.E. Gently holding the sheet in
position, mark the spar location on both of the
rear corners of the sheet.
Remove the sheet from the wing and, using a
metal straight edge, carefully trim the sheeting
so that, when the piece is laid flat, it just fits
between the L.E. and the spar.
MARK MARK
MATCH WING GAUGE
POSITIONS TO PLAN
REAR SPAR
JOINER HAS
TAPERED ENDS.
WOOD GRAIN MUST BE PARALLEL TO SPARS, L.E. AND T.E.
9
Fit the first sheeting piece between the spars
and, holding it flat to the building board, Super
Jet the edges to the spars.
Install the other two sheeting pieces in the
same manner.
9. Position ribs #2, 3, and 4, making sure to align
the rib fronts over the front guide lines on the
plan.
When satisfied with the alignment, glue to the
L.E., the bottom sheeting, the spars, and the
T.E.
10. Pin the outboard main spar in place over the
plan. Then set the rear spar and the T.E. in
place.
IMPORTANT! The outboard T.E. has no notch at one
end. This unnotched end must be at the polyhedral
joint, as shown.
POLYHEDRAL
JOINT
NOTCHED
END
Following the same procedure, trim and fit two
more sheeting pieces for the bottom center
section.