Carl Goldberg GBGA0059 User Manual
Page 13
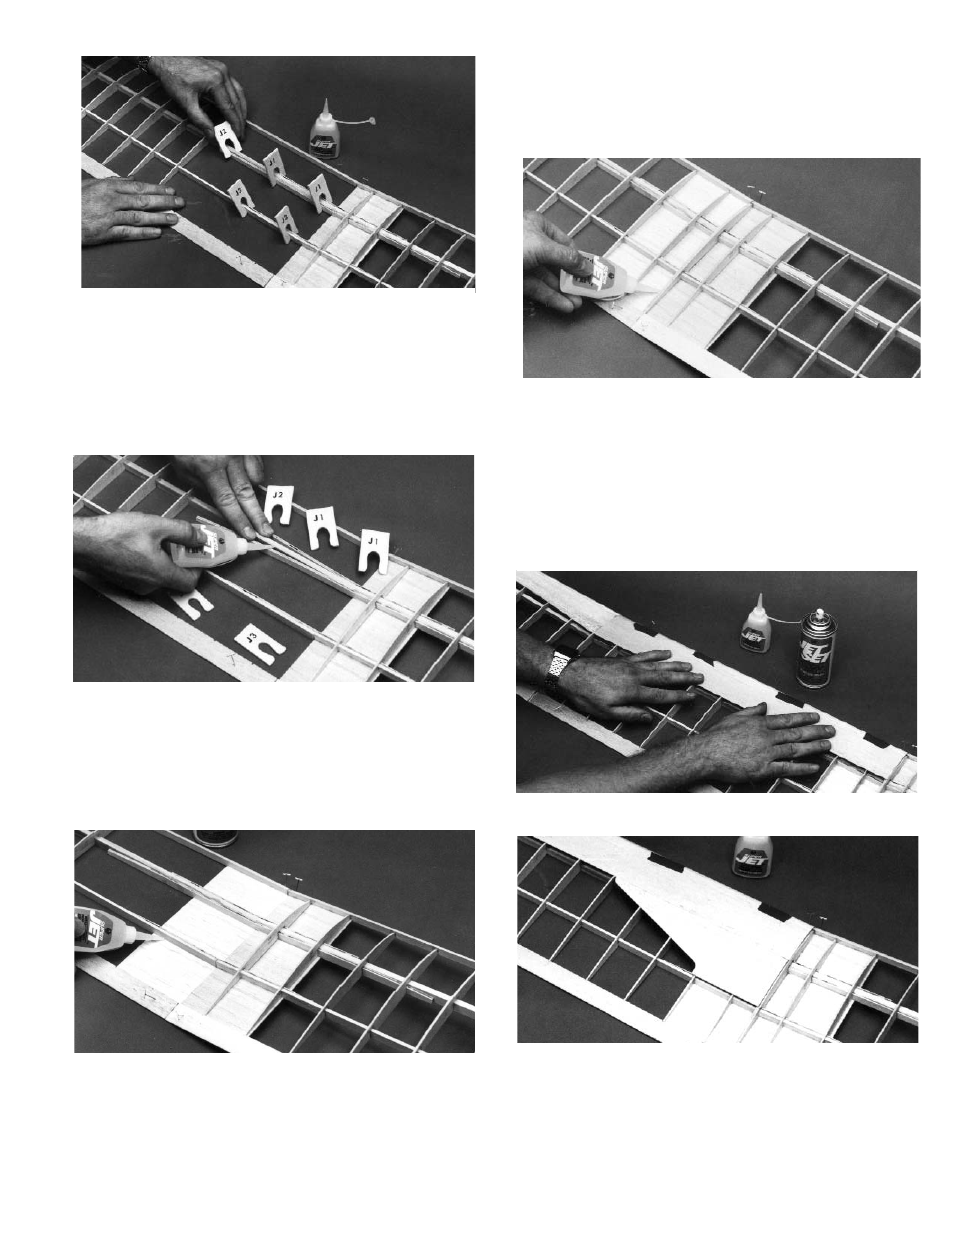
24. Remove the clamps and insert pins between
the spars and the joiners.
Apply Super Jet™ between the parts and then
remove the pins, allowing the pieces to come
back together. Immediately replace the clamps
to hold the joiners tight on the spars. Let dry
thoroughly.
25. When the glue has dried, remove all clamps
from the spars.
Cut three 3-1/4” pieces of bottom sheeting from
the remainder of the 1/16” balsa sheeting.
13
Examine the center joint for good fit and align-
ment of the L.E., the spars, the joiners, and the
T.E. Adjust as necessary, sanding slightly to
make the pieces fit together.
Temporarily install the clamps to hold the join-
ers tight on the spars.
When satisfied with the fit, pin the wings togeth-
er.
26. Glue the remaining ribs #2, #3, and #4 in place.
Glue together two #1 ribs to make a single, dou-
ble-thickness rib.
GLUE ALL JOINTS
BEFORE COMPLETE-
ING SHEETING
Trim to fit between the spars, just as was done
in Step 7. When satisfied with the fit, glue in
place.
Glue the L.E., the bottom sheets, and the T.E.
together at the center joint.
27. Following the same procedure used in Step 19,
install the inboard L.E. sheeting.
Position this doubled #1 rib at the center joint,
making sure it aligns with the spar center joint,
the L.E., the bottom sheeting, and the T.E.
Glue in place.
NOTE: Make sure all joints are well-glued before com-
pleting the center sheeting.
When the L.E. sheeting is dry, install the die-
cut, tapered center sheeting.
From plain 1/16 x3 x 12” balsa, cut and fit the
remaining rear sheeting piece.
Remove all pins and gauges and complete the
sheeting of the right wing.